Flue extension kits – Rinnai RHFE-308 FTR User Manual
Page 34
– 34 –
FLUE EXTENSION KITS
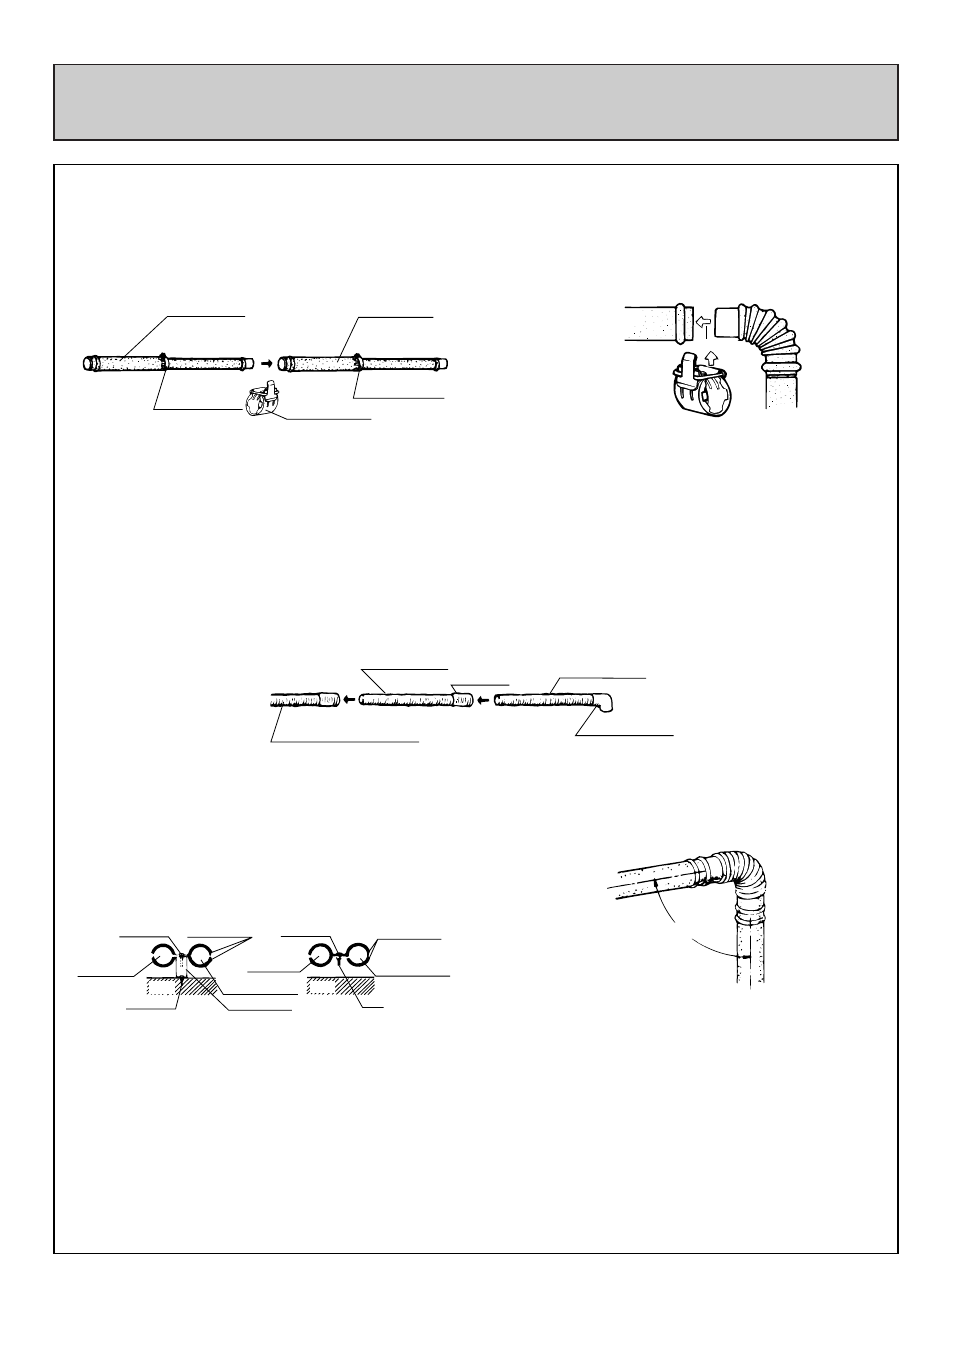
1. How to connect the flue pipes.
To connect the rigid flue pipes fit the male end into the female end and clamp with pipe stopper A to
prevent slipping. The flue pipe can be telescoped to the required length: DO NOT CUT IT.
Female end
Exhaust pipe
Pipe stopper B
Male end
Pipe stopper B
Pipe stopper A
Female end
Male end
Exhaust pipe
Fit inside
2. How to connect air intake hose.
Screw one air intake hose into socket of the appliance’s main air intake hose. If this is not long enough
then join air intake hoses together by screwing them both half way into a hose joint socket.
Important: The PVC air line is longer than the flue line and may need to be cut down to size. Be
sure to thoroughly debur all rough edges.
Main unit air intake hose
Air intake hose
Hose joint
Screw in counterclockwise
Air intake hose
Air intake elbow
Pipe stopper A
Fit inside
Connect bent pipe
Female end
Male end
3. Affixing the air intake hose and flue pipe.
NOTE: Maintain 25mm clearance between flue
pipe and combustible materials (0mm clearance
between flue pipe and non-combustible
materials.)
4. How to use the bent pipe.
Screw B
Wall
Air intake
hose
Screw A
Pipe clamp
Exhaust pipe
Wall fixture
Wall
Air intake
hose
Screw A
Nut
Pipe clamp
Exhaust pipe
Adjust the angle
Set the air intake hose and flue pipe into the
pipe clamps, screw the clamp onto the wall
fixture, and affix to the wall with screw B.
The air intake hose and flue pipe can also be
screwed onto the wall using the pipe clamp and
the nut.
With the flue pipes inserted into the ends, bend
the bent pipe to the angle required for
installation.
This part is usually used for curves or
connection to vent terminal.