How to connect your video recorder, How to connect your video recorder to the tv set – Philips VR700/58 User Manual
Page 6
How to connect your video recorder to the
TV set
We recommend the use of a scart cable. This will give you the
best picture and sound quality.
When you install your video recorder for the first time, please
read:
E The section ’Connecting with scart cable and Easy
Link/NexTView’, when your TV set is equipped with ’Easy
Link/NexTView’.
E The section ’Connecting with scart cable without Easy
Link/NexTView’, when your TV set is not equipped with
’Easy Link/NexTView’.
E The section ’Connecting without a scart cable’, if you are
not using a scart cable.
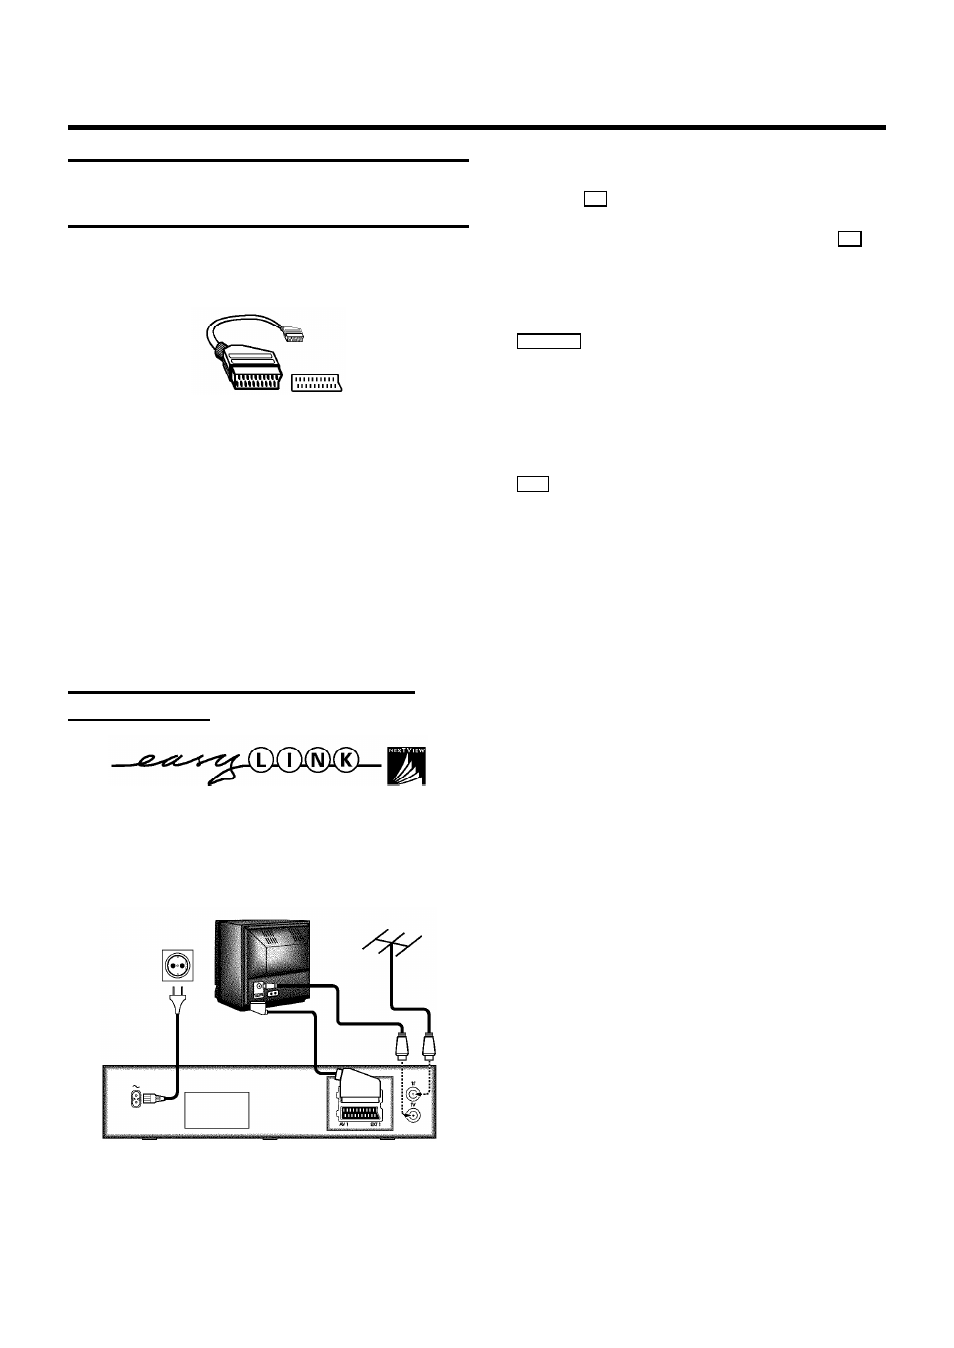
Connecting with scart cable and ’Easy
link/NexTView’
With the function ’Easy Link/NexTView’, your video recorder
can exchange information with the television (see instruction
manual TV set.). With ’Easy Link/NexTView’ the TV channels
from the TV will automatically be loaded.
a
Switch off the TV set.
b
Remove the aerial cable plug from your TV set and insert
it into the
2
socket at the back of the video recorder.
c
Plug one end of the aerial cable provided into the
3
socket on the video recorder and the other end into the
aerial input socket on your TV set.
d
Plug one end of the special scart cable provided into the
EXT.1 AV 1
scart socket at the back of the video recorder
and the other end into the scart socket on your TV set
(see instruction manual TV set).
e
Switch on the TV set.
f
Insert one end of the mains cable into the mains socket
4
at the back of the video recorder and the other end
into the wall socket.
g
The video recorder will automatically load all TV
channels stored on your TV, in the same sequence.
This may take several minutes.
When all information (TV channels, language, country)
has been copied, the following text will appear on the TV
screen: ’EASY LINK LOADING COMPLETE’.
h
Check if time and date are correct. Read the section
’Setting Time/Date’ in the chapter ’INSTALLING YOUR
VIDEO RECORDER’.
1.
HOW TO CONNECT YOUR VIDEO RECORDER
4