7 paper tray, Paper tray, 7 paper tray – Panasonic KX-FPG391 User Manual
Page 18: 2 replacing the ink film
1. Introduction and Installation
16
For Fax Advantage assistance, call 1-800-435-7329.
1.6.2 Replacing the ink film
To ensure that the unit operates properly, we
recommend the use of Panasonic replacement
film. See page 10 for accessory information.
L
We cannot be responsible for any damage to
the unit or degradation of print quality which
may occur from the use of non-Panasonic
replacement film.
1
Open the covers (see steps 1 to 3 on page
14).
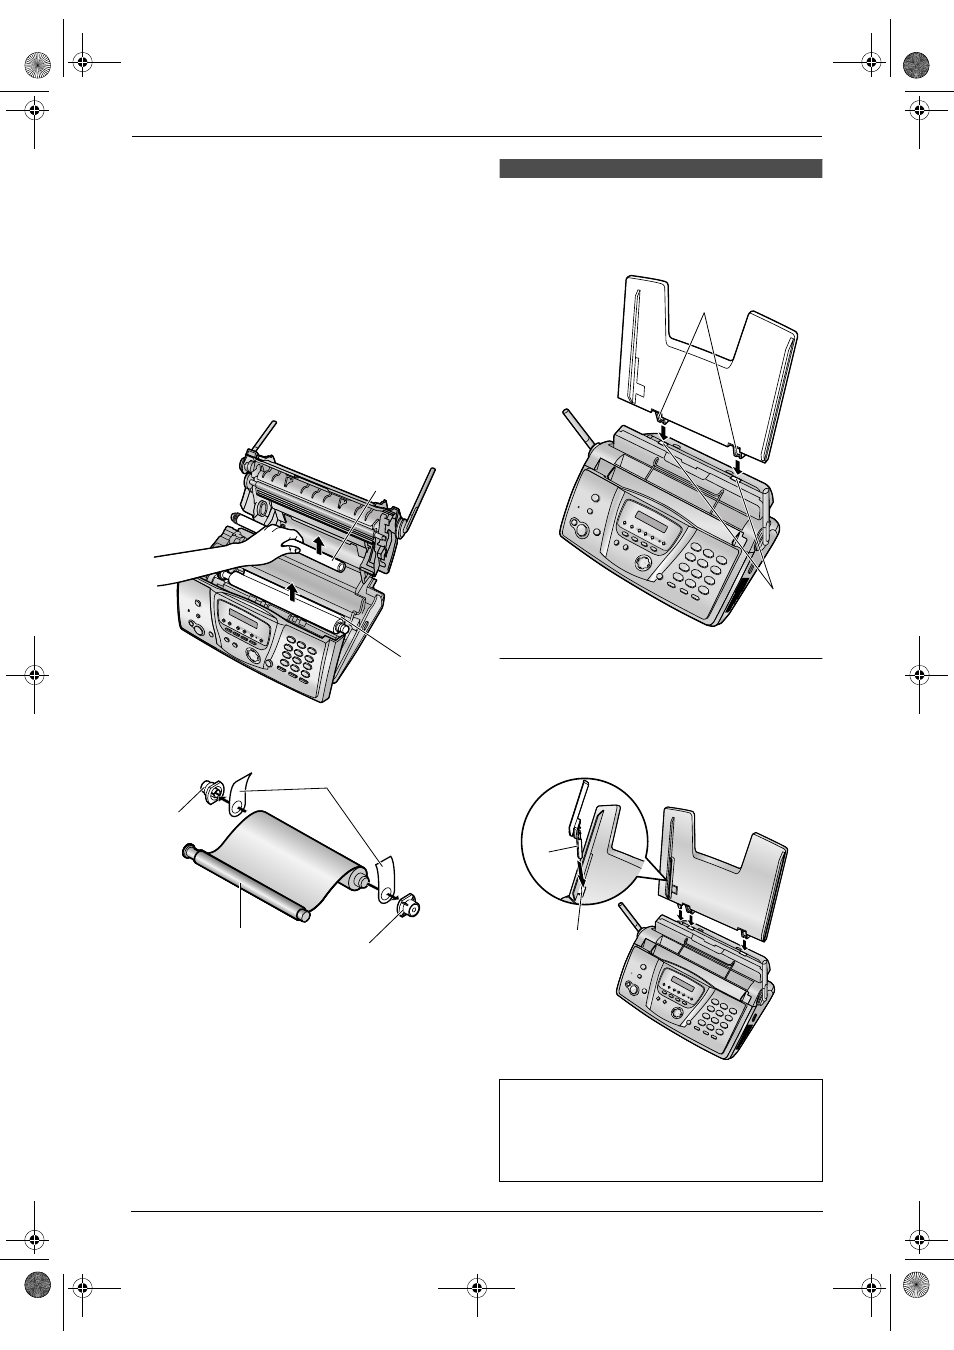
2
Remove the used core (
1) and used ink film
(
2).
3
Remove the stoppers (
1) and tags (2) from
the new ink film (
3).
4
Insert the ink film and close the covers (see
steps 4 to 7 on page 14).
1.7 Paper tray
Insert the tabs on the paper tray (
1) into the
slots on the back of the unit (
2).
To use A4 size paper
Insert the tab on the A4 paper guide (
1) into the
slot on the paper tray (
2) and push the guide
until it clicks into place. Attach the paper tray to
the back of the unit.
1
2
1
1
3
2
Note:
L
When you use letter or legal paper, you do
not need to install the A4 paper guides.
L
Change the recording paper size to “
A4”
2
1
2
1
FPG391_en.book Page 16 Friday, July 16, 2004 5:38 PM