1 installation of pda units – LXI LX7007 User Manual
Page 60
LX 7007 pro IGC V1.0
Apr.2005
Page 60
Installation of the LX 7007 PRO IGC
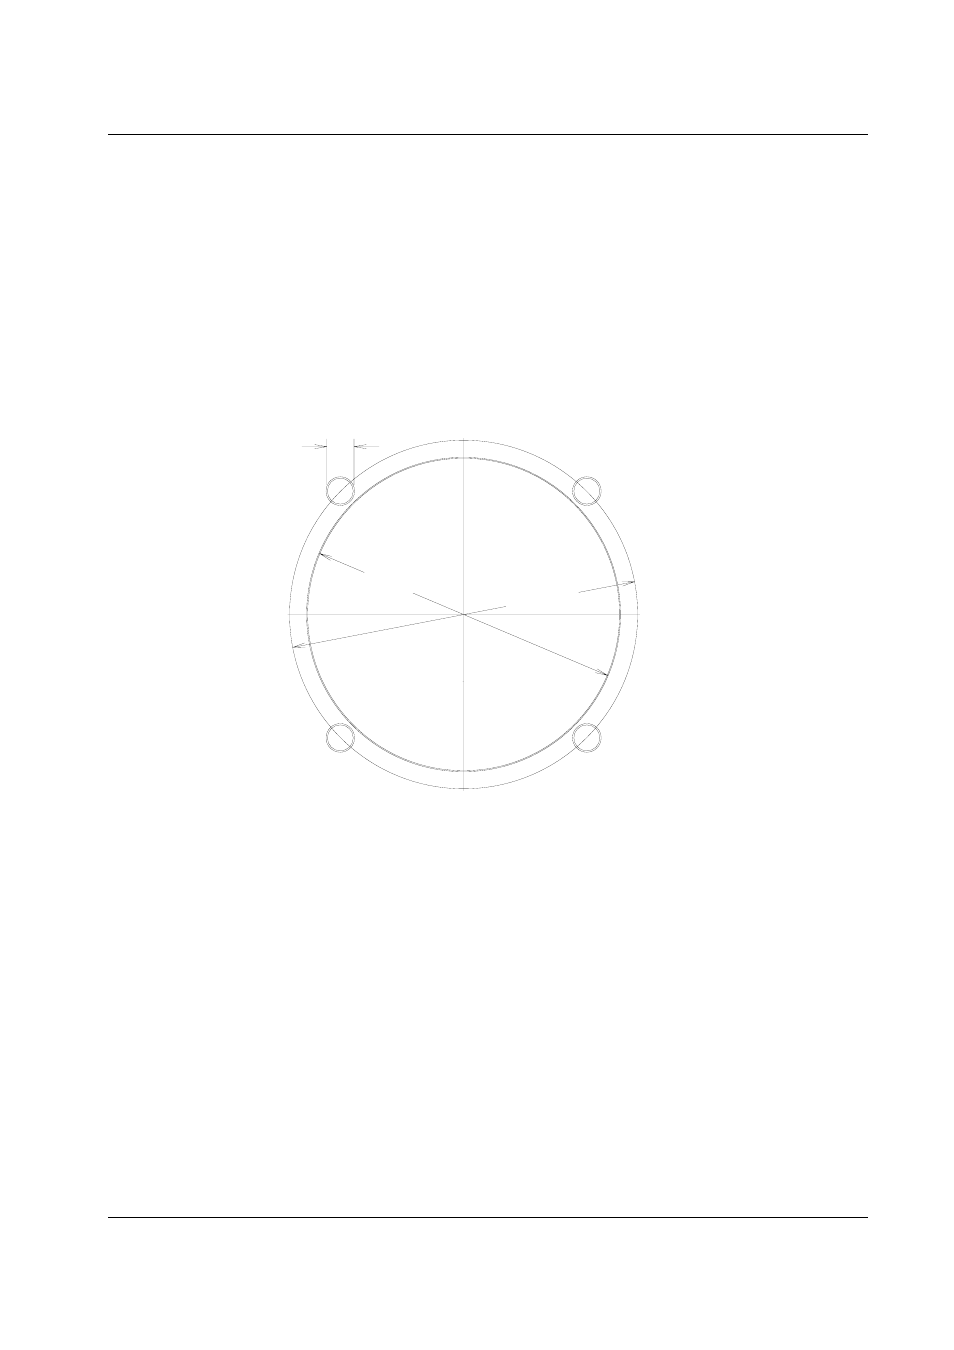
• Prepare the cutout in the instrument panel according to the drilling template.
• Remove the press-in covers from the four main selectors on the LX 7007 PRO IGC. You can now see the mounting
screws.
• While holding the knobs, slacken the screws with a screwdriver. Now the knobs can be removed (never use power to
remove the knobs, you can damage rotary switches). By problems hit on the slacken screw a little bit.
• Remove the four special type screws.
• Position the LX 7007 PRO IGC in the cutout in the instrument panel.
• Tighten the LX 7007 PRO IGC with the special screws (8 mm tool).
• Tighten the knobs and replace the covers
• LX 7007 AU doesn’t need any changes having standard 57 mm cutout.
Mounting Template:
4.1 Installation of PDA units
LX navigation offers a wide range of accessories which makes installation of a PDA in conjunction with LX 7007
extremely easy and completely plug and play. LX 7007 has a separate com port specially designed to drive PDA, 5V
power for PDA is included. Using of LX standard cables is possible to connect practically all iPAQ units to LX 7007. A
cable is delivery included. There are two types of cables.
Cable 1636 for:
31xx, 36xx, 37xx
Cable 1638 for:
H22xx, H38xx, H39xx, H41xx, H43xx, H51xx, H54xx in H55xx, H4700
There are two swivel supports available.
iPAQ Handle for:
36xx, 37xx, 31xx, H38xx, H39xx, H51xx, H54xx, H55xx, H4700
iPAQ handle 22 for:
H22xx, H41xx, H43xx
°80.0mmh11
°89.0mm
6mm