Kenwood TK-5910 User Manual
Page 9
3
i
nSTAlling
The
T
rAnSceiver
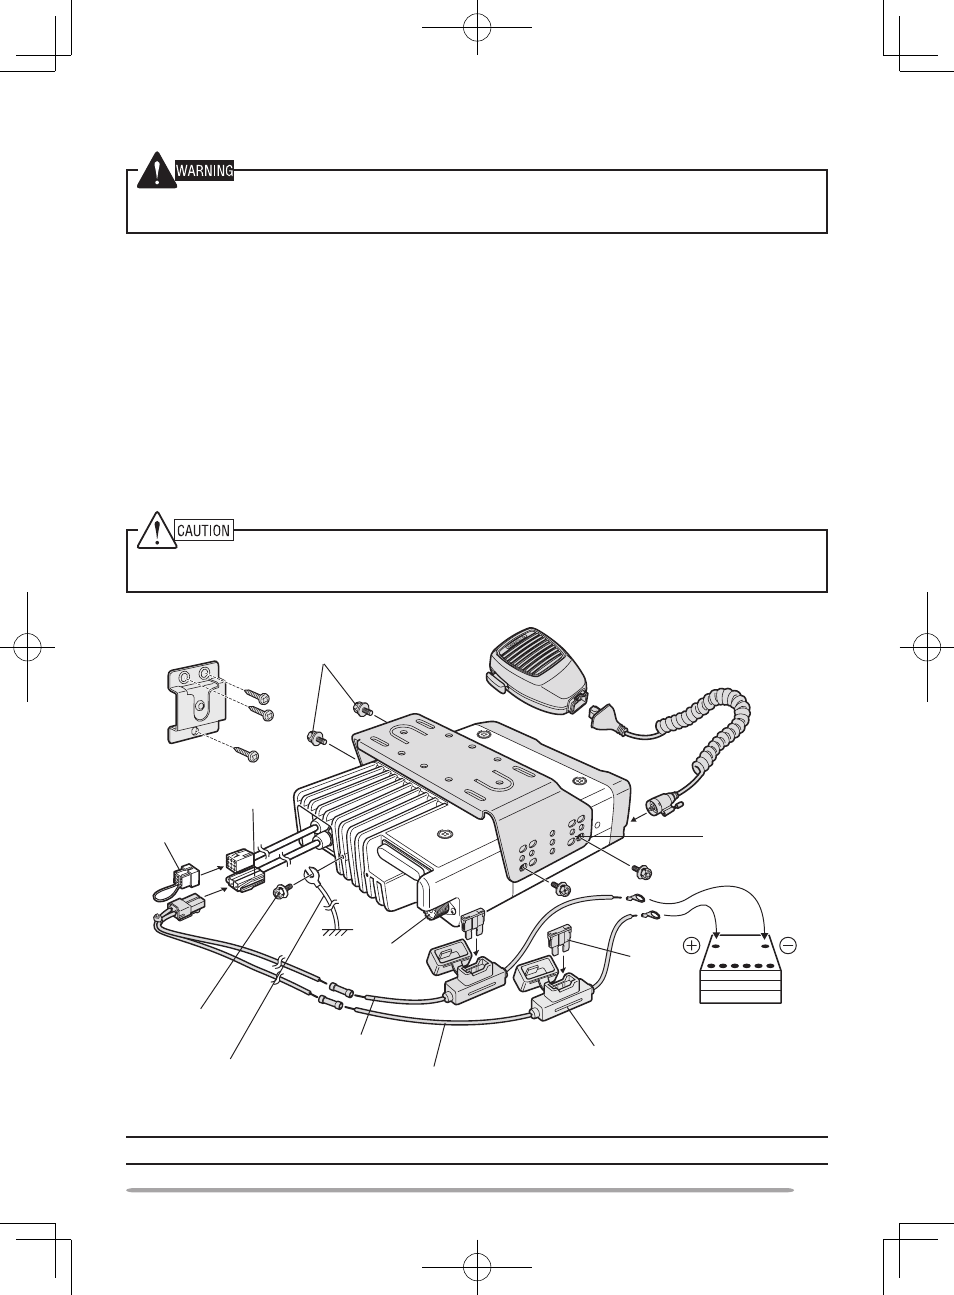
For passenger safety, install the transceiver securely using an optional mounting bracket and screw
set so the transceiver will not break loose in the event of a collision.
1 Mark the position of the holes in the dash by using the mounting bracket as a
template. Drill the holes, then attach the mounting bracket using self-tapping
screws.
• Be sure to mount the transceiver in a location where the controls are within easy
reach of the user and where there is sufficient space at the rear of the transceiver for
cable connections.
2 Connect the antenna and power cable to the transceiver.
3 Slide the transceiver into the mounting bracket and secure it using
hex-headed screws.
4 Mount a microphone hanger in a location where it will be within easy reach of
the user yet not interfere with the safe operation of the vehicle.
When replacing the fuse in the DC power cable, be sure to replace it with a fuse of the same value.
Never replace a fuse with a fuse that has a higher value.
Hex-headed
screws
DC power
cable
Mounting
bracket
Antenna
connector
Power input
connector
Fuse holder
Black (–) cable
Red (+) cable
V vehicle
battery
Microphone
Microphone
hanger
Short plug
Fuse
Hex-headed
screw
Ground lead
(commercially available)
* The TK-570/ TK-580 is shown in the above diagram.
Note: The items above shown in gray are optional accessories.