Replace the bottom cover, Press the k button, Over – Sony PDW-V1 User Manual
Page 76
Cha
p
te
r 7
Men
u
s
76
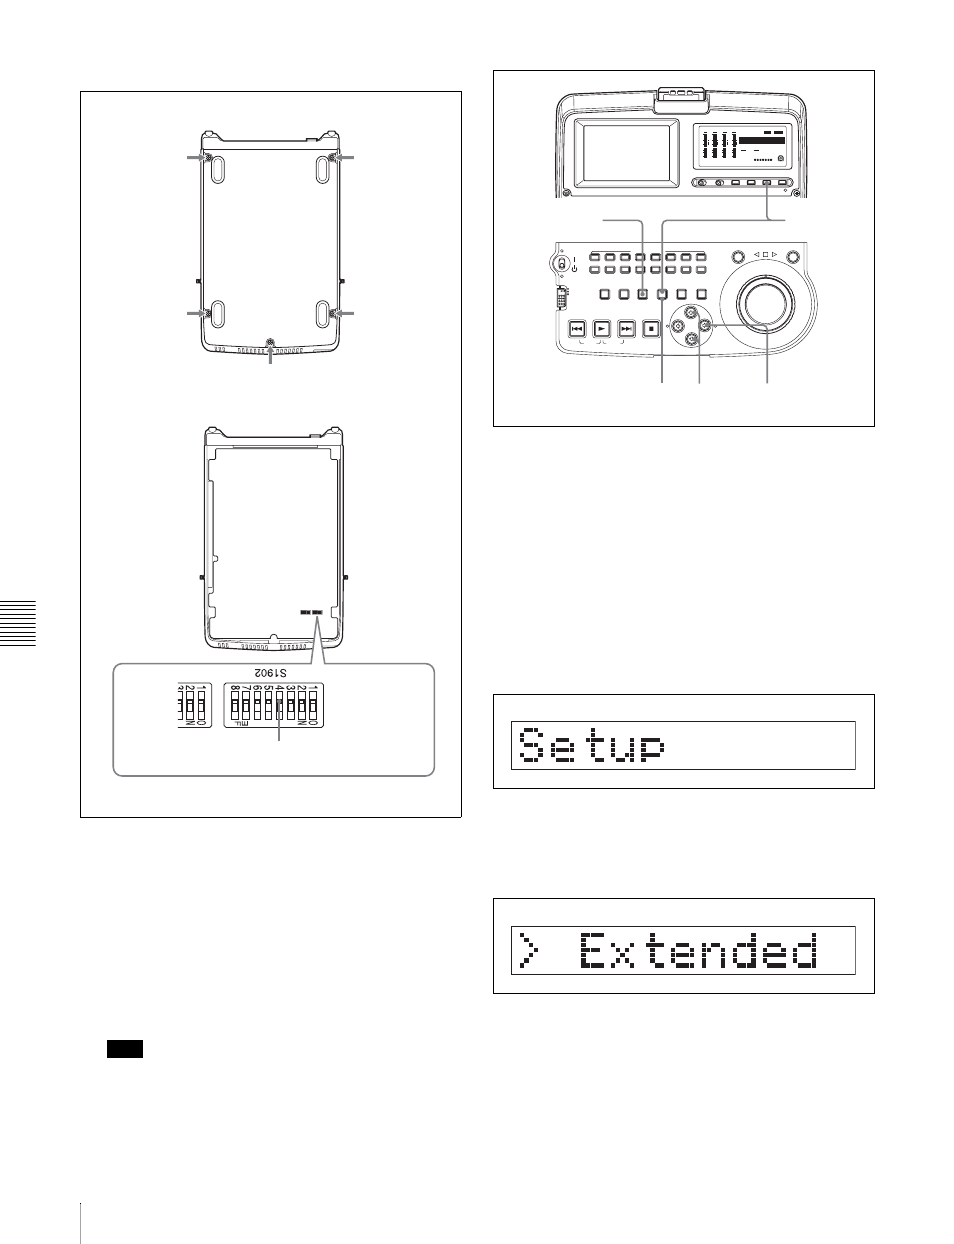
7-3 Extended Menu
To set the internal switch to on
1
Using a Phillips screwdriver, remove the bottom
cover.
There are five screws fixing the cover.
2
Using a sharp implement such as a ball-point pen, set
switch 4 in the S1902 group to the ON position (on the
front side).
3
Replace the bottom cover.
Note
Tighten the screws firmly.
To enable extended menu display in the
maintenance menu
Carry out the following operations.
1
Press the MENU button.
The menu appears in the status display.
2
Hold down the COUNTER button, and press the SET
button.
In the status display, first “MAINTE MENU” appears
momentarily, and then the item group name appears.
3
Using the
J/j buttons, display “Setup” in the status
display.
4
Press the
k button.
5
Using the
J/j buttons, display “> Extended” in the
status display.
6
Press the
k button.
The status display shows the current setting (“>>
DISABLE”).
7
Press the
j button, to display “>> ENABLE” in the
status display.
1
S1902, switch 4
2
ACCESS
L
R
NETWORK
LOCAL
REMOTE
SUB
CLIP
AUDIO MONITOR
L
R
CH-1
CH-2
CH-3
CH-4
CH-5
CH-6
CH-7
CH-8
SHUTTLE
JOG
THUMBNAIL
ESSENCE
MARK
MARK1
MARK2
IN
OUT
MENU
S.SEL
SET
RESET
SHIFT
TOP
F REV
F FWD
END
PREV
NEXT
PLAY
STOP
CLIP
MENU
SYSTEM
MENU
-30
dB
-12
-20
-40
-60
0
CH- 15
DATA
OVER
-30
dB
-12
-20
-40
-60
0
CH- 26
DATA
OVER
-30
dB
-12
-20
-40
-60
0
CH- 37
DATA
OVER
-30
dB
-12
-20
-40
-60
0
CH- 48
BATT
E
F
DATA
OVER
VITC
HOURS
AUDIO
625
IMX 50 40 30
[
]
525
4 8 CH
16 24 BIT
DVCAM
MINUTES
SECONDS
FRAMES
COUNTER
VIUB
VITC
ALARM
4,6
8 3,5,7
2
1