Ppp (dial-up) settings, Ppp connection to an internet service provider, Connecting the camera and installing the software – Sanyo VCC-WB4000 User Manual
Page 55
PPP (Dial-up) Settings
Two types of PPP settings can be made: Connecting to an “Internet Service Provider” or
“Connecting from a computer”.
PPP Connection to an Internet Service Provider
You can connect the camera to an Internet
Service Provider via a telephone line and then
use the separately-sold Network Archiving
Software to transmit alarm images.
☞
Connecting the camera and
installing the software
1
Camera wired LAN settings (TCP/IP
settings)
Make sure that the settings in “Network
Camera Settings” (p. 15) have been carried
out.
2
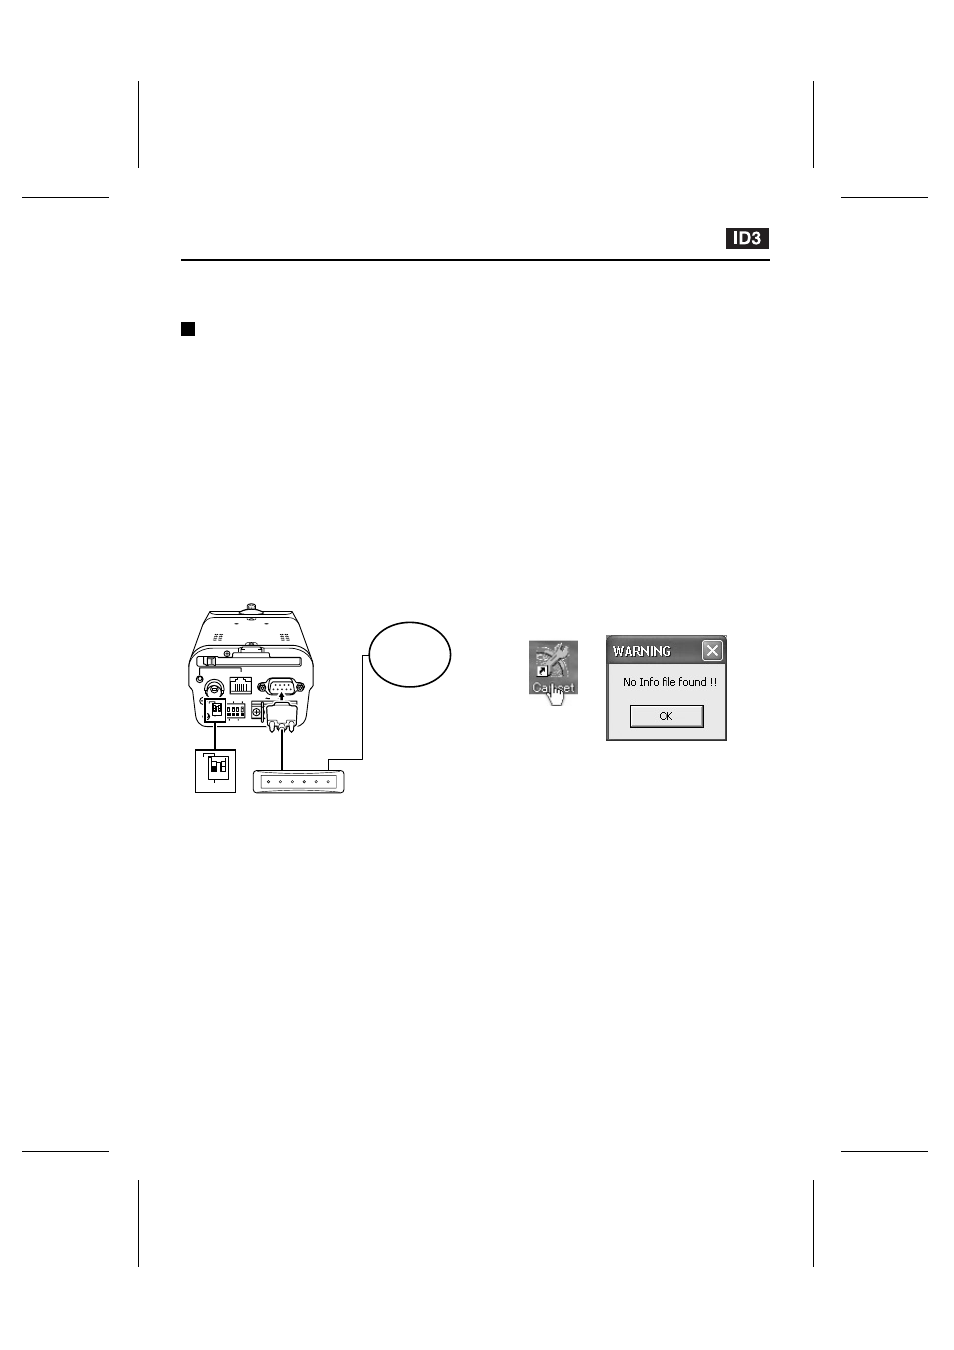
Connect a serial cable between the
RS-232C terminal at the rear of the camera
and a modem.
3
Set pin 1 of the PC/MODEM select switch
at the rear of the camera to the “MODEM”
setting.
Note: After moving the select switch, be sure to
turn the power off and then back on again.
4
Camera PPP settings
Make the settings for transmitting alarm data.
Refer to “DIAL TO PROVIDER Settings” (p.
56) for details.
Note: After making the PPP settings, close the
camera setting screen.
5
Install the Network Archiving Software
onto the computer.
Note: After installing the software, close the
software window.
6
Make the Camset settings.
Camset only makes the settings that are
required for setting up the camera. Refer to
the documentation for the Network Archiving
Software for further details.
1
Double-click the Camset icon on the
desktop.
When Camset is opened for the first time, no
files have yet been created, so the following
message will be displayed. Click the [OK]
button. “CAMSET MAIN” will then be
displayed.
CLASS 2 WIRING
PC CARD
RS-232C
ALARM IN
OUT
MODEM
PC
COM
D/N IN
AC24V
DC12V
GND
1 2
ETHERNET
POWER
MONITOR
OUT
MODEM
PC
1 2
Internet
Serial cable
Set pin 1 to “MODEM”
Modem
L5AM2/US (VCC-WB4000) GB 2003, 6, 6
– 54 –
English