Test run and break-in, Notice – Woodstock M1109 User Manual
Page 15
-13-
M1109 Combo Lathe/Mill
SE
TU
P
Test Run and Break-In
The purpose of the test run is to make sure the lathe/
mill and safety features operate correctly before pro-
ceeding with additional setup.
To begin the test run procedure, do these steps:
1. Make sure the lathe/mill is lubricated and headstock
oil level is full. Refer to
Page 34 if required.
2. Make sure the chuck is bolted to the spindle.
3. Move the spindle speed lever to the 75 RPM posi-
tion, the range lever to the red-dot position, and
the lead screw lever to the neutral position as
shown in
Figure 12.
4. Rotate the red emergency stop button (Figure 12)
clockwise so it pops to the outward position.
5. Move the half-nut lever upward to disengage the
apron, and move the feed lever to the neutral or
central position (see
Figure 13).
6. Move the spindle rotation ON/OFF lever to its cen-
tral position (
OFF) as shown in Figure 13, and con-
nect the lathe to power so the green lamp is lit.
7. Move the Spindle Rotation ON/OFF lever up or down
so the chuck turns, then push the emergency stop
button to make sure the lathe stops.
8. Move the Spindle Rotation ON/OFF lever to neutral,
reset the red emergency stop button, and use the
spindle lever to start the lathe again.
• If you hear squealing or grinding noises,
turn the
machine
OFF immediately and correct any prob-
lem before further operation.
• If the problem is not readily apparent, refer to
Troubleshooting on Page 42.
9. Let the lathe/mill run for a minimum of 10 minutes.
10. Turn the lathe/mill OFF, move levers to the next
highest RPM and repeat this step for each RPM set-
ting in Low and High range. NEVER SHIFT LATHE/MILL
GEARS WHEN MACHINE IS OPERATING.
11. Change the lubricant in the headstock with Mobil
DTE
®
Oil or with an equivalent.
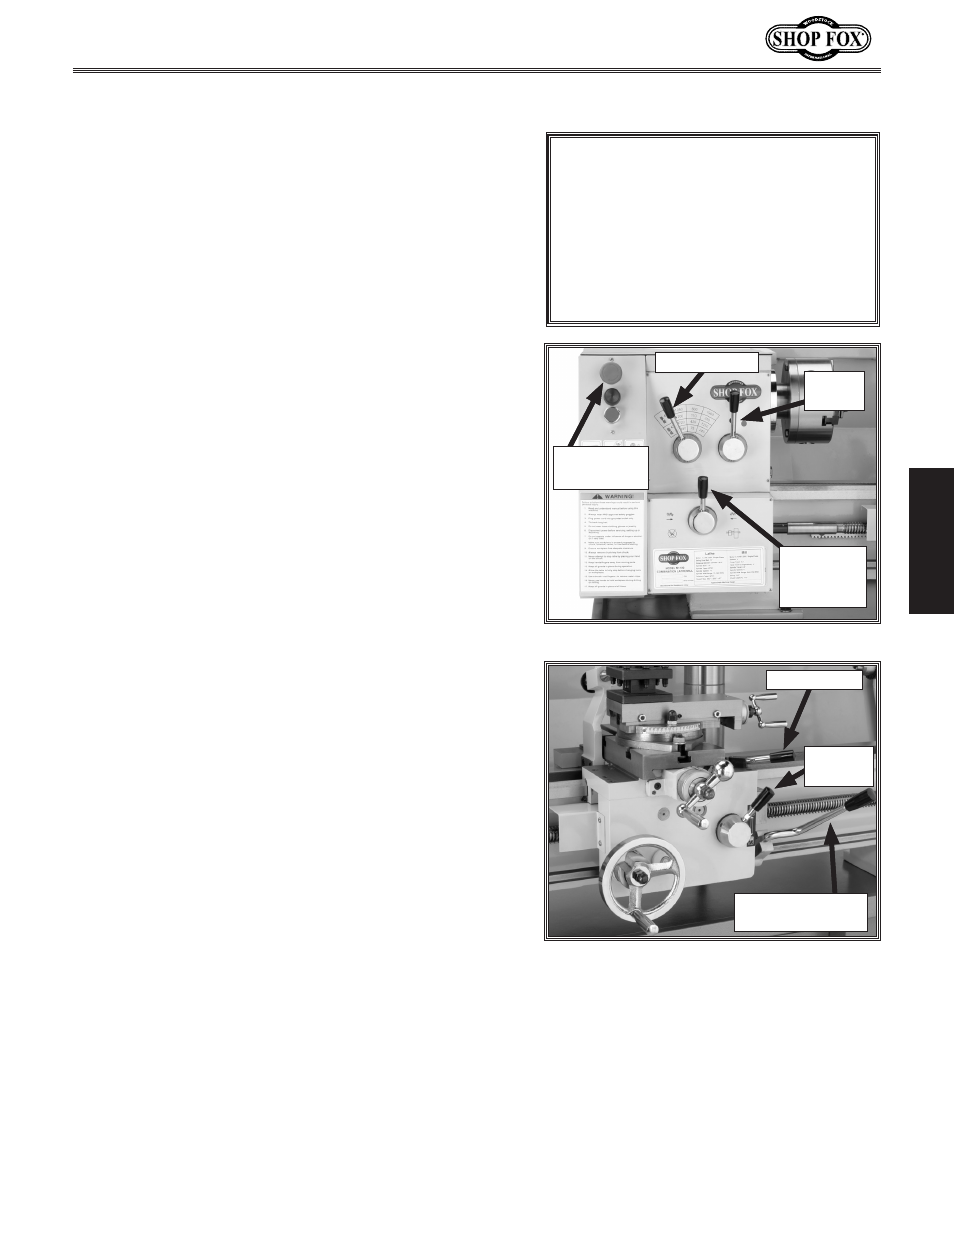
Range
Lever
Speed Lever
Emergency
Stop Button
Leadscrew
Direction
Lever
Figure 12. Headstock control levers.
Figure 13. Apron control levers.
Spindle Rotation
ON/OFF lever.
Feed Lever
Half-Nut
Lever
Make sure all power feed levers and
dials are disengaged before starting
the lathe/mill! Thoroughly familiarize
yourself with all the controls and
their functions before using any power
feed! NEVER SHIFT LATHE/MILL GEARS
WHEN MACHINE IS OPERATING.
NOTICE