Clock adjustment, Selecting input and output terminals, Connection – Sanyo SRT-4040DC User Manual
Page 39
CLOCK ADJUSTMENT
The time for the second and subsequent VCRs can be
set to the same time as the first VCR.
A signal from a separate device can also be used to set
the time for the second and subsequent VCRs to the
same time as the first VCR. When using the signal from
a separate device to set the time, input a 0 V signal to
the CONTROL IN terminal of the first VCR for 100 ms or
longer.
1
Press the MENU button to display the MAIN MENU.
2
Press the
l
(or
j
) button to select the “3.GENERAL
SET” line, then press the ENTER button.
3
Press the
l
(or
j
) button until the “CLOCK
ADJUST” setting is highlighted, then press the
ENTER button.
4
Press the
l
(or
j
) button to set the hour at which
the adjustment will be conducted, then press the
ENTER button.
NOTE:
œ
The clock adjustment cannot be set to “00:00”.
Example
TAPE@IN@MODE@@@@@STOP
TAPE@END@MODE@@@@REW
CLOCK@ADJUST@@@@@03:00
THREAD@CHECK@@@@@N
VIDEO@LOSS@@@@@@@N
CLOG@DETECT.@@@@@N
REMOTE@@@@@@@@@@@MENU
VIDEO@@@@@@@@@@@@COLOR
VERTICAL@SYNC@@@@Y
TAPE@@@@@@@@@@@@@T-160
5
Press the MENU EXIT button.
The setting procedure on the first VCR is now
completed.
6
Repeat the procedure for all the other VCRs, setting
“CLOCK ADJUST” (to the same time as set on the
first VCR).
NOTE:
œ
This function will not operate on the day the daylight
saving/standard time is changed.
Connection
SELECTING INPUT AND OUTPUT TERMINALS
The input and output terminal signals can be selected so
that the VCR can be connected to older models of VCR.
1
Press the MENU button to display the MAIN MENU.
2
Press the
l
(or
j
) button to select the “9. OTHERS”
line, then press the ENTER button.
ø
The (OTHERS) menu appears.
*ALARM@LOG
*POWER@FAILURE/DEW
*TERMINAL@SET@@@@SET1
3
Press the
l
(or
j
) button until the “TERMINAL SET”
setting is highlighted, then press the ENTER button.
4
Press the
l
(or
j
) button to select the desired
mode, then press the ENTER button.
SET1 . . . . . . . . . . . . . . According to indication on
back panel. (Select when
not connecting to an older
model.)
SET2 . . . . . . . . . . . . . . CONTROL IN is set to
CLOCK IN, SERIES IN is
set to EJECT IN,
CONTROL OUT is set to
CLOCK OUT and TIMER
OUT is set to EJECT
OUT. (Select when
connecting to an older
model.)
5
When finished, press the MENU EXIT button.
NOTE:
œ
If set to “SET2”, the “SERIES REC” line will not
appear in the (ALARM/SERIES REC SET) menu.
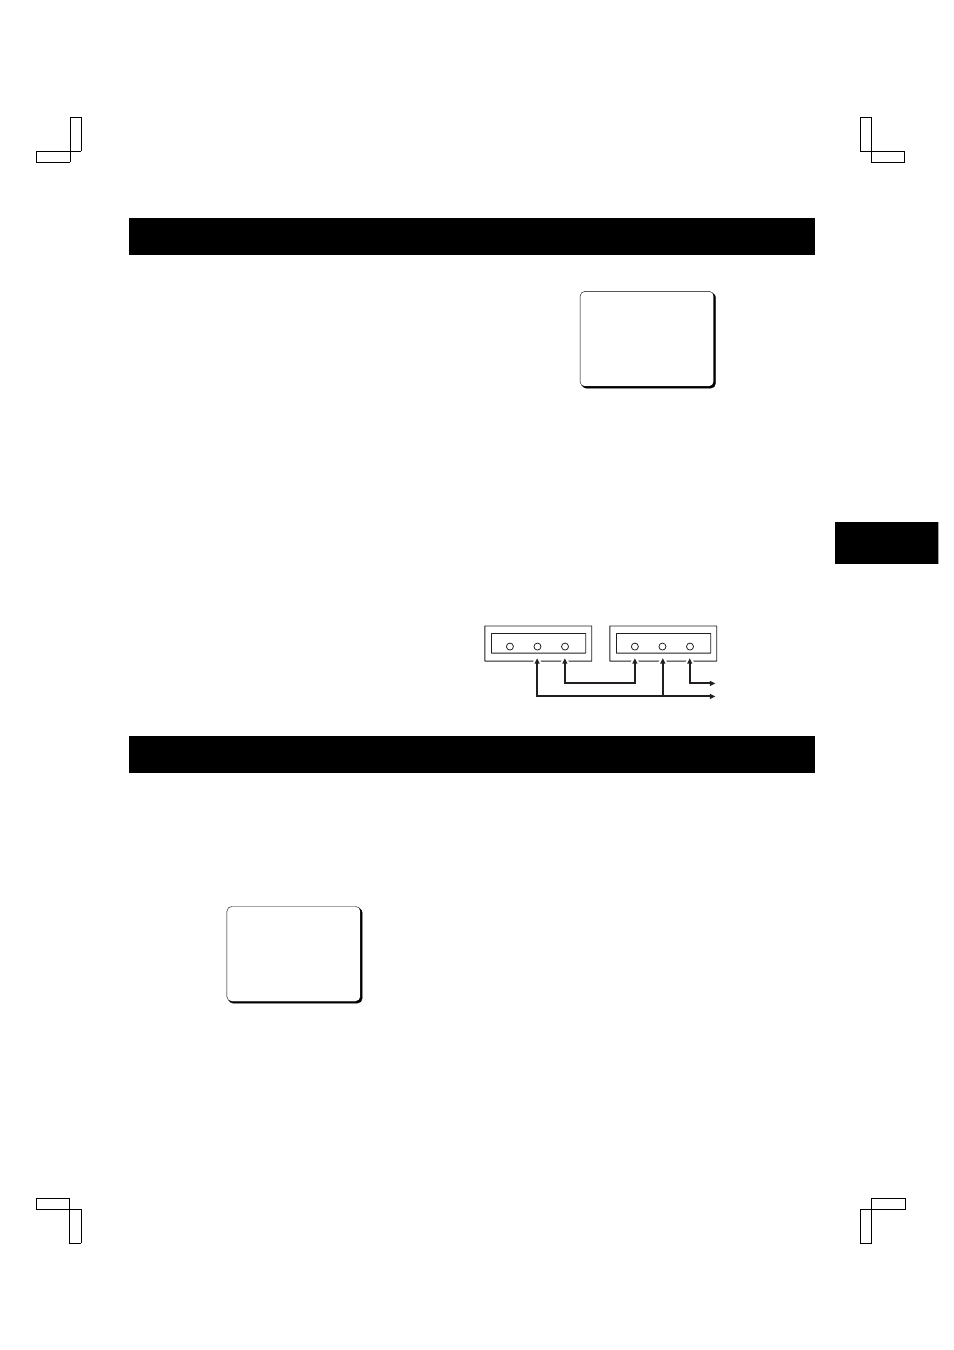
VCR No. 1
VCR No. 2
To CONTROL IN terminal
To COM terminal
CONTROL IN
COM
CONTROL OUT
CONTROL IN
COM
CONTROL OUT
NB4QR/NA (SRT-4040 GB) Tue. Sept., 10/2002
38
English