4 installing the camera – JVC VN-C625 User Manual
Page 23
23
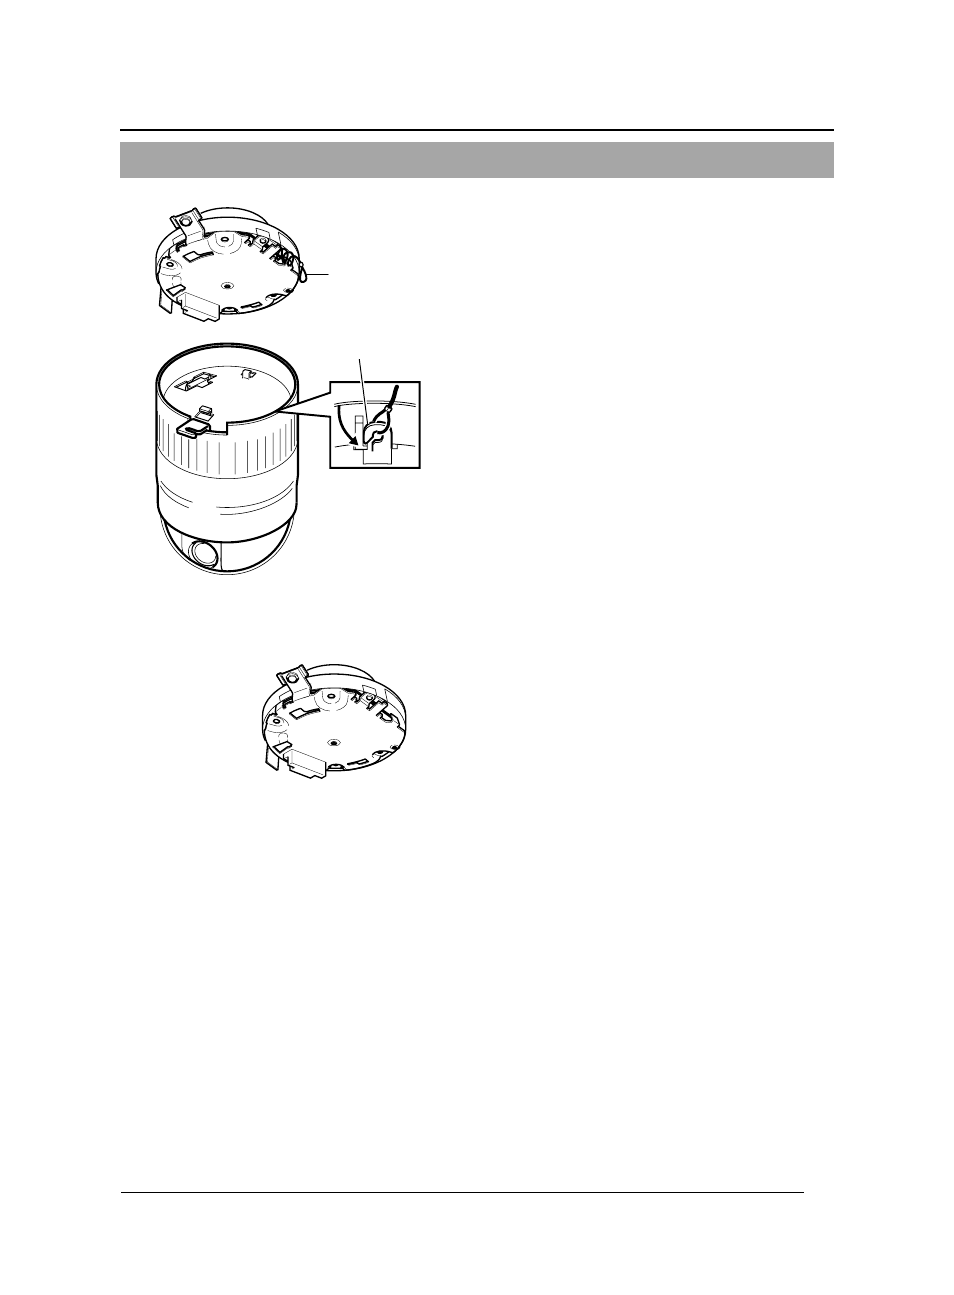
1-4 Installing the Camera
1.
Attach the safety wire to prevent the
camera from falling down
As shown in the diagram, pull out the safety
wire from the ceiling mount and hang it to the
safety wire fastening hook on the camera.
Be sure to connect the safety wire to prevent
the camera from falling down.
2.
Check that the locking screw is loosened
The camera cannot be properly installed if the
locking screw of the ceiling mount is not
loosened.
3.
Fit the camera to the ceiling mount
Align the "^" mark of the camera unit with
"&" mark of the ceiling mount, and fit the
camera to the ceiling mount upon checking
the positions of the camera clamping bracket
as well as the locking screw on the ceiling
mount.
See also other documents in the category JVC Video surveillance systems:
- LST0886-001A (85 pages)
- TK-C1530E (35 pages)
- TK-C1460 (84 pages)
- TK-C2201U (28 pages)
- WB-1550U (16 pages)
- 686BU (111 pages)
- TK-C655 (48 pages)
- VN-H217U (11 pages)
- OUTDOOR PTZ IP DOME CAMERA VN-V686WPU (44 pages)
- TK-C2201WPU (32 pages)
- VN-686WPBU (130 pages)
- LST0728-001C (168 pages)
- CU-V801U (2 pages)
- TK-C676 (44 pages)
- TK-C215V4 (16 pages)
- Wall Mount WB-S622U (4 pages)
- TK-C215VP12 (36 pages)
- VN-V26U (48 pages)
- TK-C205 (11 pages)
- VN-C215V4U (86 pages)
- VN-C11 (32 pages)
- LST0926-001A (18 pages)
- VN-V686U (44 pages)
- TK-C215V4U (24 pages)
- TK-C1531EG (70 pages)
- TK-C205VPU(A) (2 pages)
- WB-1550 (16 pages)
- TK-C675B (24 pages)
- TK-C215V12 (32 pages)
- TK-C625 (44 pages)
- TK-C215VP12U/E (40 pages)
- VN-V686WPU (119 pages)
- VN-C3U (2 pages)
- WB-1540 (16 pages)
- TK-C625U (1 page)
- TK-WD31 (48 pages)
- DZ-VCA1SE (28 pages)
- LST0728-001B (162 pages)
- VN-C215VP4U (48 pages)
- TK-C210FW (32 pages)
- TK-C926EG (60 pages)
- LWT0254-001B-H (44 pages)
- KA-H205U (2 pages)
- VN-V686UAPI (105 pages)