Output/input set, L-1 output and l-1 input setting, L-1 and l-2 audio input setting – JVC TH-R3 User Manual
Page 72: 68 l-1 output and l-1 input setting, Editing, L-1 output, Scart video, L-1 input, Video
EDITING
Page 68April 8, 2005 4:00 pm
Filename [TH-R1R3EK_09Editing.fm]
Masterpage:Left+
68
L-1 Output And L-1 Input Setting
The [L-1 INPUT/OUTPUT] connector accepts and delivers either a
composite signal (regular video signal) or a Y/C signal (a signal in
which the luminance and chrominance signals are separated). Set
AL-1 OUTPUTB and AL-1 INPUTB to the appropriate mode depending
on the type of appliance connected to the unit’s [L-1 INPUT/
OUTPUT] connector.
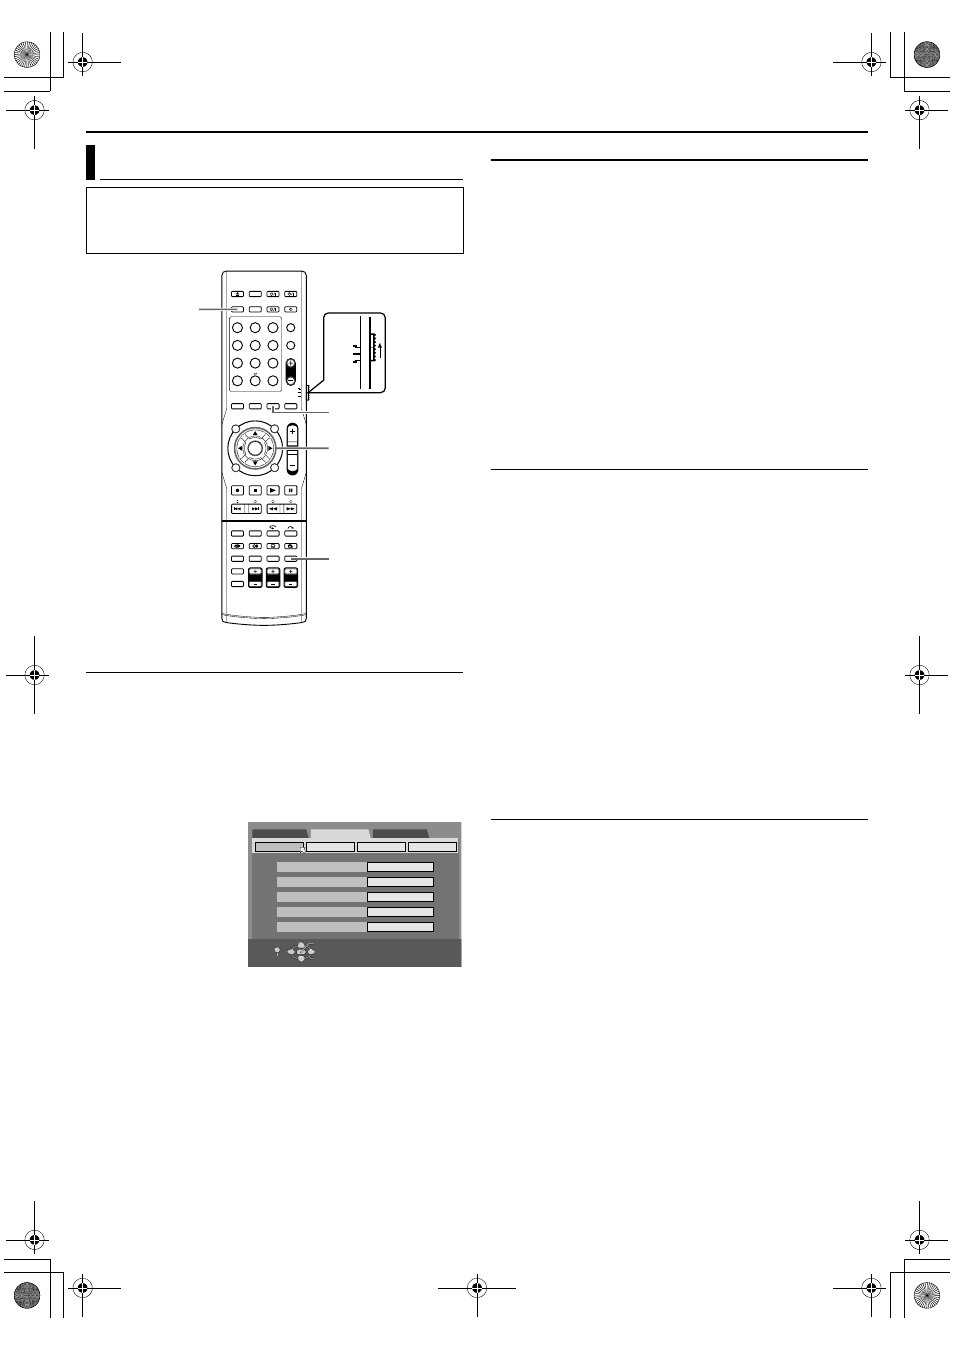
1
Press SET UP to access the Main Menu screen.
2
Press selection keys to select
AFUNCTION SET UPB, then
press ENTER.
3
Press selection keys
to select
AVIDEO IN/
OUT
B, then press
ENTER for
confirmation.
4
Press selection keys
to select
AL-1
OUTPUT
B or AL-1
INPUT
B, then press
ENTER.
5
Press selection keys
to select the appropriate setting, then press ENTER.
6
Press SET UP to complete the setting.
\
* The boldface settings below indicate the settings at your purchase.
8
L-1 OUTPUT
^
SCART VIDEO
/ SCART S-VIDEO / SCART
RGB / COMPONENT
SCART VIDEO
:
If a connected appliance’s input is compatible only with regular
video signals, set to
ASCART VIDEOB
.
SCART S-VIDEO:
If a connected appliance’s input is compatible with Y/C signals,
set to
ASCART S-VIDEOB. You can obtain a high quality picture.
(For connection, be sure to use a 21-pin SCART cable that is
compatible with the Y/C signal.)
SCART RGB:
If a connected appliance’s input is compatible with RGB
signals, set to
ASCART RGBB. You can obtain a high quality
RGB picture.
COMPONENT:
If a connected appliance’s input is compatible with Y/P
B
/P
R
signals, set to
ACOMPONENTB. You can obtain a high quality
Y/P
B
/P
R
picture. Switch the TV to the input that you can watch
component video pictures.
8
L-1 INPUT
^
VIDEO
/
S-VIDEO
VIDEO
:
If a connected appliance’s output is compatible only with regular
video signals, set to
AVIDEOB.
S-VIDEO
:
If a connected appliance’s output is compatible with Y/C
signals, set to
AS-VIDEOB. You can obtain a high quality picture.
(For connection, be sure to use a 21-pin SCART cable that is
compatible with the Y/C signal.)
NOTES:
●
If
AL-1 OUTPUTB is set to ASCART S-VIDEOB or ASCART RGBB, it
is not possible to set
AL-1 INPUTB to AS-VIDEOB.
●
If
AL-2 SELECTB is set to ASAT S-VIDEO/RGBB or ADECODERB, it
is not possible to set
AL-1 INPUTB to AS-VIDEOB.
●
If
AL-2 SELECTB is set to ADECODERB, it is only possible to set
AL-1 OUTPUTB to ASCART VIDEOB or ACOMPONENTB.
●
Component video signals are not output from the [L-1 INPUT/
OUTPUT] connector.
●
When Progressive scan mode is engaged, it is not possible to
select the setting of
AL-1 OUTPUTB on the left column.
L-1 And L-2 Audio Input Setting
You can select to input audio signals through the coaxial digital/
optical [L-1/L-2 DIGITAL INPUT (COAXIAL/OPTICAL)] or analogue
connectors depending on the appliance connected to the unit.
There is a time limit when performing the following setting. If the
time is up before completing the setting, re-perform from the
beginning.
1
Press SETTING.
The item of the setting performed most recently is displayed on
the front display panel.
2
Press
F or G to display the L-1, L-2 input setting on the front
display panel.
3
Press
D or E to select the desired audio input.
Each time you press
D or E, the L-1 and L-2 combination is
displayed in the sequence as shown below:
L-1 L-2
(AN - AN) N (AN - OP) N (AN - CO) N
(OP - AN) N (OP - CO) N (CO - AN) N
(CO - OP) N (back to the beginning)
AN: Analogue signal input
OP: Optical signal input
CO: Coaxial digital signal input
Output/Input Set
●
Turn on the unit.
●
Turn on the TV and select an input mode such as EXT1.
●
Set the remote control selector switch to AUDIO.
●
Press DVD on the remote control.
1
2
3
4
5
6
7
8
9
0
VOL
SAT
TV
AUDIO
(FGDE)
ENTER
SETTING
SET UP
DVD
Selection Keys
DVD SET UP
FUNCTION SET UP
INITIAL SET UP
VIDEO IN/OUT
RECORDING SET
OTHERS
SELECT WITH [CURSORS]
THEN PRESS [ENTER]
MONITOR TYPE
F-1 INPUT
L-1 INPUT
DISPLAY SET
L-1 OUTPUT
L-2 SELECT
4:3LB
VIDEO
VIDEO
SCART VIDEO
S-VIDEO/RGB
EXIT
OK
SELECT
SET UP
TH-R1R3EK_00.book Page 68 Friday, April 8, 2005 4:00 PM