Basic operations, Turning on and off the power, Listening with headphones – JVC XL-R5020BK User Manual
Page 11: Remote control
9
On the unit:
COMPACT
DIGITAL AUDIO
Recordable
ReWritable
MIN
MAX
COMPACT
DIGITAL AUDIO
XL – R5020 CD/CDR MULTIPLE COMPACT DISC RECORDER
CA
NC
EL
R
EC
SO
UR
CE
DI
SP
LA
Y
ME
NU
1
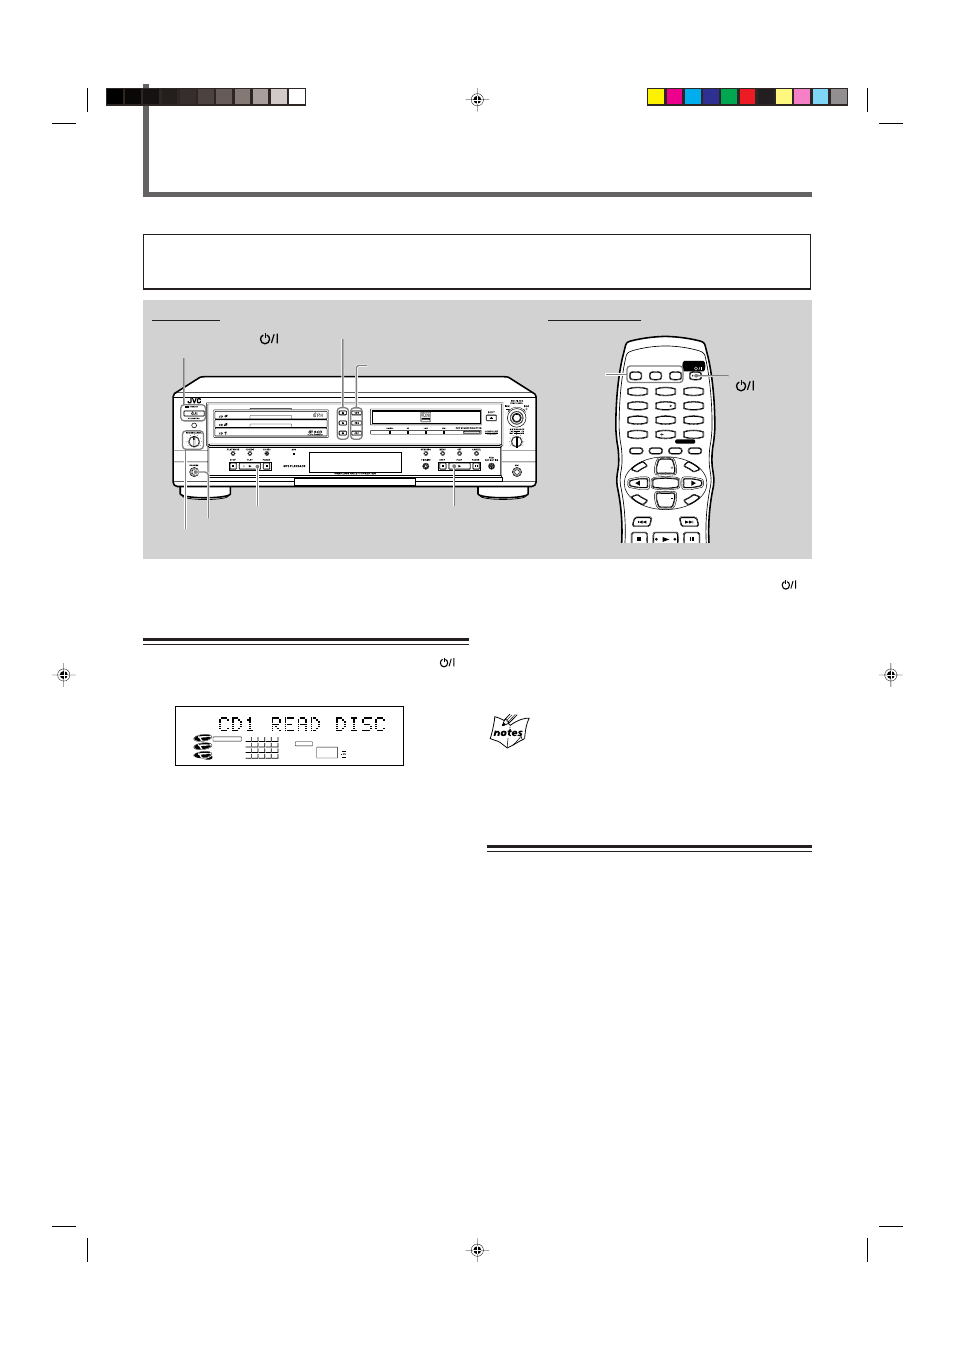
CD1
CD2
CD3
STANDBY/ON
PLAY
MODE
SET
GROUP
REPEAT
CD
CDR
4
7
10
2
5
8
3
6
9
10
GROUP
CONTROL
GROUP
Basic Operations
Before operating the unit any further, first set the clock built in
this unit (see page 37).
Turning On and Off the Power
To turn on the unit without playing, press STANDBY ON
so that the STANDBY lamp on the unit goes off.
• Last selected disc tray is selected again.
To start playback after turning on the unit, press one of the
following buttons.
Disc number buttons (CD1, CD2 or CD3)
—3-CD Changer starts continuous play from the selected
disc.
PLAY
3 for 3-CD Changer on the unit
—3-CD Changer starts playing the last selected disc (if a
disc is loaded on the disc tray).
PLAY
3 for CD Recorder on the unit
—CD Recorder starts playing if a disc is loaded on the CD
Recorder tray.
• Pressing 3-CD Changer disc eject
0 buttons (0 CD1, 0
CD2 or
0 CD3) or EJECT 0 for CD Recorder also turns on
the unit and opens the corresponding disc tray, but the
currently selected disc does not change, and the playback
will not start.
To turn off the unit (on standby), press STANDBY/ON
again so that the STANDBY lamp lights red and current time
appears on the display.
• A little power is always consumed even while the unit is in
standby mode.
To switch off the power supply completely, unplug the
AC power cord from the AC outlet.
When you unplug the AC power cord or if a power failure occurs,
the clock will be reset to “AM 12:00” and the timer settings will be
erased. If this happens, set the clock and the timer again.
Listening with Headphones
When this unit is not connected to a receiver (amplifier), you
can listen to the sound reproduced on 3-CD Changer or CD
Recorder by connecting a pair of headphones to PHONES
jack on the unit.
To increase the volume level, turn PHONE LEVEL control to
the right.
To decrease the volume level, turn PHONE LEVEL control to
the left.
• Be sure to turn down PHONE LEVEL fully before
connecting or putting on the headphones.
Ex.: When previously selected disc is CD1 on 3-CD Changer.
Remote control:
STANDBY/ON
PHONES jack
PHONES LEVEL control
STANDBY/ON
and
STANDBY lamp
20
15
10
5
19
14
9
4
18
13
8
3
17
12
7
2
16
11
6
1
44.1kHz
HIGH SPEED AUTO TRACK
CD-RW
L
0
R
3
dB
6
10
15
20
30
40
DIGITAL
CD CD-R
FINALIZED
CD PLAYER
1
2
3
PLAY
3 for 3-CD Changer
PLAY
3 for CD Recorder
Disc number buttons
(CD1, CD2, CD3)
Disc eject
0 buttons
(
0 CD1, 0 CD2 or 0 CD3)
Disc number
buttons
(CD1, CD2,
CD3)
IMPORTANT
When using operating buttons (
3, 7, 8) on the remote control, check which indicator lights up on the display—CD PLAYER (3-CD
Changer) or CD RECORDER. If the incorrect indicator is lit, press CONTROL CD or CONTROL CDR to select the correct target source.
01-17.XL-R5020BK_f
02.5.28, 11:31 AM
9