Editing, Cont.) audio dubbing – JVC YU30052-625-1 User Manual
Page 56
56
EN
EDITING
(Cont.)
Audio Dubbing
Using a tape recorded at 32 kHz, you can customize the soundtrack of a tape you’ve recorded.
NOTE:
Audio Dubbing is not possible on a tape recorded at 48 kHz.
4
PAUSE DURING DUBBING
Press PAUSE.
5
STOP DUBBING
Press STOP.
NOTES:
● When editing onto a tape that was recorded at 32 kHz,
the old and new soundtracks are recorded separately.
● To select the desired sound for playback, press AUDIO
MONITOR on the remote control.
● If you dub onto a blank space on the tape, the sound may
be disrupted. Make sure you only edit recorded areas.
● If feedback or howling occurs, move the Docking
Station so the camcorder’s microphone is away from the
TV, or turn down the TV’s volume.
● If you change from 32 kHz to 48 kHz in mid-recording
and then use the tape for Audio Dubbing, it is not
effective from the point where 48 kHz recording began.
1
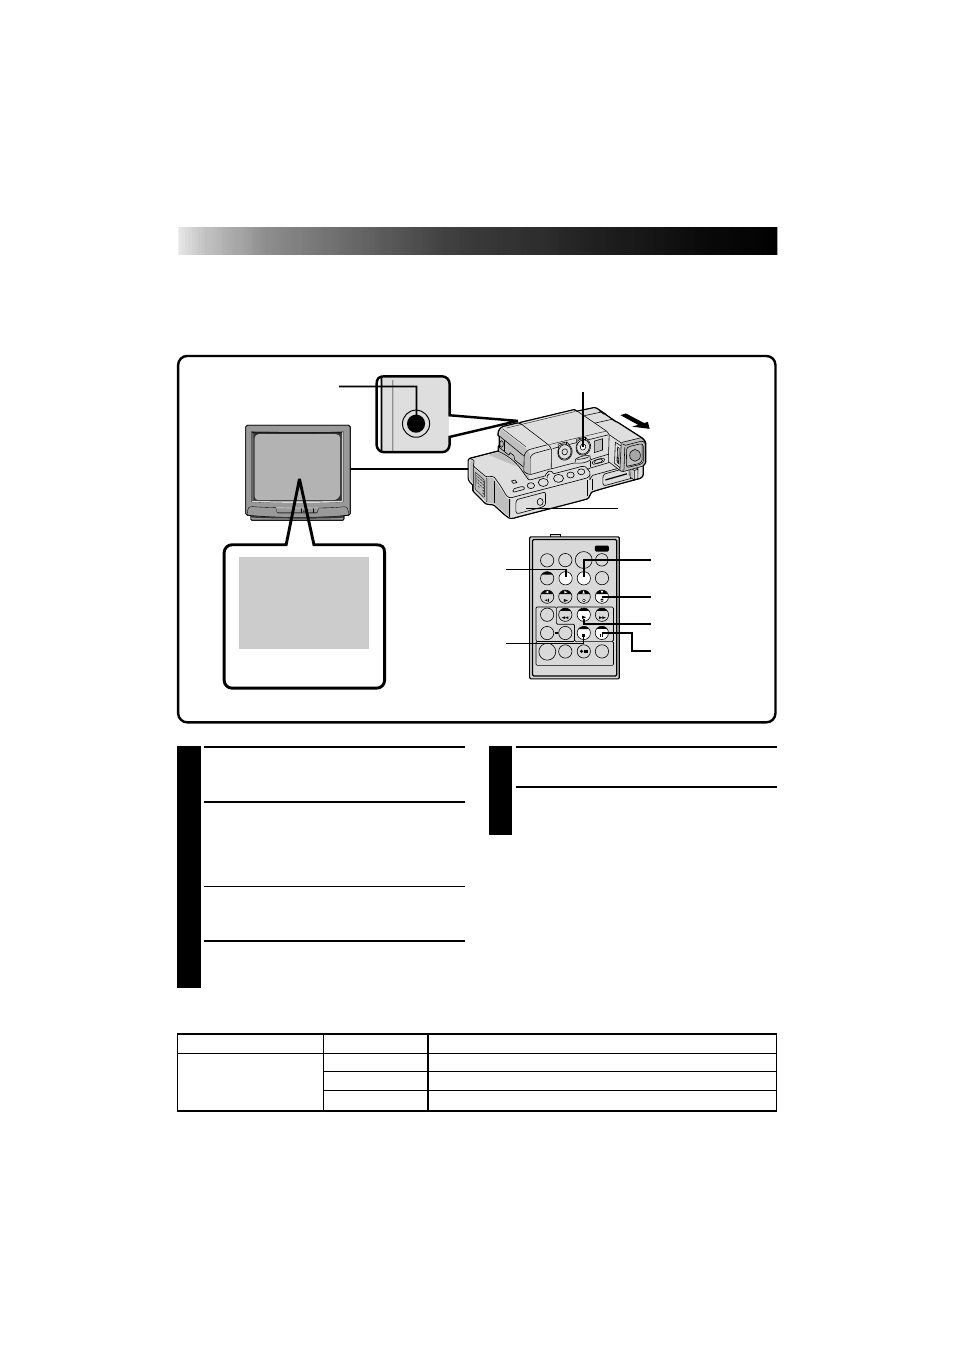
FIND EDIT-IN POINT
Play back the tape to locate the point where
editing will start, then press PAUSE.
2
CONNECT EXTERNAL
MICROPHONE
Connect an optional stereo microphone. Then
while holding A. DUB on the remote control,
press PAUSE.
• Pull out the viewfinder and “6e” appears.
• Press DISPLAY on the remote control if
sending the image to a connected TV.
3
BEGIN DUBBING
Press PLAY, then begin “narrating” using the
external microphone.
6e
T
W
POWER DIAL
REMOTE SENSOR
AUDIO DUB STANDBY
A.DUB
PLAY
PAUSE
EXT. MIC INPUT
CONNECTOR
DISPLAY
STOP
AUDIO MONITOR
RM-V708U (provided)
RECORDING SOUND
DISPLAY
OUTPUT SOUND
32 kHz
FULL SOUND
Original and new tracks are combined and output in stereo.
SOUND 1
Original track is output on both "L" and "R" channels in stereo.
SOUND 2
New track is output on both "L" and "R" channels in stereo.