Subsidiary settings (cont.), Storing channels manually, Access main menu – JVC HM-DR10000EK User Manual
Page 60: Access confirmation screen, Select position, Attention, Select band, Input channel, Enter new channel information, Close confirmation screen
60
1
2
3
4
5
6
7
8
9
1
2
1
2
3
– –:– –
0
3
4
4
SUBSIDIARY SETTINGS (cont.)
Storing Channels Manually
To store channels that were not stored during Auto Set Up
(
੬
pg. 8), Preset Download (
੬
␣ pg. 9) or Auto Channel Set
(
੬
␣ pg. 58).
ACCESS MAIN MENU
1
Press MENU.
ACCESS CONFIRMATION
SCREEN
2
Press
%fi to move the highlight bar (pointer) to
“MANUAL CH SET”, then press OK or
#
. The Confir-
mation screen appears.
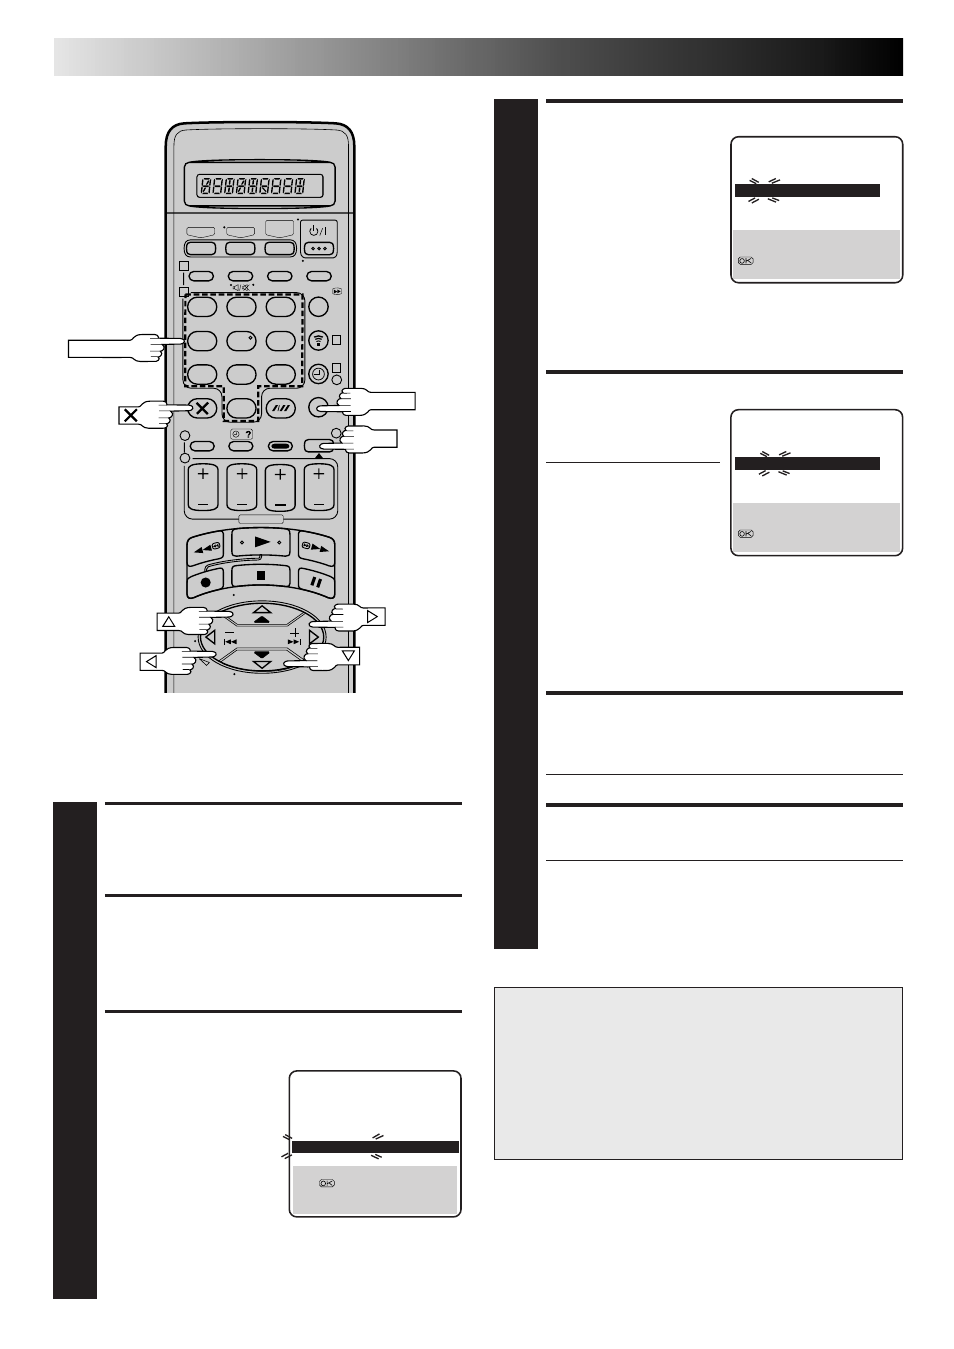
SELECT POSITION
3
Press
%fi
@ #
until an
open position in which
you want to store a
channel begins blinking,
then press OK. The
Manual Channel Set
screen appears.
NUMBER
(Ex.) To store in position 6.
The blueback screen and the
programme currently being
broadcast by the selected channel
appear alternately for 8 seconds
each.
The blueback screen and the
programme currently being
broadcast by the selected channel
appear alternately for 8 seconds
each.
5
5
PR
CH
ID
PR
CH
ID
01
26
BBC1
08
– – – –
02
33
BBC2
09
– – – –
03
23
ITV
10
– – – –
04
30
CH4
11
– – – –
05
37
CH5
12
– – – –
06
– – – – 13
– – – –
07
– – – – 14
– – – –
[
5∞ ]
=
: EDIT
= [X] : DELETE
[MENU] : EXIT
OK
ATTENTION
Guide Program numbers are not set when channels are
stored manually. If an attempt is made at timer program-
ming with VIDEO Plus+ in this state, the “GUIDE PROG
SET” screen appears; set the Guide Program numbers on
this screen.
੬
“ATTENTION – Regarding Guide Program
Number Set” on pg. 19.
Or perform “Guide Program Number Set” (
੬
pg. 65).
The blueback screen and the
programme currently being
broadcast by the selected channel
appear alternately for 8 seconds
each.
SELECT BAND
4
Press
%fi to change the
band between CH (regular)
and CC (cable), then
press
#
.
INPUT CHANNEL
5
Press the NUMBER keys to
input the channel number
you want to store.
● To input the registered
station name (ID –
੬
pg. 63), press
#
until "– –
–␣ –" (ID setting) begins
blinking, then press
%fi.
● For fine tuning
adjustment, press
#
until "+/–" begins
blinking, then press
%fi. While tuning,
“+” or “–” appears.
● When "AV2 SELECT" is set to "AV2" or "SAT", the
"DECODER" setting cannot be changed (
੬
pg. 50).
ENTER NEW CHANNEL
INFORMATION
6
Press OK and the Confirmation screen appears.
● Repeat steps 3 through 6 as necessary.
CLOSE CONFIRMATION SCREEN
7
Press MENU.
● To change positions, see "Change Station Preset
Position" (
੬
pg. 61).
● If you wish to set station names other than the ones
registered in your recorder,
੬
"Set Stations (B)" on
pg. 62.
PR CH
ID
FINE DECODER
06 CH21 – –␣ – – +/–
OFF
[
5∞] : SELECT
[
] : CURSOR +=
: OK
[MENU] : EXIT
∞
∞
PR CH
ID
FINE DECODER
06 CH01 – –␣ – – +/–
OFF
[
5∞] : SELECT
[
] : CURSOR +=
: OK
[MENU] : EXIT
∞
∞
MENU