Madrigal Imaging MP-8 User Manual
Page 27
Step 7
➤
Look directly into the green lens. Press , ,
or
to center the
displayed crosshatch on the face of the picture tube.
Step 8
➤
Look directly into the blue lens. Press , ,
or
to center the
displayed crosshatch on the face of the picture tube.
Step 9
➤
Press
to increase contrast to a normal viewing level.
Step 10
➤
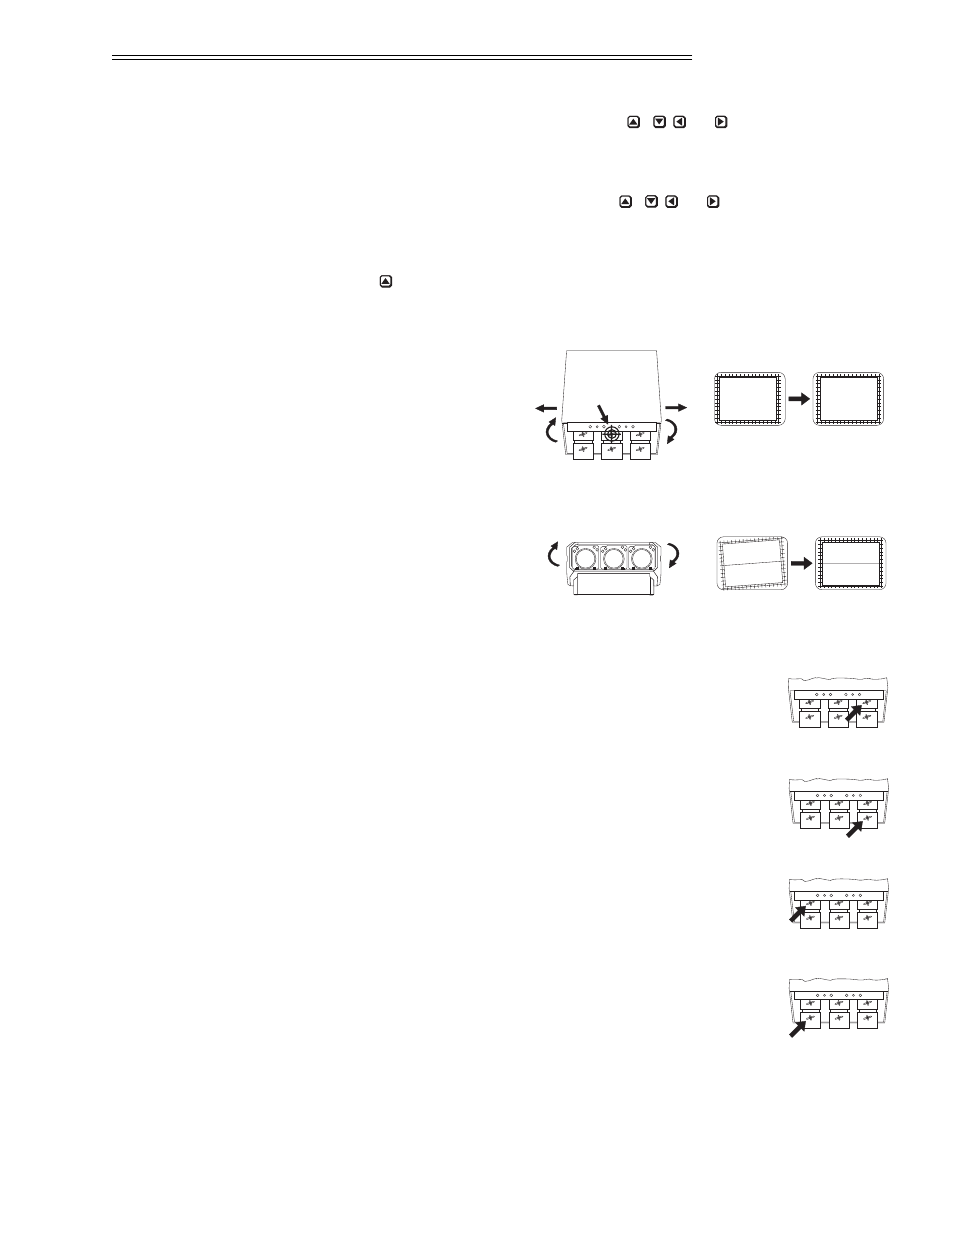
Pivot the projector and
move it side to side as
necessary to display a
symmetrical crosshatch
centered left-to-right on
the screen. The pivot
point should be at the
rear wing nut of the green lens to avoid changing the throw distance.
Step 11
➤
Tilt the projector until
the center horizontal line
is level and centered with
the screen. Adjust the feet
of the projector or ceiling mount as required.
Step 12
➤
A red image is displayed. Loosen the rear wing nut on the
red lens. Rotate the lens using the wing nut until the picture
is focused in the center. Tighten the rear wing nut.
Step 13
➤
Loosen the front wing nut on the red lens. Rotate the front
lens barrel until the picture is focused in the corners.
Tighten the front wing nut.
Step 14
➤
A blue image is displayed. Loosen the rear wing nut on
the blue lens. Rotate the lens using the wing nut until the
picture is focused in the center. Tighten the rear wing nut.
Step 15
➤
Loosen the front wing nut on the blue lens. Rotate the
front lens barrel until the picture is focused in the corners.
Tighten the front wing nut.
R
G
B
R
G
B
R
G
B
R
G
B
B
R
G
Before
After
pivot
point
Before
After
INSTALLATION & SETUP
2.21