MediSense PCx User Manual
Page 91
Questions? Refer to Page 10-13 For Customer Care Information.
8-31
What You See
on the Display
What You Do
Comments
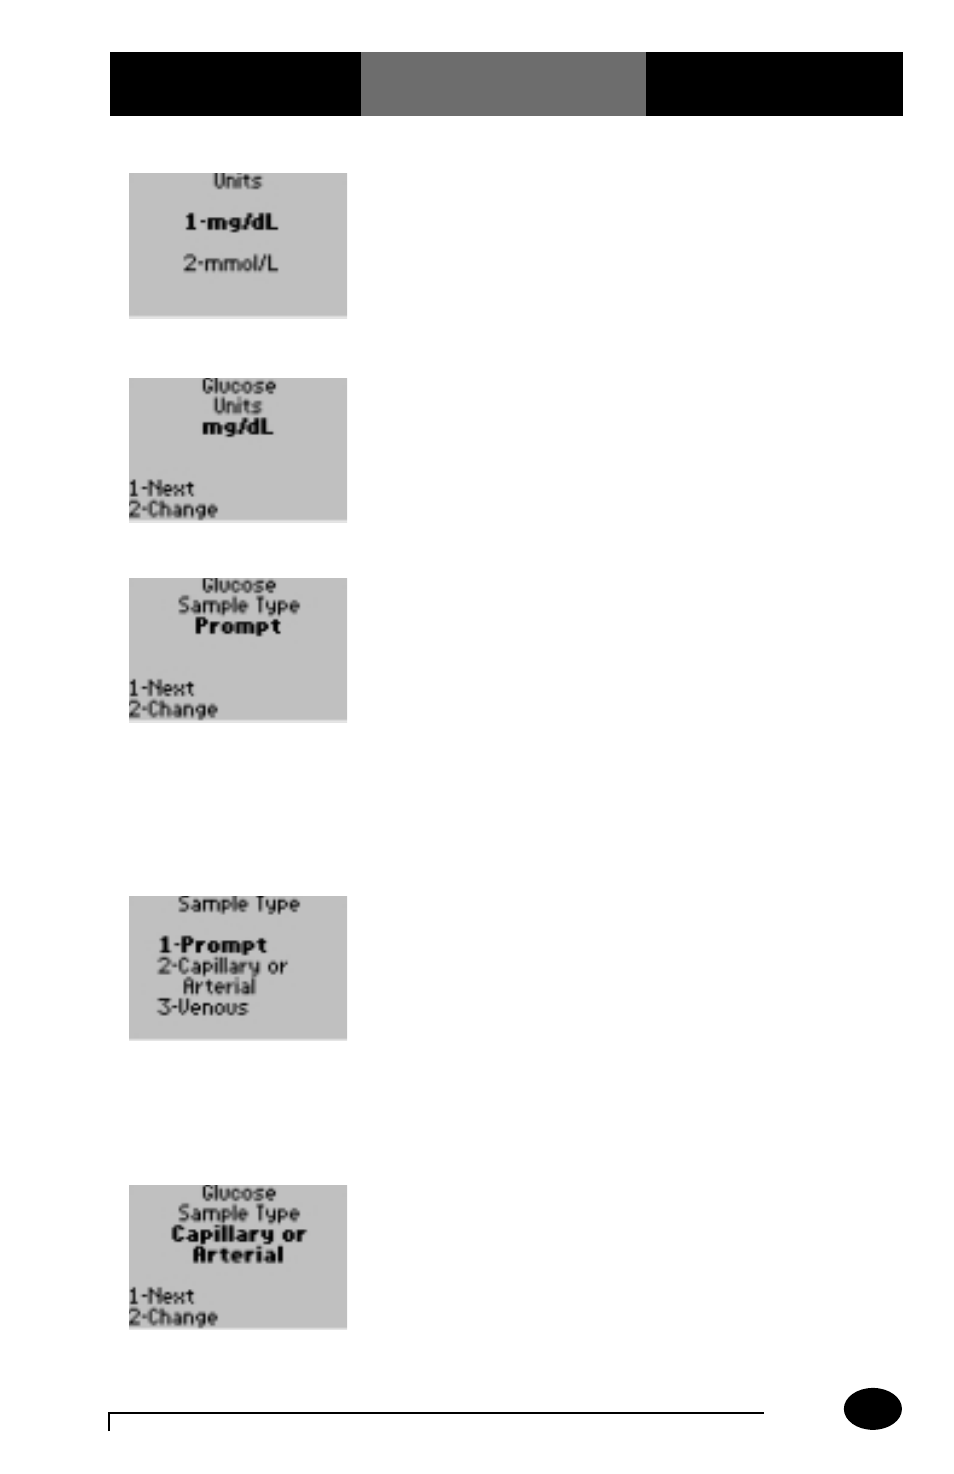
5. Choose one of the
following options:
Press 1 – mg/dL.
Press 2 – mmol/L.
The display is returned
to the Glucose Units
screen.
6. Press 1 to continue
to the next menu.
The display shows the
Glucose Sample Type
screen.
7. The administrator will
select one of the
following options:
Press 1 – Next, to
continue to Glucose
Action Range menu; skip
forward to step 10.
Press 2 – Change, to
change Sample Type
prompt.
The display shows the
Sample Type options.
8. The administrator will
select one of the
following options:
Press 1 – Prompt.
Press 2 – Capillary or
Arterial.
Press 3 – Venous.
The monitor can be set to
always prompt for the
sample type or to always
default to either Capillary
or Arterial, or Venous
blood samples.
The display is returned to
the Glucose Sample Type
screen.
9. Press 1 to continue to
the Glucose Action
Range menu.
The display shows the
Glucose Action Range
screen.