Removing the lcd cable / inverter board – Matsushita CF-Y5LWVYZ 1 2 User Manual
Page 34
34
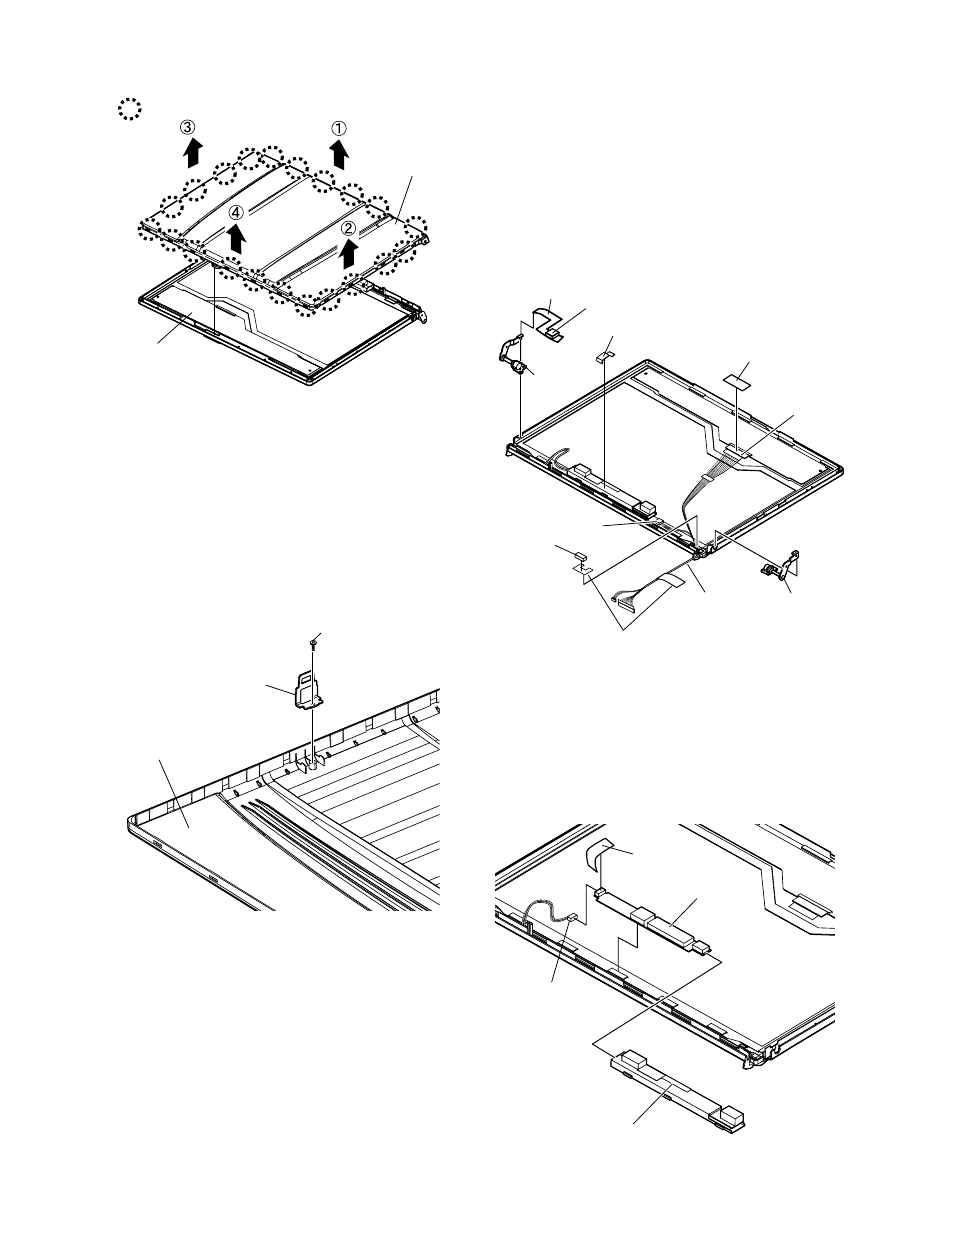
2. The intuition combination part of LCD rear case (21
places) is separated with LCD front case.
9.2.21. Removing the LCD Cable / Inverter
Board
Preparation : perform the section 9.2.1., 9.2.3.,
9.2.4., 9.2.18. and 9.2.20. first.
1. Peel of the damper, conductive cloth, inverter tape
and the tape.
Inverter tape : DFHR3E07ZA (K18)
2. Remove the hinge (L), (R).
3. LCD Ccable is removed from LCD unit board
(CN101), and connector (CN1) is removed from
inverter board.
Note:
-When each hook is removed, it becomes easy to
detach if the driver who wraps protection cloth etc. is
inserted with LCD Front Case between LCD rear
covers, and the slide is repeated.
-Do noting that externals are not damaged.
3. Remove the 1 screw (e) from LCD rear and then
remove the LCD hook.
Screw (e) : DXQT2+D25FNL (N6)
Hook position
LCD Unit
LCD Rear
Screw (e)
LCD Hook
LCD Rear
Conductive Cloth
Inverter Tape
LCD Cable
PET Tape
CN101
Damper
CN1
Conductive Cloth
Damper
Hinge (L)
Hinge (R)
Note:
Conductive cloth and tapes cannot be recycled.
Please use new parts.
4. Inverter case is peeled off and Inverter fixed with a
both sided tape is taken out.
5. Peel off the tape from inverter.
6. Remove the connector (CN2) and then remove the
inverter.
Inverter Case
Tape
CN2
Inverter
Note:
Tape and inverter case cannot be recycled. Please
use new parts.