Disassembly lnstructions, Preparation, Removing the hdd – Matsushita CF-Y5LWVYZ 1 2 User Manual
Page 25: Removing the keyboard
25
9.2. Disassembly lnstructions
9.2.1. Preparation
Attention:
Before disassembly, be sure to perform the
following steps.
1. End the Windows.
2. Turn off the power and then remove the AC adaptor.
3. Slide the hooks (A) and then remove the battery
Pack.
4. Remove the screw (A) and then remove the DIMM
cover.
(Remove if the DIMM memory is equipped with)
Screw (A) : XSB2+4FNL (N14)
Screw (A)
DIMM Cover
Lithium Ion Battery Pack
Hook (A)
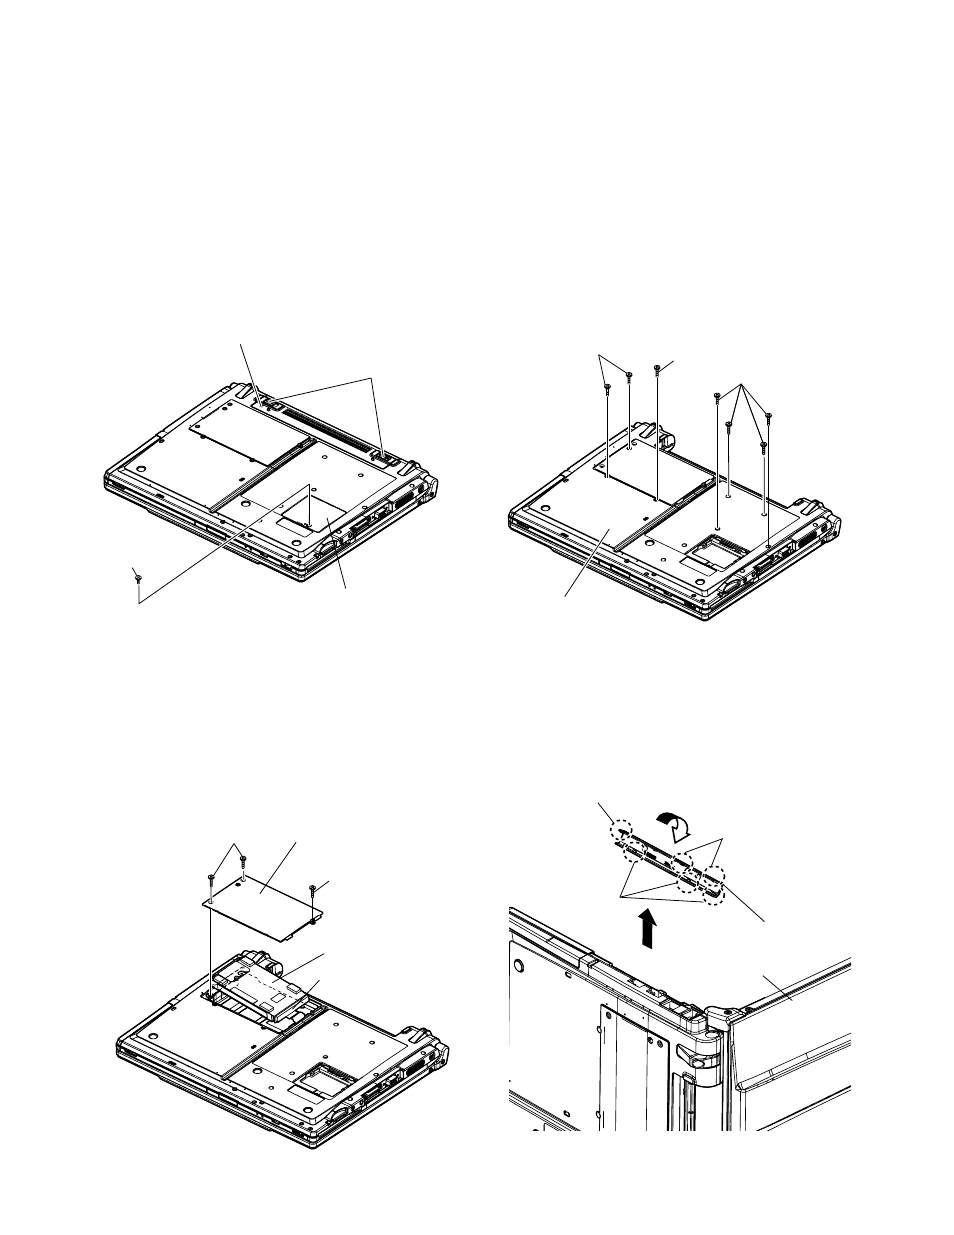
9.2.2. Removing the HDD
Preparation : perform the section 9.2.1. first.
1. Remove the 2 screws (B) and 1 screw (C).
Screw (B) : DXQT2+D4FNL (N7)
Screw (C) : DXQT2+E12FNL (N9)
2. Lift up the HDD unit and remove FFC connector and
then remove the HDD unit.
3. HDD is taken out of the HDD case.
9.2.3. Removing the Keyboard
Preparation : perform the section 9.2.1. first.
1. Remove the 7 screws (D).
Screw (D) : DXQT2+E12FNL (N9)
2. Operate the LCD knob and open the LCD Unit to an
angle of 90 degrees or more.
The minus clock driver removes hook (B-1) in the
intuition combination part so as not to damage from
the W-LAN connector side space to the exterior,
and then rotates to the keyboard side, and KB side
cover is detached.
3. Remove the keyboard hook plates,and then remove
the hook of back side of keyboard with screwdriver.
Note :
Please do not bend pins of the HDD connector, at
the time of removing HDD and FFC
connector.
Screw (B)
Screw (C)
HDD Case
HDD FPC Connector
HDD Cover
4. Operate the LCD knob and open the LCD unit to an
angle of 90 degrees or more.
The minus clock driver removes hook (B-1) in the
hook position so as not to damage from the wireless
LAN connector side space to the exterior, and then
rotates to the keyboard side, and KB side cover is
removed.
KB Side Cover (R)
LCD Unit
Hook (B-2)
Hook (B-1)
Hook (B-1)
Note :
Be careful not to wrap the protection cloth etc.
around minus clock driver's point, and be careful
not to damage the exterior.
Screw (D)
Screw (D)
Screw (D)
Bottom Case