Epson CX11NF User Manual
Page 49
Selecting EPSON Scan Settings
49
Office Mode:
Click the
Color
,
Grayscale
, or
Black & White
button to select the colors in the
original.
Professional Mode:
Click the arrow to open the Document Type list and select
Reflective
(for
scanning a document or photo). Then click the arrow in the Auto Exposure Type
list and select
Document
or
Photo
.
2. Do one of the following to select your destination setting(s):
Home Mode:
Click the button for the way you plan to use the scanned image in the Destination
box:
■
Screen/Web
for images you will view only on a computer screen or post on
the web.
■
Printer
for images you will be printing or converting to editable text with an
OCR (Optical Character Recognition) program.
■
Other
if you want to select a specific resolution for other purposes.
Office Mode:
Select
ADF
from the
Document Source
drop-down list. Select the size of your
original document as the
Size
setting.
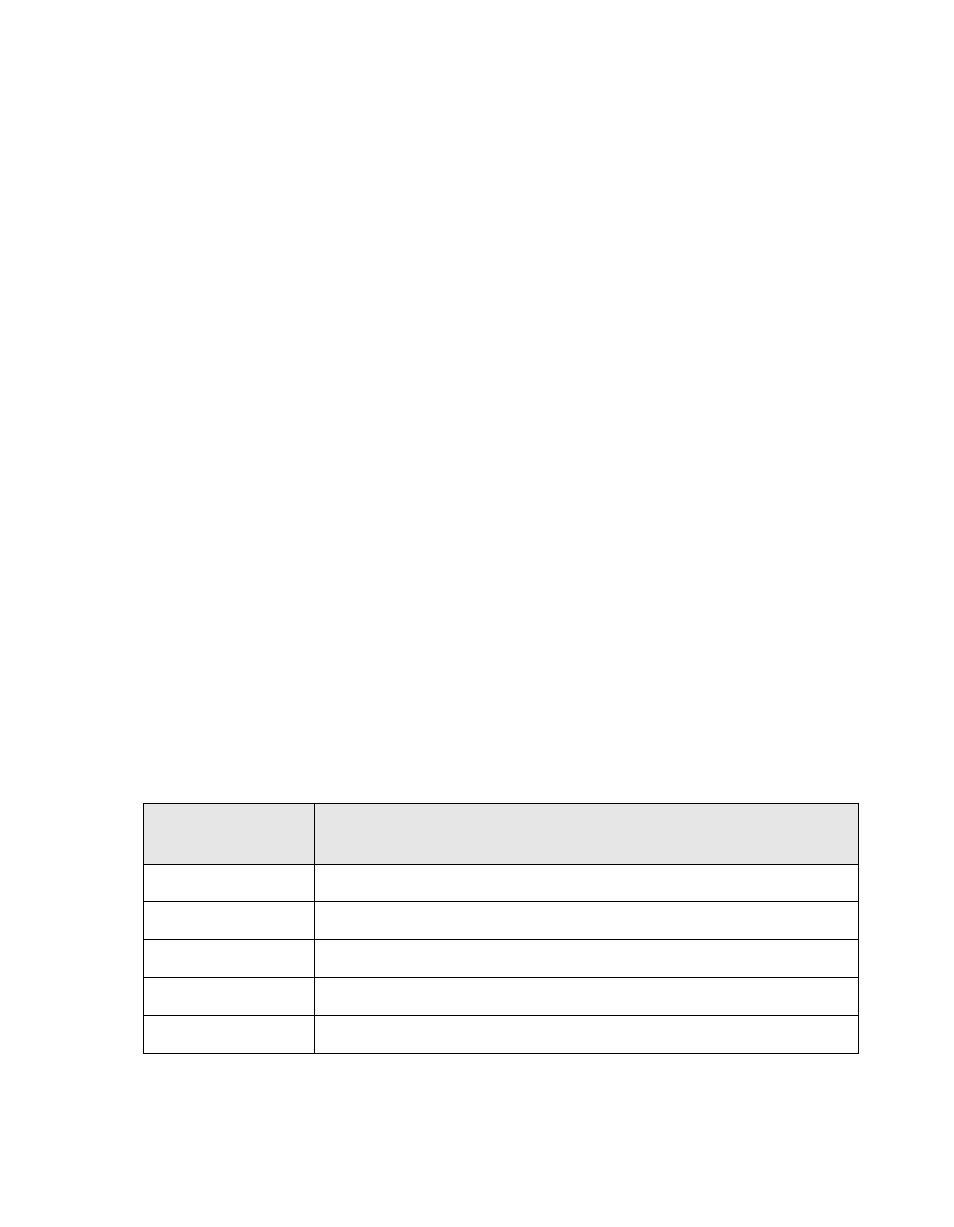
Professional Mode:
Click the arrow to open the Image Type list and select the image type you are
scanning:
3. EPSON Scan selects a default resolution setting based on the original and
destination settings you select. See page 50 to continue scanning.
Image Type
setting
Type of image you are scanning
24-bit Color
Color photo
Color Smoothing
Color graphics, such as a chart or graph
16-bit Grayscale
Black-and-white photo with many shades of gray
8-bit Grayscale
Black-and-white photo with just a few shades of gray
Black & White
Document with black text and/or line art