Fence stops – Grizzly G9953ZX User Manual
Page 38
-36-
Ultimate Series Jointers
To set the 90˚ stop:
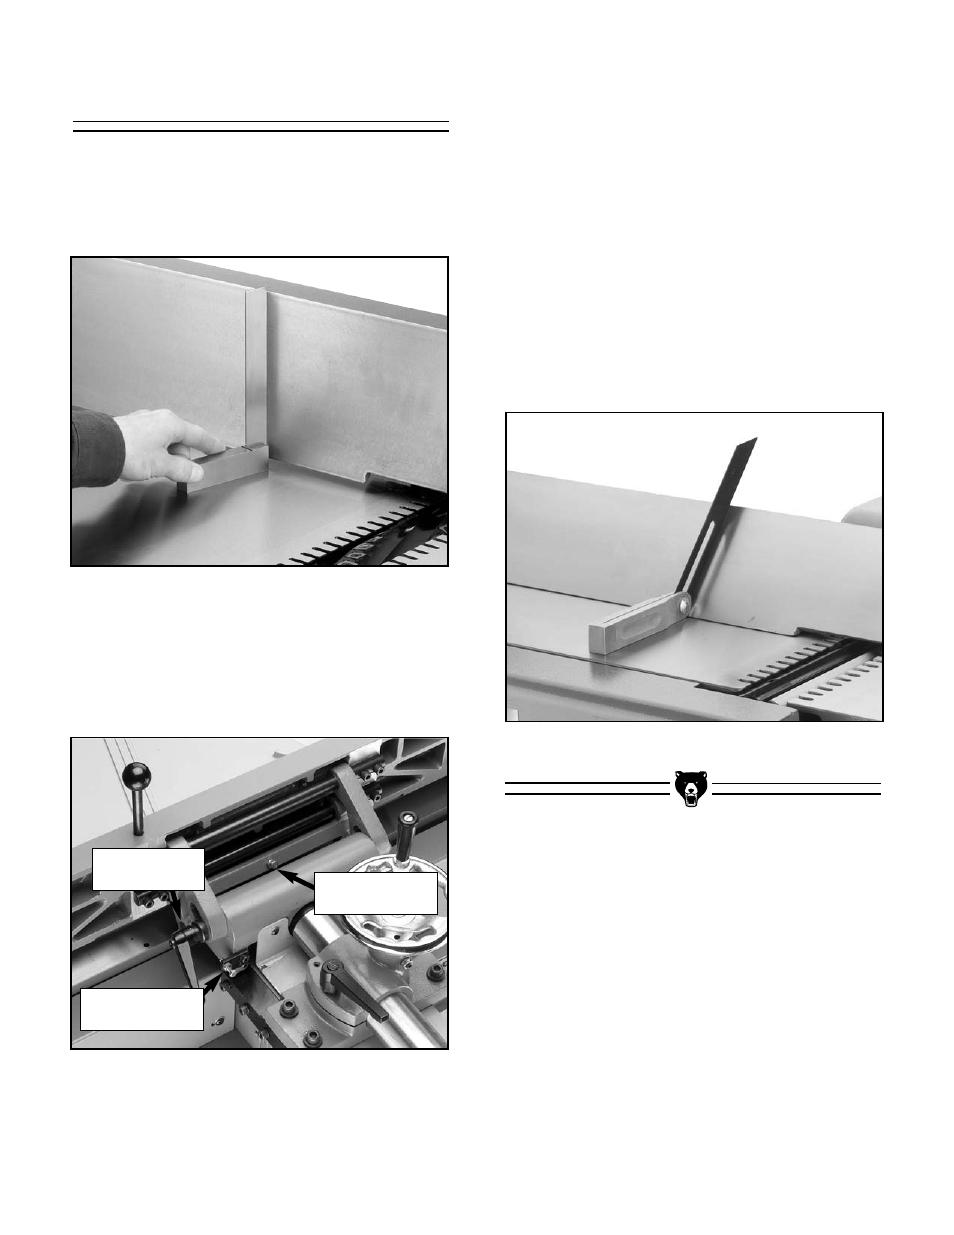
1.
Place a square on the outfeed table fairly
close to the cutterhead as shown in
Figure
41.
Figure 41. Use of square to align fence.
Fence Stops
2.
While holding the fence adjusting handle,
loosen the check nut on the 90˚ stop screw
(
Figure 42). Turn the stop screw against the
bracket until the fence contacts the edge of
the square evenly.
Figure 42. 90˚ and 45˚ fence stops.
90˚ Stop Bolt
And Check Nut
45˚ Stop Bolt
And Check Nut
Angle Setting
Lock Knob
3.
Tighten the check nut on the stop bolt and tilt
the fence back, then forward against the stop
bolt.
4.
Recheck with the square. Tightening the
check nut will move the stop bolt slightly, so
some trial-and-error may be necessary to
perfect your settings.
To set the 90˚ stop:
The process for setting the 45˚ fence stop is the
same as for the 90˚ stop, with the exception of
using a bevel gauge set to 45˚ (
Figure 43) and
adjusting the fence mechanism against the 45˚
stop (
Figure 42).
Figure 43. Using a bevel square to align fence.