Servicing instructions, Servicing, Servicing requirements – Stovax PR0741 User Manual
Page 24
SERvICING INSTRUCTIONS
SERvICING
24
1. SERvICING REQUIREMENTS
This fire must be serviced at least once a year by a
competent person.
All tests must be serviced by best practice as described by
the current CORGI recommendations.
1.1 Before any tests are undertaken on the fire, conduct a gas
soundness test for the property to ensure that there are no
gas leaks prior to starting work.
1.2 Before any tests are undertaken on the fire it is also
recommended to fully check the operation of the fire.
1.3 Special checks
1.3.1 Clean any lint or fluff from the pilot - pay particular
attention to the aeration hole in the side of the pilot.
1.3.2 Clean away any fluff or lint from under the burner
1.3.3 Check that the spark gap on the pilot is correct.
1.4 Correct any faults found during the initial tests and then
recommission the fire conducting the usual safety
checks.
1.5 Advise the customer of any remedial action taken.
1.6 As part of the annual service, the space behind the firebox
must be inspected for any debris, which may have fallen
down the chimney.
1.7 To remove the fire from the firebox first remove the
decorative frame. There are two screws securing the frame
to the fire. Refer to separate frame instructions.
1.8 Turn off the gas supply at the isolation device located
under the fire.
1.9 Disconnect the gas supply pipe leaving the isolation device
on the supply pipe and not the fire.
1.10 Remove the glass window by removing the four screws in
the retaining bracket, Diagram 1.
1
AR1377
E-STUDIO
LOGIC E-BOX
AR1767
LogIC E-Box
1.11 Remove the loose coals, and place on a dry, clean surface.
1.12 Remove the front coal, flame baffle and all the ceramic
liners. All these items are very fragile so store them
carefully.
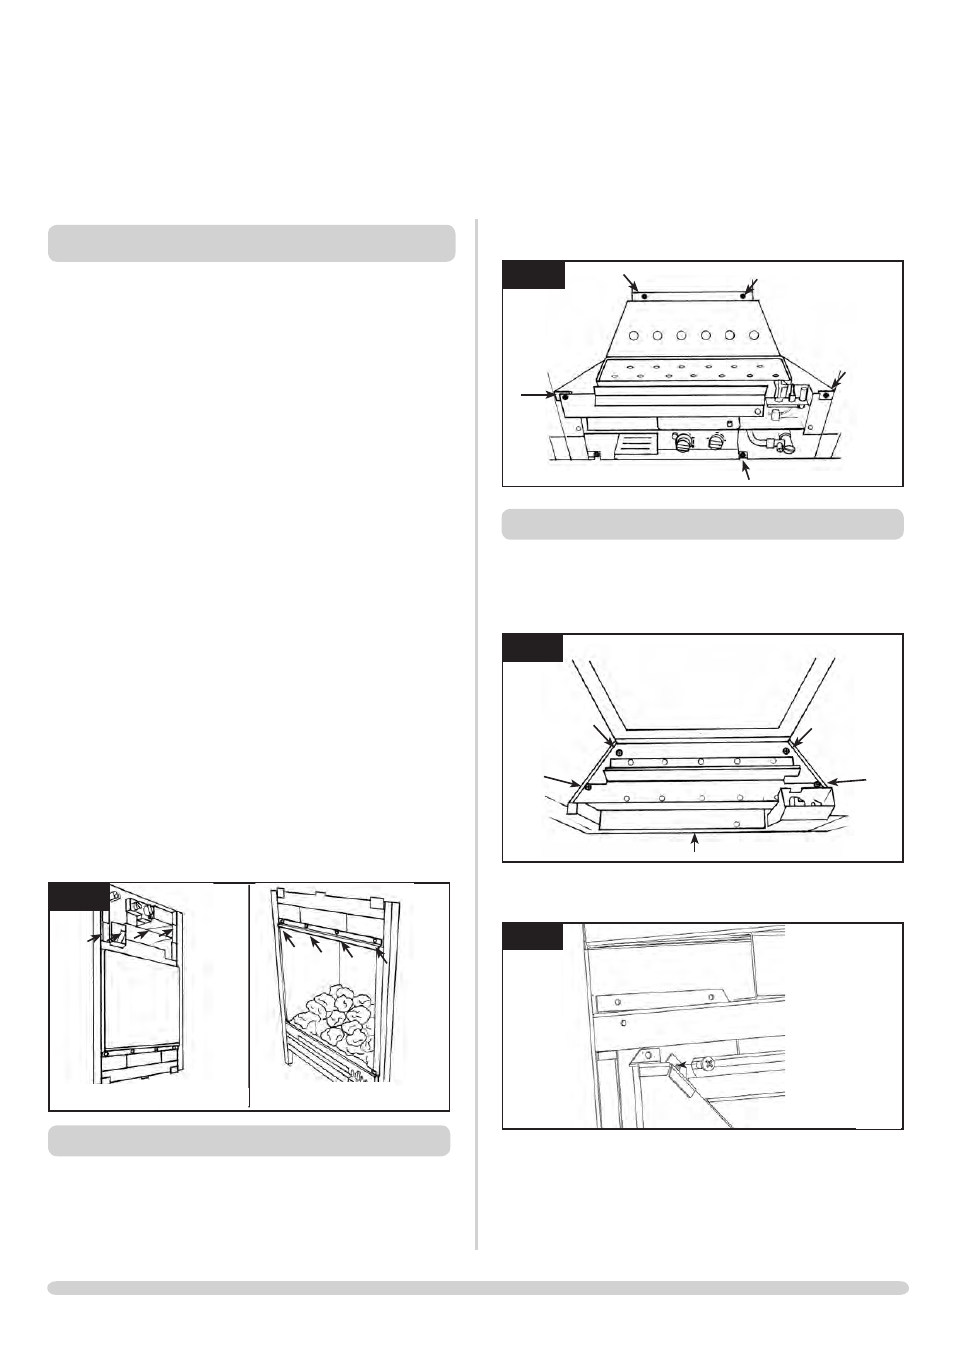
1.13 Remove the five screws securing the burner unit to the fire
and lift clear. See diagram 2
2
Logic E-Box
AR1372
E-STUdIo
1.14 Remove the five screws securing the burner unit. Gently
slide the whole burner assembly forward. Gently empty the
granite chippings onto a dry clean surface. Clean any debris
from the burner skin.
3
AR1775
1.15 Remove the two decorative panel securing clamps,
Diagram 4
4
AR1931