6 5.2.2 radar range setup – Furuno COLOR VIDEO PLOTTER 1933C User Manual
Page 177
5. CUSTOMIZING YOUR UNIT
5-6
5.2.2 Radar
range
setup
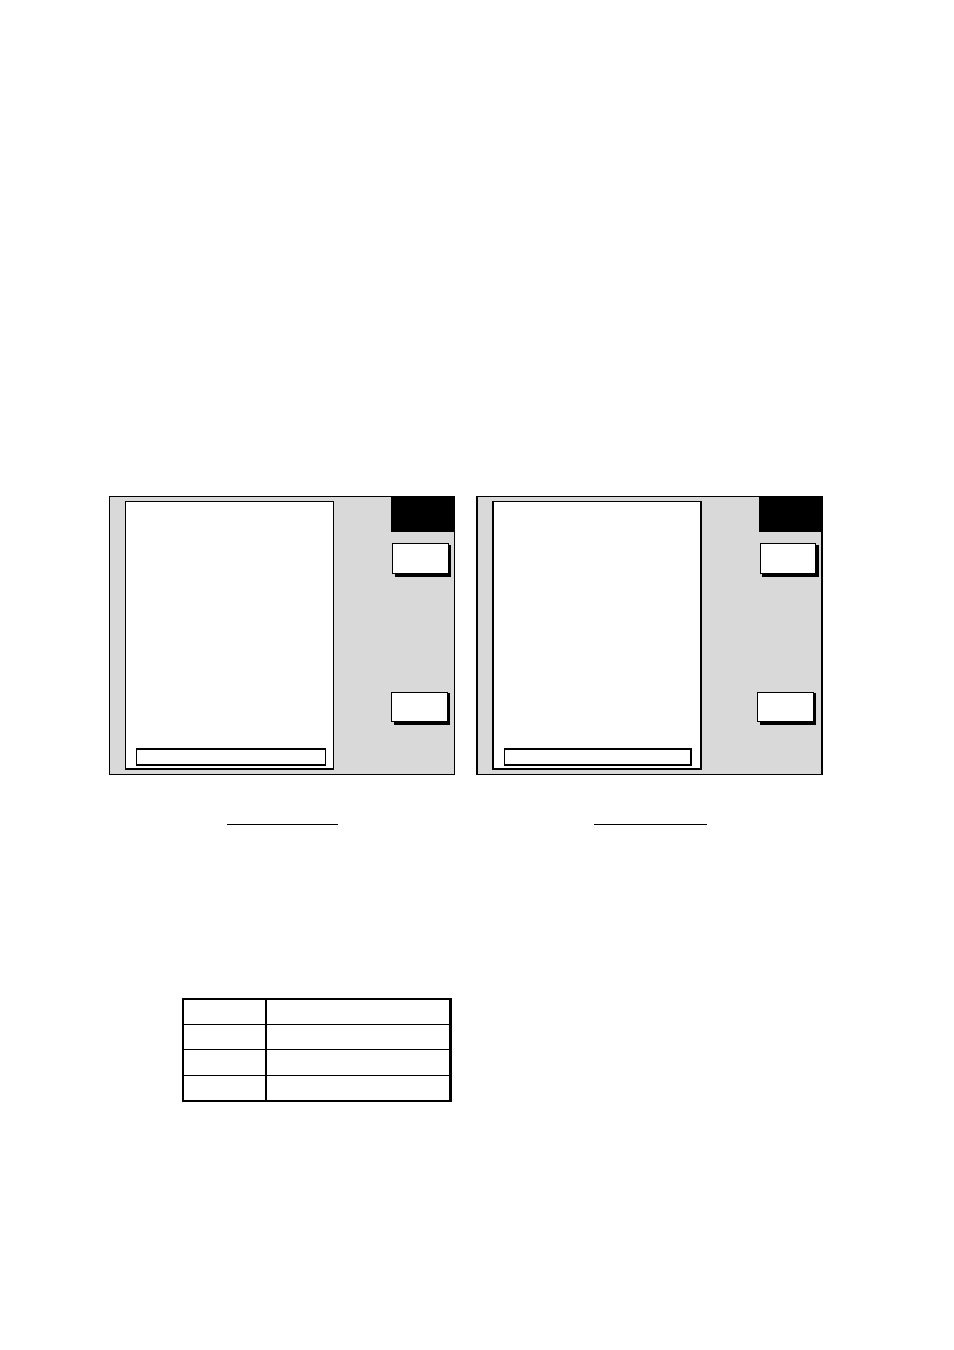
You may choose the radar ranges you wish to use, from the RADAR RANGE
SETUP menu. After choosing the ranges desired, change the range with the
[RANGE] key to activate range settings. Available ranges depends on the radar
used.
At least two ranges (excluding maximum range) must be turned on. When less
than two ranges are turned on you cannot escape from the RADAR RANGE
SETUP menu.
Note that this function is not available with the GD-1900C.
1. Press the [MENU] key to show the main menu.
2. Press the RADAR RANGE SETUP soft key to show the RADAR RANGE
SETUP menu.
RANGE
SETUP
ON/OFF
RETURN
RANGE
SETUP
ON/OFF
RETURN
▲
▲
Range unit: nm
Range unit: km
* = Max. range depends on network radar used and is set on the network radar at installation.
0.125nm
0.25nm
0.5nm
0.75nm
1nm
1.5nm
2nm
3nm
4nm
6nm
8nm
12nm
16nm
24nm
36nm
48nm
64nm
MAXIMUM RANGE XXnm
*
ON
ON
ON
ON
OFF
ON
OFF
ON
OFF
ON
OFF
ON
OFF
ON
OFF
OFF
OFF
0.25km
0.5km
0.75km
1km
1.5km
2km
3km
4km
6km
8km
12km
16km
24km
36km
48km
64km
MAXIMUM RANGE XXkm
*
ON
ON
ON
ON
OFF
ON
OFF
ON
OFF
ON
OFF
ON
OFF
OFF
OFF
OFF
Radar range setup menu
3. Use the trackball to select the range which you want to turn on or off.
4. Press the ON/OFF soft key to turn a range on or off as appropriate.
5. Press the RETURN soft key to register settings.
6. Press the [MENU] key to close the menu.
Model Maximum
Range
1833C
36 nm, km, sm
1933C
48 nm, km, sm
1943C
64 nm, km, sm