Lenovo ThinkServer RD550 User Manual
Page 145
5. Locate the hot-swap hard-disk-drive backplane. See “Server components” on page 25.
6. Remove all the installed hot-swap hard disk drives and dummy trays (if any) from the hard-disk-drive
bays. See “Installing or replacing a hot-swap hard disk drive” on page 119.
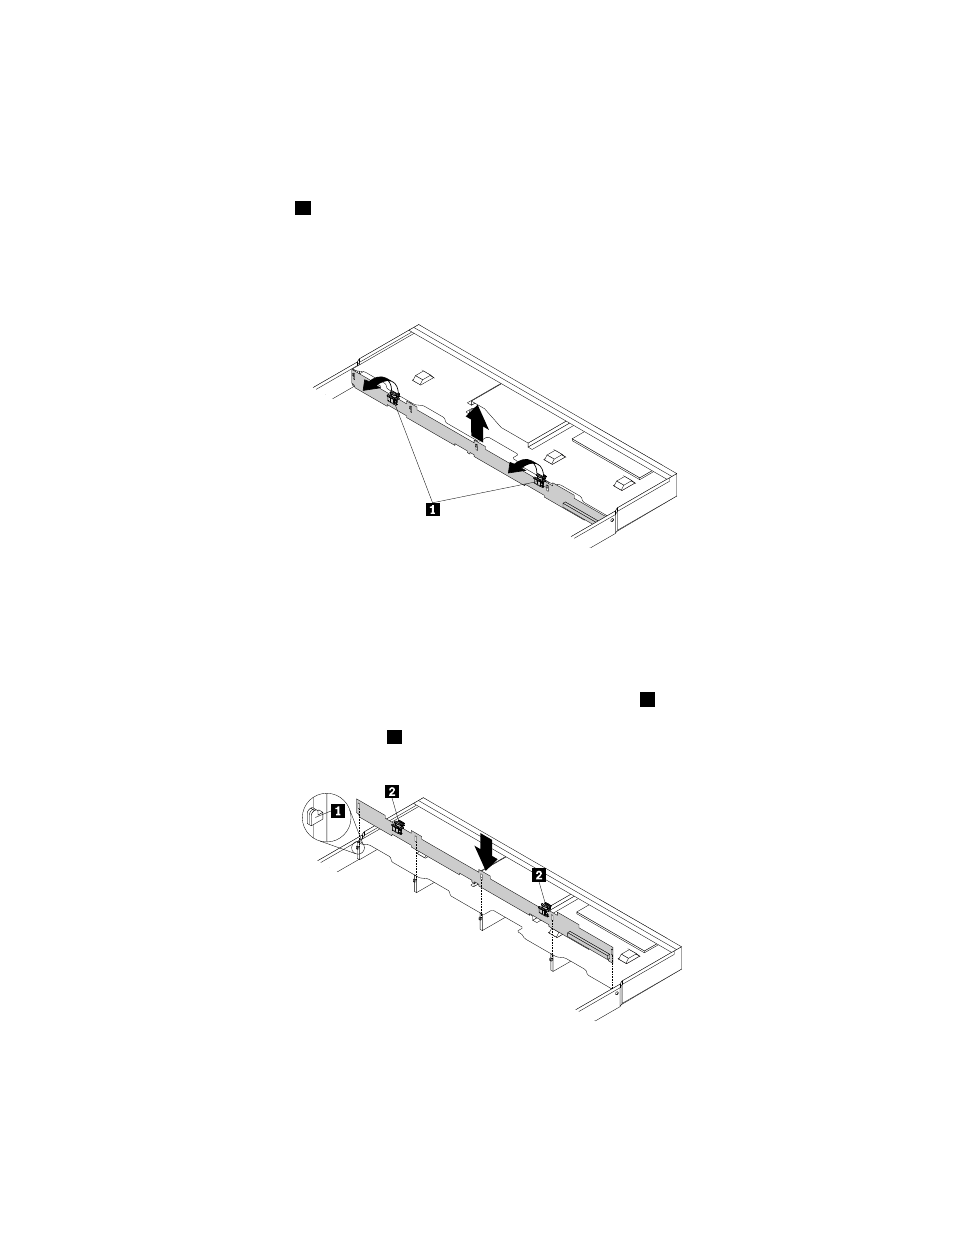
7. Record the cable connections on the backplane and then disconnect all the cables from the backplane.
8. Press the two latches
1
in the direction as shown until the latches are disengaged from the chassis.
Carefully lift the backplane straight up a little bit so that the small hooks on the chassis are aligned with
the corresponding holes in the backplane. Then, move the backplane to the rear of the chassis to
release the backplane from the hooks.
Figure 109. Removing the hot-swap hard-disk-drive backplane
9. Touch the static-protective package that contains the new hot-swap hard-disk-drive backplane to any
unpainted surface on the outside of the server. Then, remove the new backplane from the package.
Note: Carefully handle the backplane by its edges.
10. Note the orientation of the new backplane. Ensure that the small hooks
1
on the chassis pass through
the corresponding holes in the new backplane. Then, carefully press the new backplane straight down
so that it is secured by the latches
2
on the backplane.
Figure 110. Installing the hot-swap hard-disk-drive backplane
11. Reinstall all the hot-swap hard disk drives and dummy trays (if any) on the backplane. See “Installing or
replacing a hot-swap hard disk drive” on page 119.
.
131