Screen setting – Sanyo DSR-3016 User Manual
Page 84
SCREEN SETTING
3
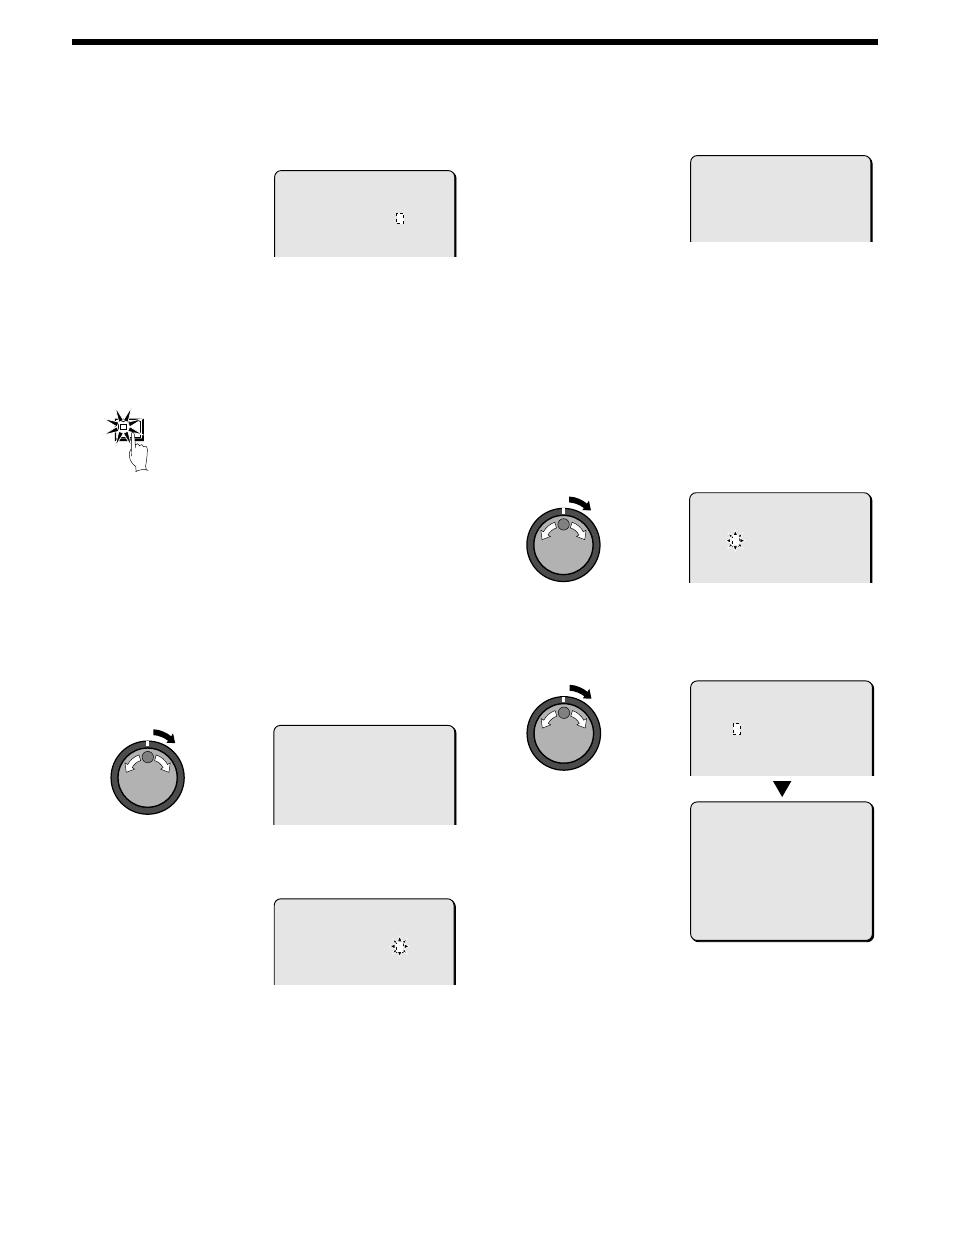
Use the jog dial to set the switching time to “ 05” , and then
turn the shuttle dial clockwise.
Automatic switching display is set to intervals of 5 seconds.
Display examples:
•
1 – 30S: Sets the automatic switching time to the number of
seconds selected.
•
INDIV. : Select when setting individual switching times for each
camera. (See page ??.)
4
Press the EXIT/OSD button.
The display returns to the normal screen.
5
At the normal screen (automatic switching is possible), press
the SEQUENCE button.
The screen will switch at 5-second intervals. To stop the screen
switching, press the SEQUENCE button once more.
Example 2: To set the automatic switching period
for the main monitor.
For the DSR-3009 model, set cameras from 1 to 9.
•
Set cameras 1 to 8 to 2-second automatic switching displays.
•
Set cameras 9 to 16 to 3-second automatic switching displays.
Note: The automatic switching time interval for monitor 2 can be set
in the same way (individual setting conditions for each camera
will be the same as for the main monitor).
1
Use the jog dial to move the cursor to SEQUENCE, and then
turn the shuttle dial clockwise.
“1S” flashes.
2
Use the jog dial to change the SEQUENCE setting to “ INDIV.” ,
and then turn the shuttle dial clockwise.
The cursor moves to SEQUENCE SET.
3
Turn the shuttle dial clockwise.
The SEQUENCE SET MENU sub-menu appears.
4
Turn the jog dial to select MAIN MONITOR, and then turn the
shuttle dial clockwise.
“1S” flashes.
5
Use the jog dial to set “ INDIV.” , and then turn the shuttle dial
clockwise.
6
Use the jog dial to move the cursor to INDIVIDUAL INTERVAL
SET, and then turn the shuttle dial clockwise.
The INDIVIDUAL INTERVAL MENU sub-menu appears.
7
Use the jog dial to move the cursor to CAMERA 1 (01), and
then turn the shuttle dial clockwise.
“1S” flashes.
8
Use the jog dial to set “ 2S” , and then turn the shuttle dial
clockwise.
Repeat the above procedure to set each item from 02 to 08 to
“2S”, and from 09 to 16 to “3S”.
Note: When separate switching time intervals are entered for each
camera, the screens will switch automatically according to the
switching times entered.
1.MULTI SCREEN : NORMAL
MULTI SCREEN SET ->
2.SEQUENCE : 5S
SEQUENCE SET ->
3.MASK : OFF
MASK SET ->
EXIT/OSD
IN IN IN IN
01:OFF 02:OFF 03:OFF 04:OFF
05:OFF 06:OFF 07:OFF 08:OFF
09:OFF 10:OFF 11:OFF 12:OFF
13:OFF 14:OFF 15:OFF 16:OFF
1.MULTI SCREEN : NORMAL
MULTI SCREEN SET ->
2.SEQUENCE : 1S
SEQUENCE SET ->
3.MASK : OFF
MASK SET ->
MAIN MONITOR : 1S
MAIN MONITOR SET ->
MON.2 : 1S
MON.2 SET ->
QUAD : 1S
IN IN IN IN
01:1s 02:OFF 03:OFF 04:OFF
05:OFF 06:OFF 07:OFF 08:OFF
09:OFF 10:OFF 11:OFF 12:OFF
13:OFF 14:OFF 15:OFF 16:OFF
IN IN IN IN
01:2s 02:OFF 03:OFF 04:OFF
05:OFF 06:OFF 07:OFF 08:OFF
09:OFF 10:OFF 11:OFF 12:OFF
13:OFF 14:OFF 15:OFF 16:OFF
IN IN IN IN
01:2s 02:2s 03:2s 04:2s
05:2s 06:2s 07:2s 08:2s
09:3s 10:3s 11:3s 12:3s
13:3s 14:3s 15:3s 16:3s
English
83