General setting – Sanyo DSR-3016 User Manual
Page 77
GENERAL SETTING
RS-485 Selection
Connect the RS-485 control terminals (A and B) of the digital video
recorder in series with other devices such as a controller, multiplexer
or another digital video recorder. (See page 9.)
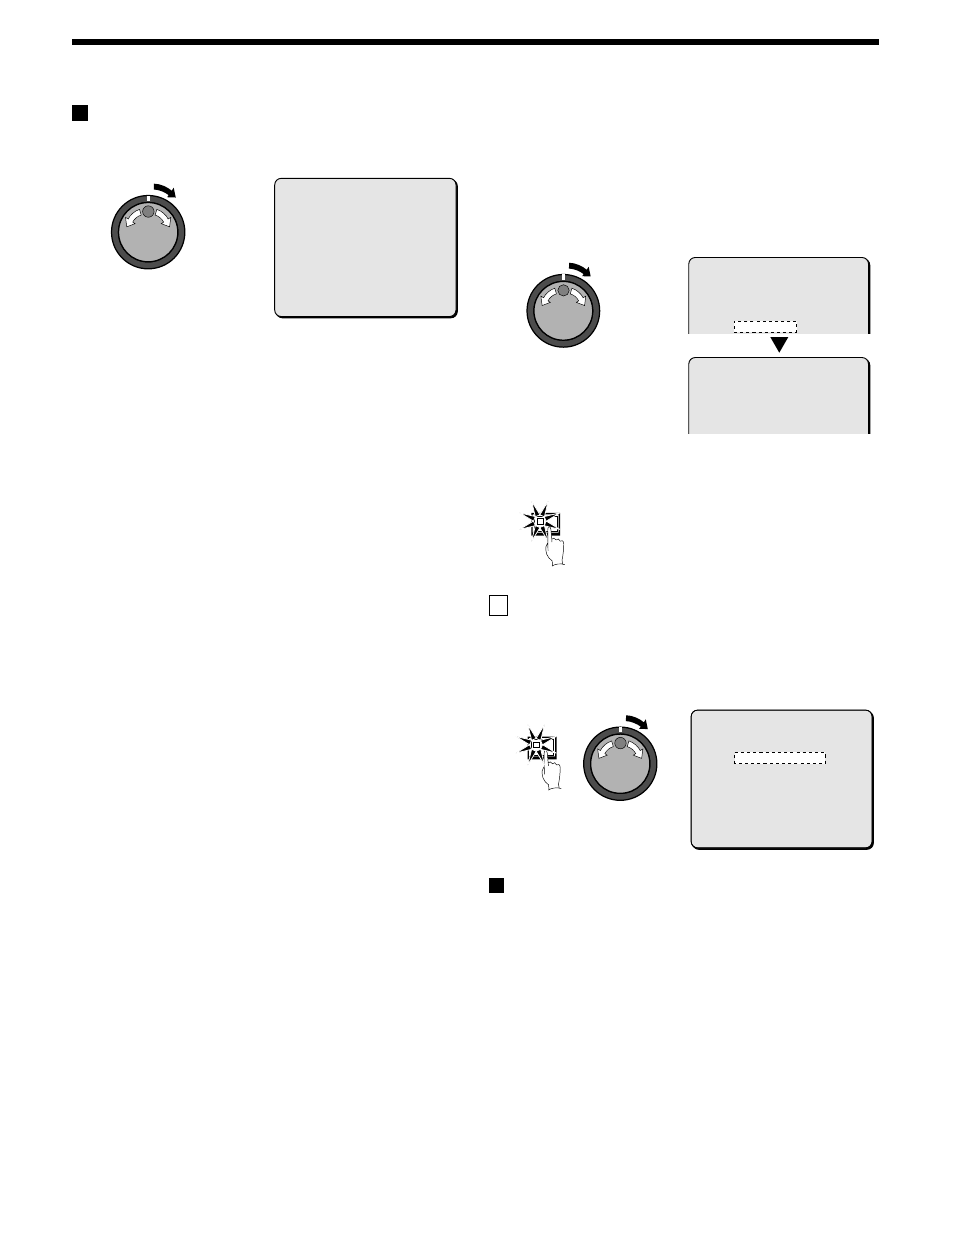
1
Turn the shuttle dial clockwise, use the jog dial to select
RS-485, and then turn the shuttle dial clockwise.
The cursor moves to DATA SPEED.
The STATUS INFO, ALARM INFO and ADDRESS settings can be
changed.
2
Turn the shuttle dial clockwise, use the jog dial to select a
communication speed (example: “ 19200” ), and then turn the
shuttle dial clockwise.
•
Communication speeds: 2400, 4800, 9600 and 19200
The cursor moves to STATUS INFO.
3
Turn the shuttle dial clockwise, use the jog dial to select
status information (example: “ ON” ), and then turn the shuttle
dial clockwise.
•
ON: Status information can be transmitted via the RS-485 line.
The cursor moves to ALARM INFO.
4
Turn the shuttle dial clockwise, use the jog dial to select
alarm information (example: “ ON” ), and then turn the shuttle
dial clockwise.
•
ON: Alarm information can be transmitted via the RS-485 line.
The cursor moves to ADDRESS.
5
Turn the shuttle dial clockwise, use the jog dial to select an
address (example: “ 37” ), and then turn the shuttle dial
clockwise.
This completes the setting and the cursor moves to CONTROL.
Note: The range of valid addresses for this unit is from 0 to 127. If
more than one digital video recorder is connected, be careful
that same addresses are not repeated.
•
Address item: 0 to 127
6
Press the EXIT/OSD button.
The display returns to the normal screen.
E
HDD SET setting
This displays the hard disk capacity for disk 1 (standard) and disk 2
(standard or added).
Note: Before adding (or initializing) a hard disk, it is important to make
a backup of recorded images onto a separate medium such as
a DAT or CD-R disc.
Hard disk initialization
1
Press the MENU button to select GENERAL SET, and then
turn the shuttle dial clockwise.
The GENERAL SET sub-menu appears, and the cursor is
positioned at DISPLAY SET.
2
Use the jog dial to move the cursor to HDD SET, and then turn
the shuttle dial clockwise.
The HDD SET sub-menu appears, and the cursor moves to DISK
INITIALIZE.
CONTROL : RS-485
DATA SPEED : 19200
STATUS INFO : ON
ALARM INFO : ON
ADDRESS : 000
CONTROL : RS-485
DATA SPEED : 19200
STATUS INFO : ON
ALARM INFO : ON
ADDRESS : 037
CONTROL : RS-485
DATA SPEED : 19200
STATUS INFO : ON
ALARM INFO : ON
ADDRESS : 037
EXIT/OSD
MENU
DISK1 : 80GB
DISK2 : ---GB
DISK INITIALIZE ->
CAUTION : ALL RECORDING WILL BE ERASED!
MIRRORING : OFF
PLAYBACK DRIVE : ¤¤¤
CAUTION : RECORDING SPEED WILL BE
LIMITED BY MIRRORING!
76
English