Initial set menu – Sanyo DSR-3016 User Manual
Page 49
INITIAL SET MENU
Example 2: Set the timer operation as follows
☞
To set TIME PERIOD A time zones to automatic
switching screen and monitor mask.
☞
To set TIMER PERIOD B timer zones for the
motion sensor.
1
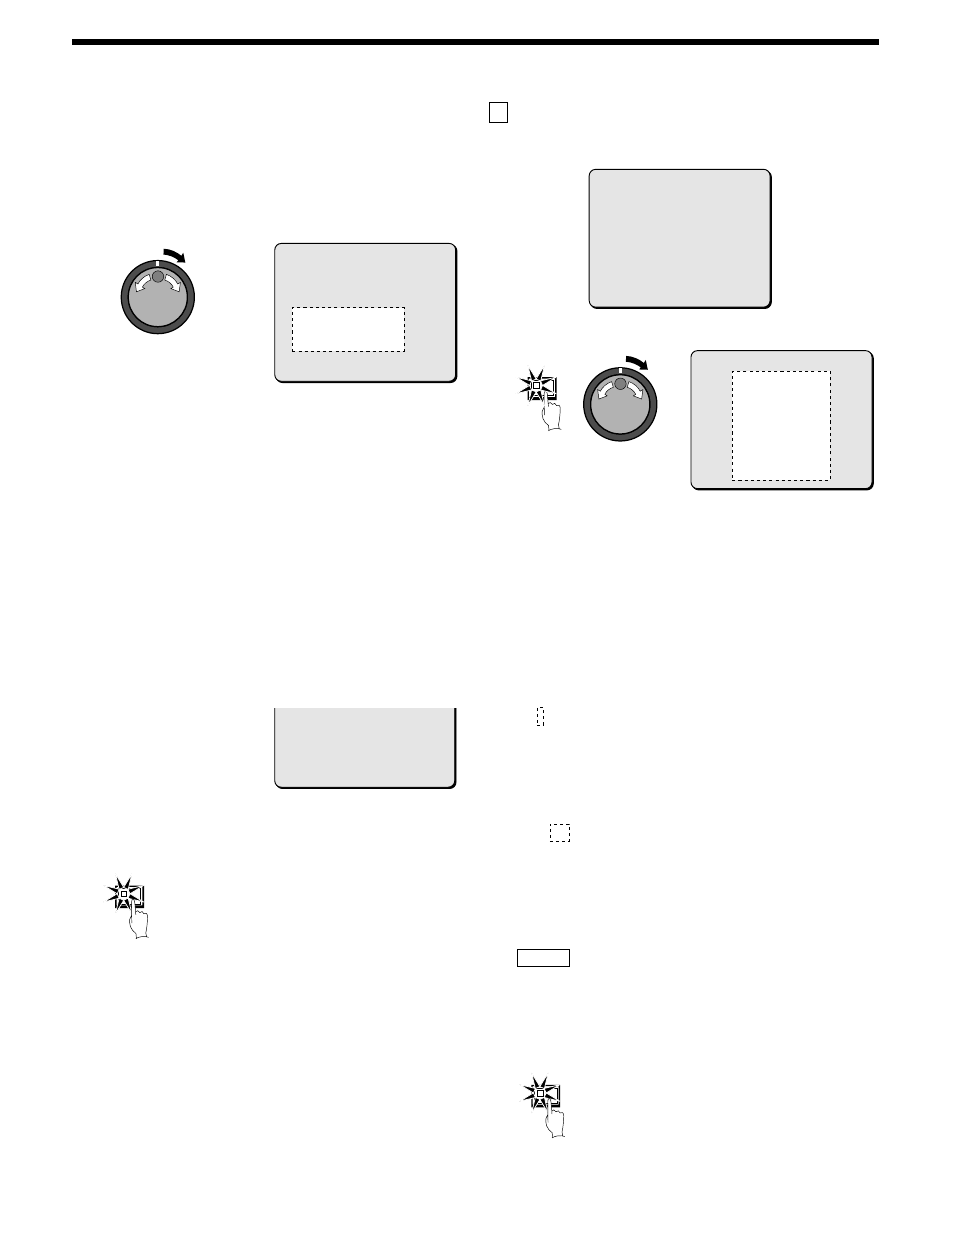
Turn the jog dial to move the cursor to the SEQUENCE setting
in the SELECT WEEK OF TIME PERIOD menu, and then turn
the shuttle dial clockwise.
The cursor moves to TIME PERIOD A.
2
Turn the jog dial to change the setting to “ TIME PERIOD A”
(TIME PERIOD A setting), and then turn the shuttle dial
clockwise.
The cursor moves to MASK.
3
Turn the shuttle dial clockwise to move the cursor to “ TIME
PERIOD A” , use the jog dial to change the MASK setting to
“ TIME PERIOD A” (TIME PERIOD A setting), and then turn the
shuttle dial clockwise.
The cursor moves to MOTION.
4
Turn the shuttle dial clockwise to move the cursor to “ TIME
PERIOD A” , and then use the jog dial to change the MOTION
setting to “ TIME PERIOD B” (TIME PERIOD B setting).
5
Press the EXIT/OSD button.
This completes the timer setting. The display returns to the normal
screen.
C
HOLIDAY SET setting
Note: For a timer setting make sure that you make the time settings
for Sunday (SUN) before changing SET to “ON”. (See page ??.)
Example: To set 17 November as a holiday
1
Press the MENU button to select INITIAL SET, and then turn
the shuttle dial clockwise.
The INITIAL SET sub-menu appears, and the cursor is positioned
at LANGUAGE/CLOCK SET.
2
Use the jog dial to move the cursor to HOLIDAY SET, and then
turn the shuttle dial clockwise.
The HOLIDAY SET sub-menu appears.
3
Turn the shuttle dial clockwise.
“– – ” (month) flashes in the line 1.
4
Use the jog dial to change from “– –” to “ 11” , and then turn
the shuttle dial clockwise.
“– – ” (day) flashes in the line 1.
5
Use the jog dial to change from “– –” to “ 17” , and then turn
the shuttle dial clockwise.
The cursor moves to the line 2.
6
Follow the same procedure to set other holiday dates.
7
Press the EXIT/OSD button.
The display returns to the normal screen.
SELECT WEEK OF TIME PERIOD
SEQUENCE TIME PERIOD A
MASK TIME PERIOD A
MOTION TIME PERIOD A
SELECT WEEK OF TIME PERIOD
SEQUENCE TIME PERIOD A
MASK TIME PERIOD A
MOTION TIME PERIOD B
EXIT/OSD
WEEK START STOP PROGRAM FPS SET
SUN 08:00 18:00 OFF 10FPS OFF
MON 08:00 18:00 OFF 10FPS ON
THE 08:00 18:00 OFF 10FPS ON
WED 08:00 18:00 OFF 10FPS ON
THU 08:00 18:00 OFF 10FPS ON
FRI 08:00 18:00 OFF 10FPS OFF
SAT --:-- --:-- -- 10FPS OFF
DLY --:-- --:-- -- 10FPS OFF
MENU
1. ----- 11. -----
2. ----- 12. -----
3. ----- 13. -----
4. ----- 14. -----
5. ----- 15. -----
6. ----- 16. -----
7. ----- 17. -----
8. ----- 18. -----
9. ----- 19. -----
10. ----- 20. -----
1. -----
1. 11---
1. 11-17
2. -----
EXIT/OSD
48
English