Advanced menu set 8, Camera control settings – Sanyo DSR-5716P User Manual
Page 151
150
English
ADVANCED MENU SET
8
INTRODUCTION
SE
TTINGS
NE
T
W
O
R
K
CO
NT
RO
L
NETW
ORK
O
P
E
RATION
NE
T
W
ORK
S
E
TTINGS
OTHE
R
OPE
RATION
Settings are required when a remotely controllable camera(s)
is connected with the digital video recorder.
With connection made by following the procedure below, you
can control a camera(s) in the full screen mode.
Connections necessary for remote operation:
z
Connect coaxial control cameras to the VIDEO terminal.
z
Connect the Sanyo RS-485 control camera to the RS-485
(RJ-11) terminal.
z
Connect another maker’s RS485/422 control camera to the
2ND RS485/422 terminal.
z
If “ADDRESS” in the
set to between “001” and “008”, camera control settings
can be performed. Camera control settings are not
available if “ADDRESS” is set to “000” or between “009”
and “127”.
z
Before configuring trigger actions, be sure to configure
the settings under “ALARM REC MODE SET” and
“PROTOCOL/ADDRESS SET”.
1
Press the [MENU] button.
The MENU indicator lights up and the
displayed.
2
Turn the jog dial to select
“8.ADVANCED MENU SET” and then
turn the shuttle dial clockwise.
The
3
Turn the jog dial to select “3.CAMERA
CONTROL SET” and then turn the
shuttle dial clockwise.
The
4
Turn the jog dial to select
“1.PROTOCOL/ADDRESS SET” and
then turn the shuttle dial clockwise.
The
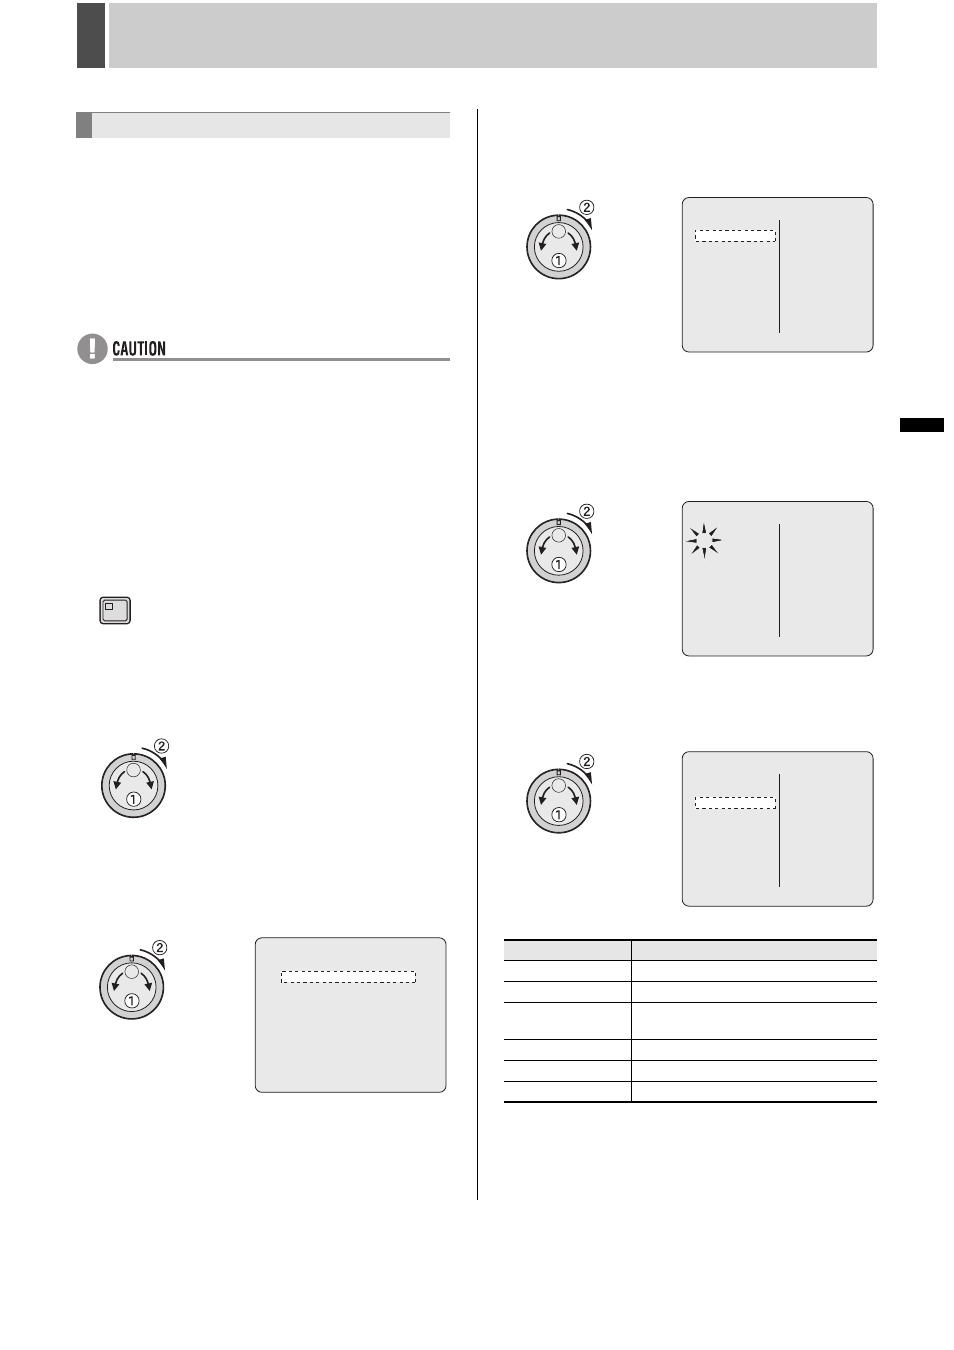
5
Turn the jog dial to select the camera
number corresponding to a connected
dome camera and then turn the shuttle
dial clockwise.
“OFF” flashes for “PROTOCOL”.
On the DSR-5709P, cameras No. 01-09 are displayed.
6
Turn the jog dial to select a protocol and
then turn the shuttle dial clockwise.
The cursor moves to the next camera number.
[Settings] ( indicates default setting)
Camera control settings
MENU
1. PROTOCOL/ADDRESS SET ->
2. ALARM REC TRIGGER SET ->
Setting
Description
OFF
No protocol
SANYO RS485
SANYO RS485
BBV COAX
BBV COAX
(Also supports AUX commands.)
PELCO COAX
PELCO COAX
2ND RS-485/422
2ND RS-485/422
COAX (H-SSP)
COAX (H-SSP)
CH PROTOCOL ADD. CH PROTOCOL ADD.
01 OFF --- 09 OFF ---
02 OFF --- 10 OFF ---
03 OFF --- 11 OFF ---
04 OFF --- 12 OFF ---
05 OFF --- 13 OFF ---
06 OFF --- 14 OFF ---
07 OFF --- 15 OFF ---
08 OFF --- 16 OFF ---
2ND RS-485/422 PROTOCOL : OFF 9600bps
CH PROTOCOL ADD. CH PROTOCOL ADD.
01 OFF --- 09 OFF ---
02 OFF --- 10 OFF ---
03 OFF --- 11 OFF ---
04 OFF --- 12 OFF ---
05 OFF --- 13 OFF ---
06 OFF --- 14 OFF ---
07 OFF --- 15 OFF ---
08 OFF --- 16 OFF ---
2ND RS-485/422 PROTOCOL : OFF 9600bps
CH PROTOCOL ADD. CH PROTOCOL ADD.
01 SANYO RS-485 001 09 OFF ---
02 OFF --- 10 OFF ---
03 OFF --- 11 OFF ---
04 OFF --- 12 OFF ---
05 OFF --- 13 OFF ---
06 OFF --- 14 OFF ---
07 OFF --- 15 OFF ---
08 OFF --- 16 OFF ---
2ND RS-485/422 PROTOCOL : OFF 9600bps