Sanyo DSR-5716P User Manual
Page 119
118
English
GENERAL SET
3
INTRODUCTION
SE
TTINGS
NE
T
W
O
R
K
CO
NT
RO
L
NETW
ORK
O
P
E
RATION
NE
T
W
ORK
S
E
TTINGS
OTHE
R
OPE
RATION
5
Turn the shuttle dial clockwise.
The first user ID entry bar “|” flashes.
6
Enter a user ID.
Use the jog dial, shuttle dial or [CAMERA SELECT] buttons to
enter up to eight alphanumeric characters. Refer to “Setting
camera titles” (JP.70) for more details regarding how to enter
characters.
7
Turn the shuttle dial clockwise.
The first password entry bar “4” flashes.
8
Enter a password.
Use the jog dial, shuttle dial or [CAMERA SELECT] buttons to
enter between four and eight alphanumeric characters. Refer
to “Setting camera titles” (JP.70) for more details regarding
how to enter characters.
9
Turn the shuttle dial clockwise.
The password is confirmed.
z
The “LV” setting registered on line 1 cannot be changed
from “4” (the user ID and password can be changed). To
change the level, register a separate user on a different
line. After the password is confirmed for line 2 or any line
thereafter, the cursor moves to the “LV” setting. Set the
user level.
z
The same “USER ID” cannot be registered more than
once.
10
Use the same procedure to register
other users.
11
Press the [EXIT/OSD] button.
The setting is completed and the display returns to the normal
screen.
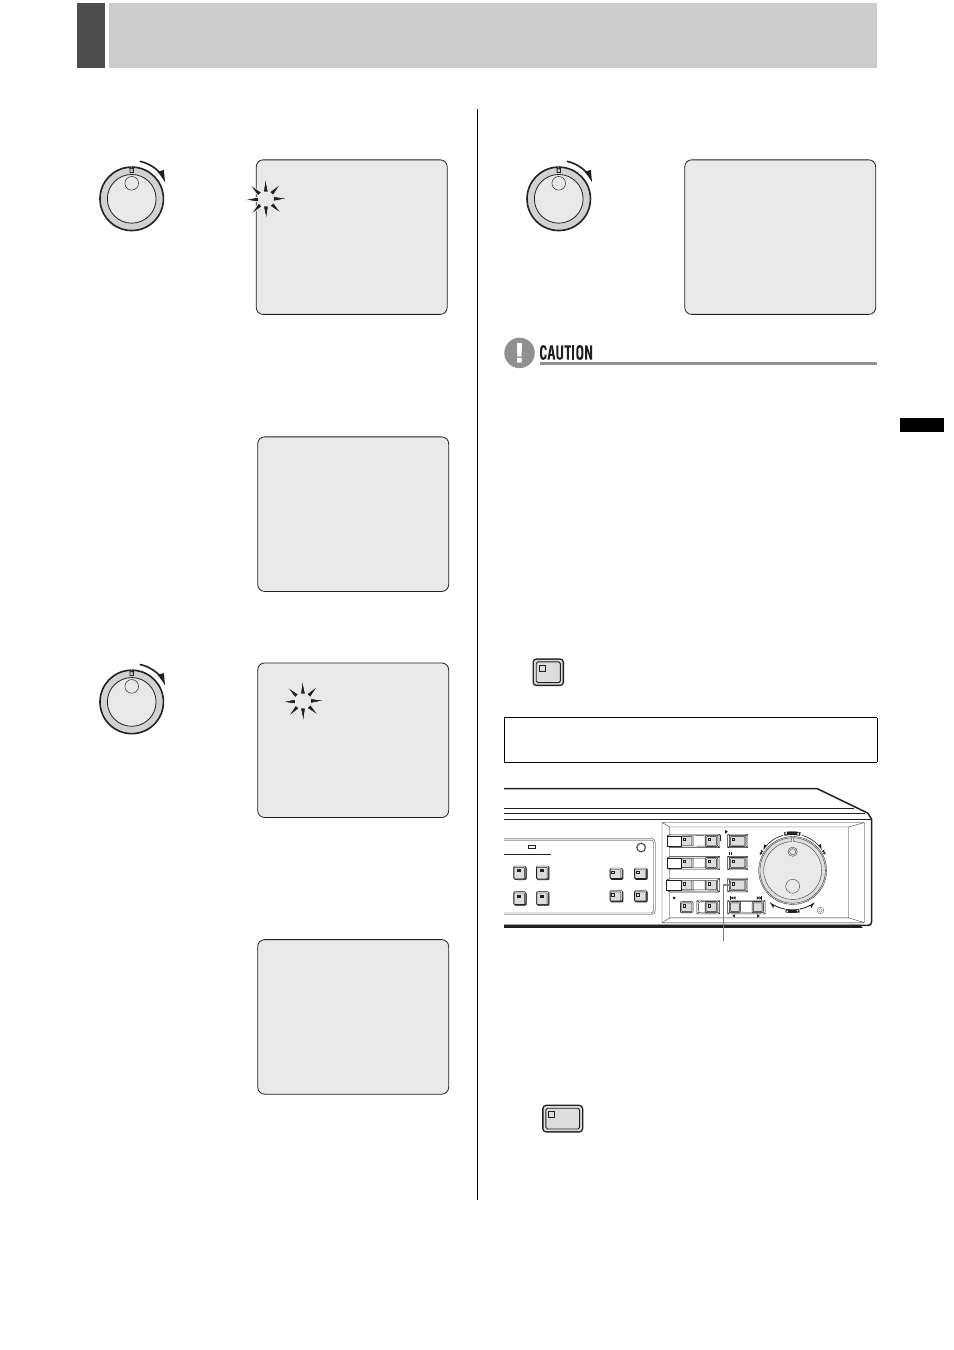
1
With the normal monitoring screen
displayed, press the [SHUTTLE HOLD]
button for approximately 3 seconds.
The LOCK indicator on the front panel lights up and a buzzer
sounds to indicate setting of key lock, password lock, or
network lock.
USER ID PASSWORD LV | USER ID PASSWORD LV
ID4----- 4444---- 4 | -------- -------- -
ID3----- 3333---- 3 | -------- -------- -
ID2----- 2222---- 2 | -------- -------- -
ID1----- 1111---- 1 | -------- -------- -
-------- -------- - | -------- -------- -
-------- -------- - | -------- -------- -
-------- -------- - | -------- -------- -
-------- -------- - | -------- -------- -
LV1:LIVE, LV2:PLAY, LV3:REC, LV4:MENU SET
Turning on the key lock, password lock and
network lock
USER ID PASSWORD LV | USER ID PASSWORD LV
ID4----- 4444---- 4 | -------- -------- -
ID3----- 3333---- 3 | -------- -------- -
ID2----- 2222---- 2 | -------- -------- -
ID1----- 1111---- 1 | -------- -------- -
-------- -------- - | -------- -------- -
-------- -------- - | -------- -------- -
-------- -------- - | -------- -------- -
-------- -------- - | -------- -------- -
LV1:LIVE, LV2:PLAY, LV3:REC, LV4:MENU SET
EXIT/OSD
[SHUTTLE HOLD] button
SHUTTLE HOLD