Minor adjustments, Air adjustment, Broil and bottom burner air adjustment – Hotpoint RGB747GER User Manual
Page 31: Shutters
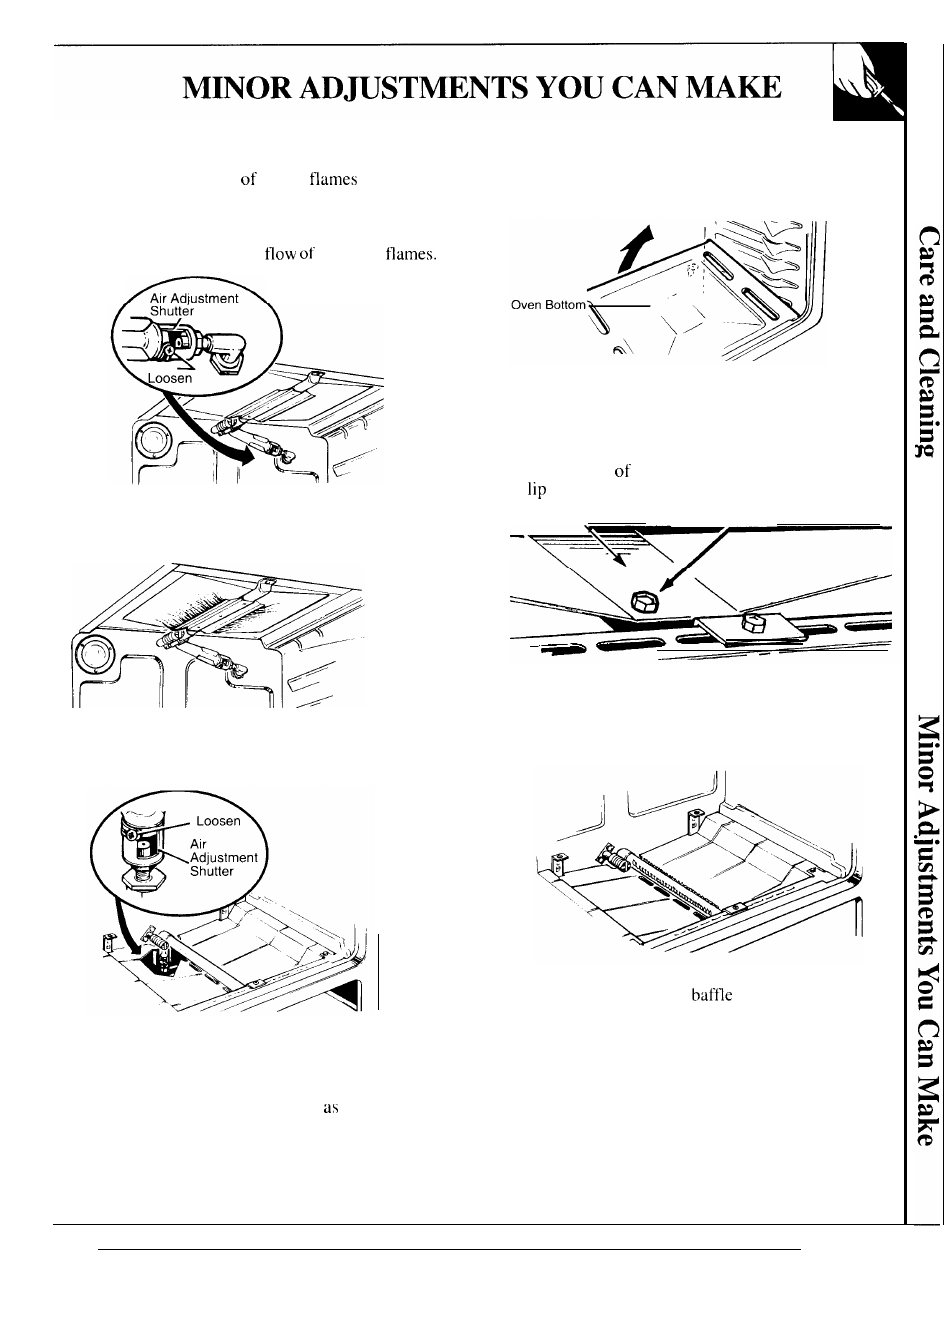
Broil and Bottom Burner Air Adjustment
The combustion quality
burner
needs to be
determined visually. See the Installation Instructions
and the Problem Solver sections in this book. Air
adjustment shutters for the top (broil) and bottom
(oven) burners regulate the
air to the
The air adjustment shutter for the top (broil) burner
is in the center of the rear wall of the oven.
(See Installation Instructions in this book.)
The flames for the top (broil) burner should burn
steady with approximately 1“ blue cones and should
not extend out over the edges of the burner baffle.
Shutters
To determine if the bottom burner flames are proper,
remove the oven bottom and the burner baffle.
To remove the oven bottom:
1. Remove the knurled screws holding down rear of
oven bottom.
2. Grasp the oven bottom at finger slots on each side.
3. Lift the rear the oven bottom enough to clear the
of the range frame, then pull out.
Burner Baffle
—–Remove Screw
To remove the burner baffle, use a nut driver
to remove the 1/4” hex head screw shown in the
illustration above. Do not remove any other screws.
Pull baffle straight out until it is free from the slot
that holds it at rear of’ oven.
The flames should have 1/2” to 3/4” blue cone with no
yellow tipping. When the
is back in place, the
flames will resettle.
The shutter for the bottom (oven) burner is near the
back wall behind the storage drawer, or kick panel.
To adjust the flow of air to either burner,
loosen the
Phillips head screw and rotate the shutter to allow
more or less air into the burner tube needed.
31