Belt maintenance, Replacing the blade drive belt, Cutter deck maintenance – Hayter Mowers RT380H User Manual
Page 35: Servicing the blades
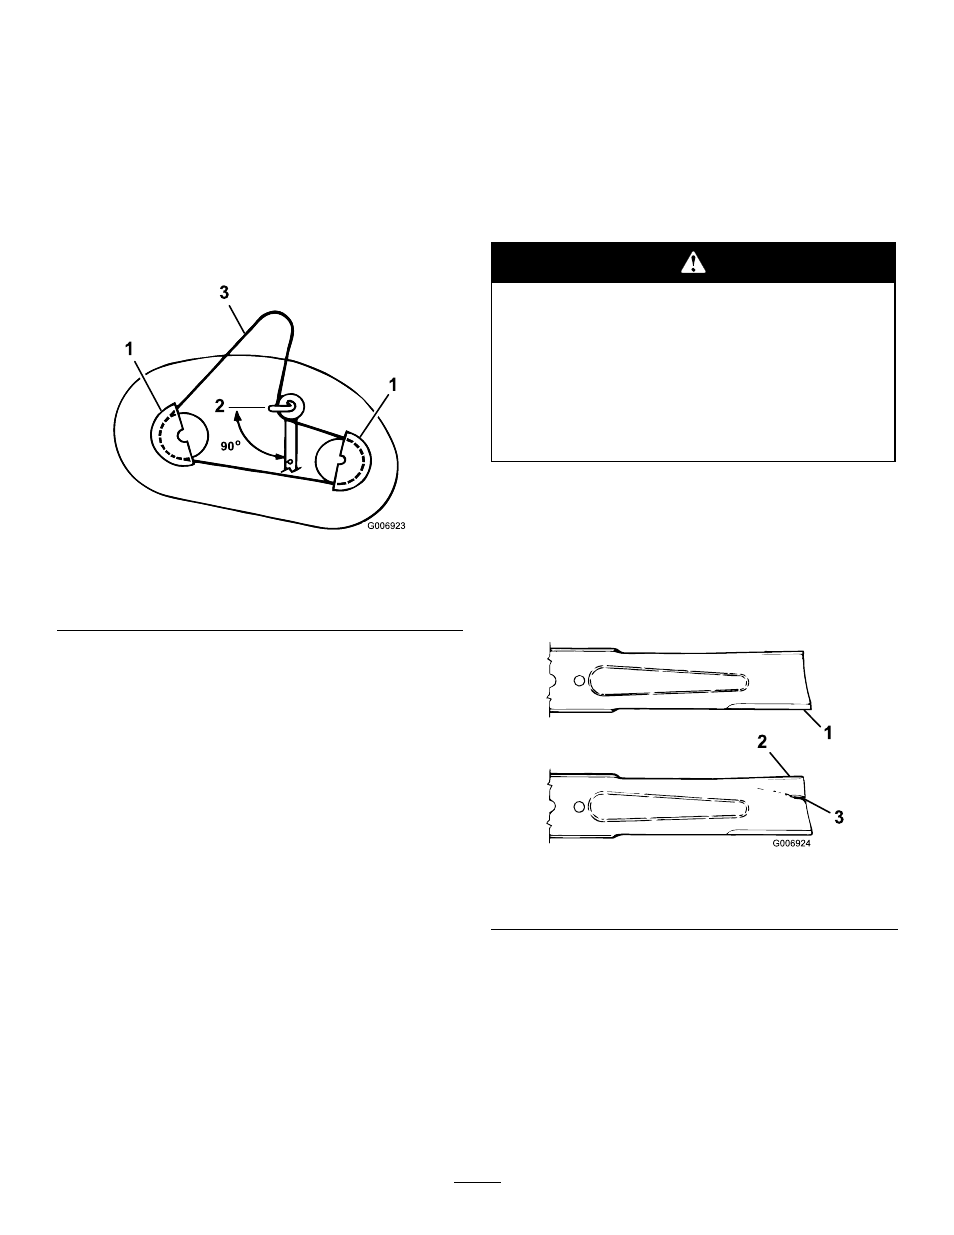
Belt Maintenance
Replacing the Blade Drive Belt
Removing the Blade Drive Belt
1. Remove the cutter deck; refer to Removing the
Cutter Deck.
2. Remove the pulley cover mounting screws and pulley
covers from both blade pulleys (Figure 44).
Figure 44
1.
Pulley cover
3.
cutter deck belt
2.
Idler pulley belt guide
position
3. Loosen, but do not remove, the bolt and nut that
secures the idler pulley and the belt guide (Figure 44).
4. Remove the blade drive belt from the pulleys.
Installing the Blade Drive Belt
1. Install the new blade drive belt around the blade
pulleys and under the belt guide on the idler pulley.
2. Position the idler pulley belt guide so that it points
toward the left, 90° to the idler arm (Figure 44).
3. Tighten the mounting bolt and the locknut that
secure the idler pulley and the belt guide.
4. Install the left and right pulley covers with the
mounting screws (Figure 44).
5. Install the cutter deck; refer to Installing the Cutter
Deck.
Cutter Deck Maintenance
Servicing the Blades
Service Interval: Before each use or daily
To ensure a superior quality of cut, keep the blades
sharp. For convenient sharpening and replacement,
keep extra blades.
A worn or damaged blade can break and a piece
of the blade could be thrown into the operator’s
or bystander’s area, resulting in serious personal
injury or death.
•
Inspect the blade periodically for wear or
damage.
•
Replace a worn or damaged blade.
Inspecting the Blades
1. Remove the cutter deck; refer to Removing the
Cutter Deck.
2. Inspect the cutting edges (Figure 45). If the edges
are not sharp or have nicks, remove the blades and
sharpen them; refer to Sharpening the Blades.
Figure 45
1.
Cutting edge
3.
Wear/slot forming
2.
Curved area
3. Inspect the blades, especially the curved area
(Figure 45). If you notice any damage, wear, or a slot
forming in this area (Figure 45), immediately install a
new blade.
Removing the Blades
1. Remove the cutter deck; refer to Removing the
Cutter Deck.
2. Carefully tip the cutter deck over.
35