Drive system maintenance, Figure 39, Checking the tyre pressure – Hayter Mowers RT380H User Manual
Page 32: Servicing the transaxle fluid, Installing the bulb, Checking the fluid level
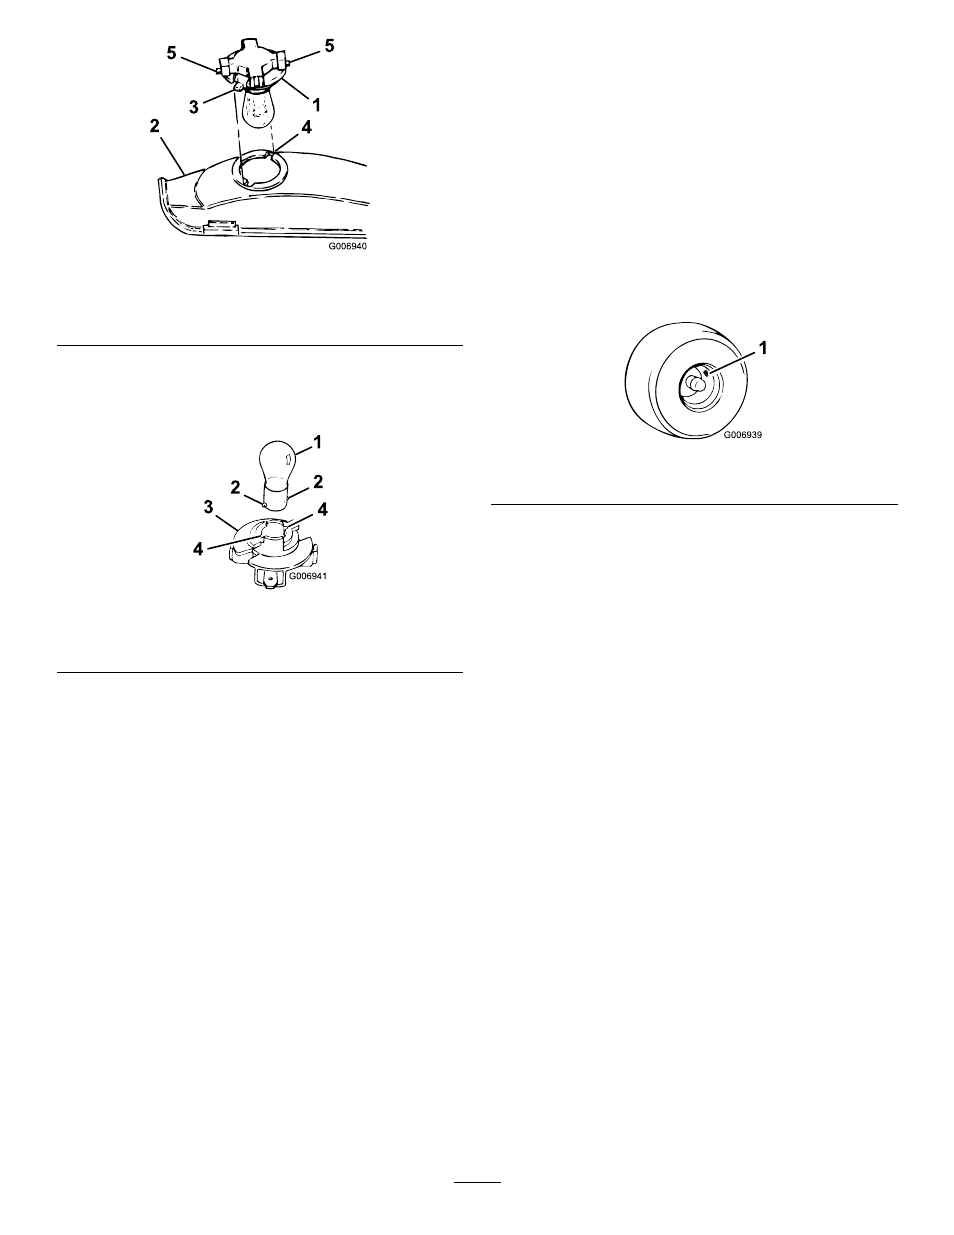
Figure 39
1.
Bulb holder
4.
Slots
2.
Reflector
5.
Terminals
3.
Tabs
4. Insert and rotate the bulb counterclockwise until it
stops (approx. 1/4 turn), and remove the bulb from
the bulb holder (Figure 40).
Figure 40
1.
Bulb
3.
Bulb holder
2.
Metal pins
4.
Slots
Installing the Bulb
1. Align the metal pins on the side of the bulb base
with the slots in the bulb holder.
2. Insert the base into the holder (Figure 40).
3. Push and rotate the bulb clockwise until it stops.
4. Align the tabs on the bulb holder (Figure 39) with
the slots in the reflector, insert the bulb holder into
the reflector, and rotate it 1/4 turn clockwise until
it stops.
5. Connect the wire connectors to the terminals on the
bulb holder.
Drive System
Maintenance
Checking the Tyre Pressure
Service Interval: Every 25 hours
Maintain the air pressure in the front and rear tyres at
20 psi (138 kPa). Check the pressure at the valve stem
(Figure 41) after every 25 operating hours or yearly,
whichever occurs first. Check the tyres when they are
cold to get the most accurate pressure reading.
Figure 41
1.
Valve stem
Servicing the Transaxle Fluid
Service Interval: Every 100 hours—Service the
transaxle fluid.
Always keep the fluid level at the full level when the
transaxle is cold.
Note: The transaxle is factory sealed and does not
require oil changes.
Fluid Type: SAE 20W-50 engine oil (API service
SH/CD is recommended)
Checking the Fluid Level
1. Park the tractor on a level surface.
2. Disengage the blade control (PTO) and set the
parking brake.
3. Stop the engine, remove the key, and wait for all
moving parts to stop before leaving the operating
position.
4. Clean around the fill plug (Figure 42) so that dirt
cannot fall into the reservoir if you need to add fluid.
32