4 installing the seat 5 activating the battery, Figure 5, Installing the seat – Hayter Mowers RT380H User Manual
Page 12: Activating the battery
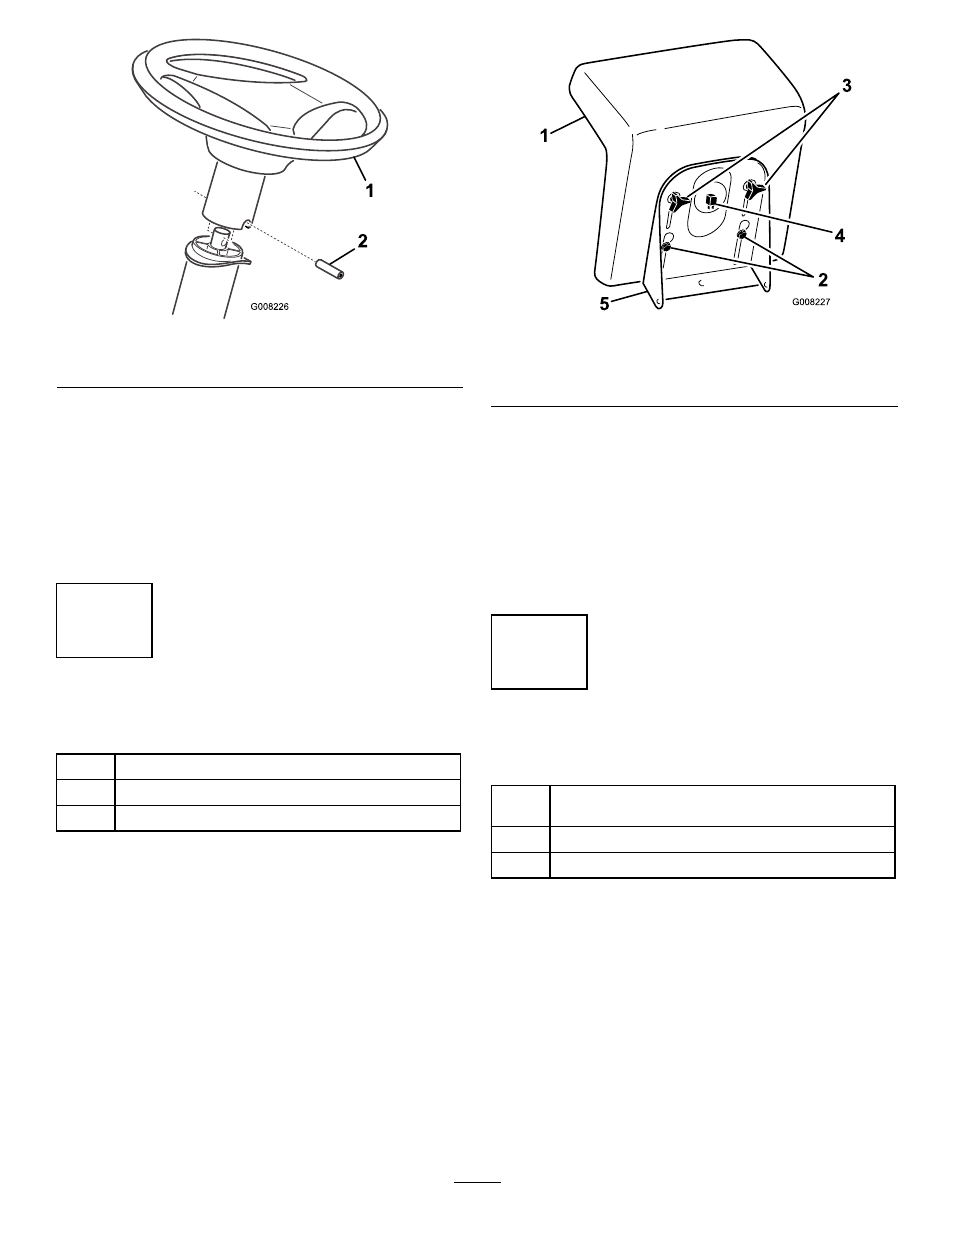
Figure 5
1.
Steering wheel
2.
Spirol pin
3. Align the holes by inserting a punch or a long nail
partially through the holes in the steering wheel and
shaft.
4. Insert the spirol pin into the hole on the opposite
side (Figure 5).
5. Using a hammer, drive the spirol pin in until it is flush
with the outside of the steering wheel (Figure 5).
4
Installing the Seat
Parts needed for this procedure:
1
Seat
2
Knobs
2
Flat-washer
Procedure
1. Position the seat onto the seat base by inserting 2
shoulder bolts through the key hole openings at the
end of both slots (Figure 6).
Figure 6
1.
Seat
4.
Seat switch
2.
Shoulder bolts
5.
Seat base
3.
Knobs and flat washers
2. Thread the knobs and flat washers through the slots
and into the rear center holes in the seat (Figure 6).
3. Adjust the seat and tighten the knobs.
4. Connect the seat switch to the wire harness
connector (Figure 6).
Note: Ensure that the wiring is not pinched in the
seat brackets.
5
Activating the Battery
Parts needed for this procedure:
As
needed
Bulk electrolyte, 1.260 specific gravity (purchase
separately)
2
Bolt (1/4 x 3/4 inch)
2
Wing nut
Procedure
Purchase bulk electrolyte with 1.260 specific gravity
from a local battery supply outlet.
Important: Never fill the battery with electrolyte
while the battery is installed in the tractor.
Electrolyte could be spilled on other parts and
corrode them.
1. Remove the battery and battery box from the tractor;
refer to Removing the Battery in Maintenance.
12