Locating and lining up the azimuth bearing – Hughes DIRECWAY AN4-074-DF User Manual
Page 60
Chapter 5 • Pointing the antenna
44
1035567-0001 Revision A
Checking the azimuth,
elevation, and
polarization settings
1. Check to see if the elevation reference and polarization
settings are still at their previously set values (the values
calculated by the installation software). If they are not, see
Installing the Az/El cap onto the antenna on page 15 and
follow the instructions to align the antenna to the correct
values.
2. If you have not already done so, tighten the clamp nuts all the
way; then loosen them just enough to move the antenna
reflector from side to side to adjust the azimuth.
The clamp bolts should be as snug as possible, while still
allowing the antenna reflector to be moved from side to side.
See Figure 39.
3. Use a compass to determine the azimuth bearing specified by
the installation software as follows:
a. Rotate the antenna reflector in azimuth (sideways) until the
reflector is pointed at the magnetic bearing. Use a pencil to
mark the location on the mast, and label this mark 1.
b. Mark the location on the Az/El cap above mark 1. This is
the azimuth alignment mark. (See Figure 40.)
c. Make another mark on the mast 3/4-in. to the right of mark
1 and label it 2. Make another mark on the mast
3/4-in. to the left of mark 1 and label it 3.
4. Stand behind the antenna and point the front of the reflector
to the left of the estimated bearing to the satellite so the
azimuth alignment mark lines up with mark 2.
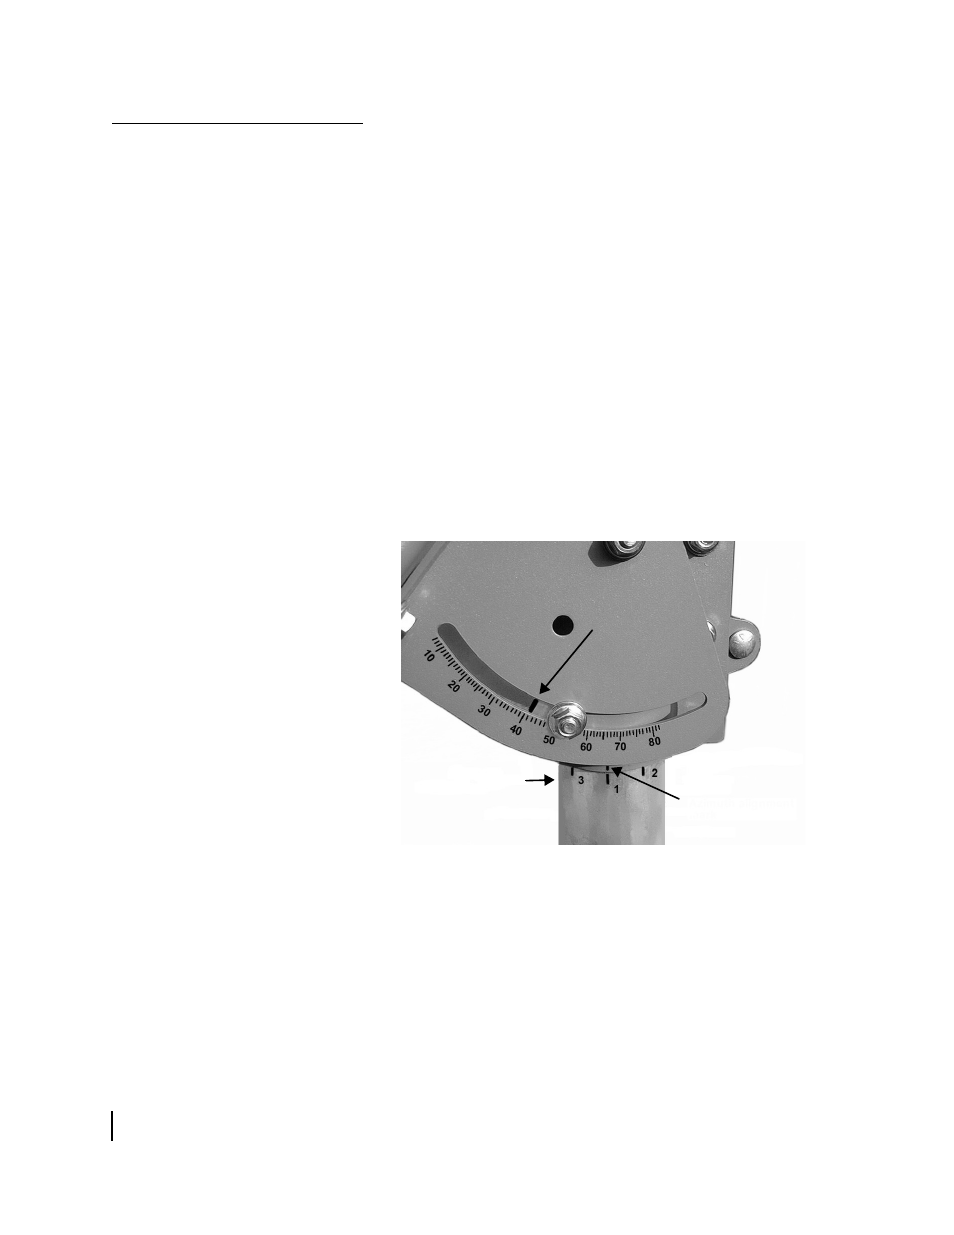
Figure 40: Locating and lining up the azimuth bearing
Elevation
reference
edge
Azimuth
alignment mark
Marks 1, 2, and 3