Ink cartridge setup for the r1900 – Epson STYLUS R1900 User Manual
Page 10
Sawgrass Technologies, Inc. ~ www.sawgrassink.com
4
Ink Cartridge Setup for the R1900
1.
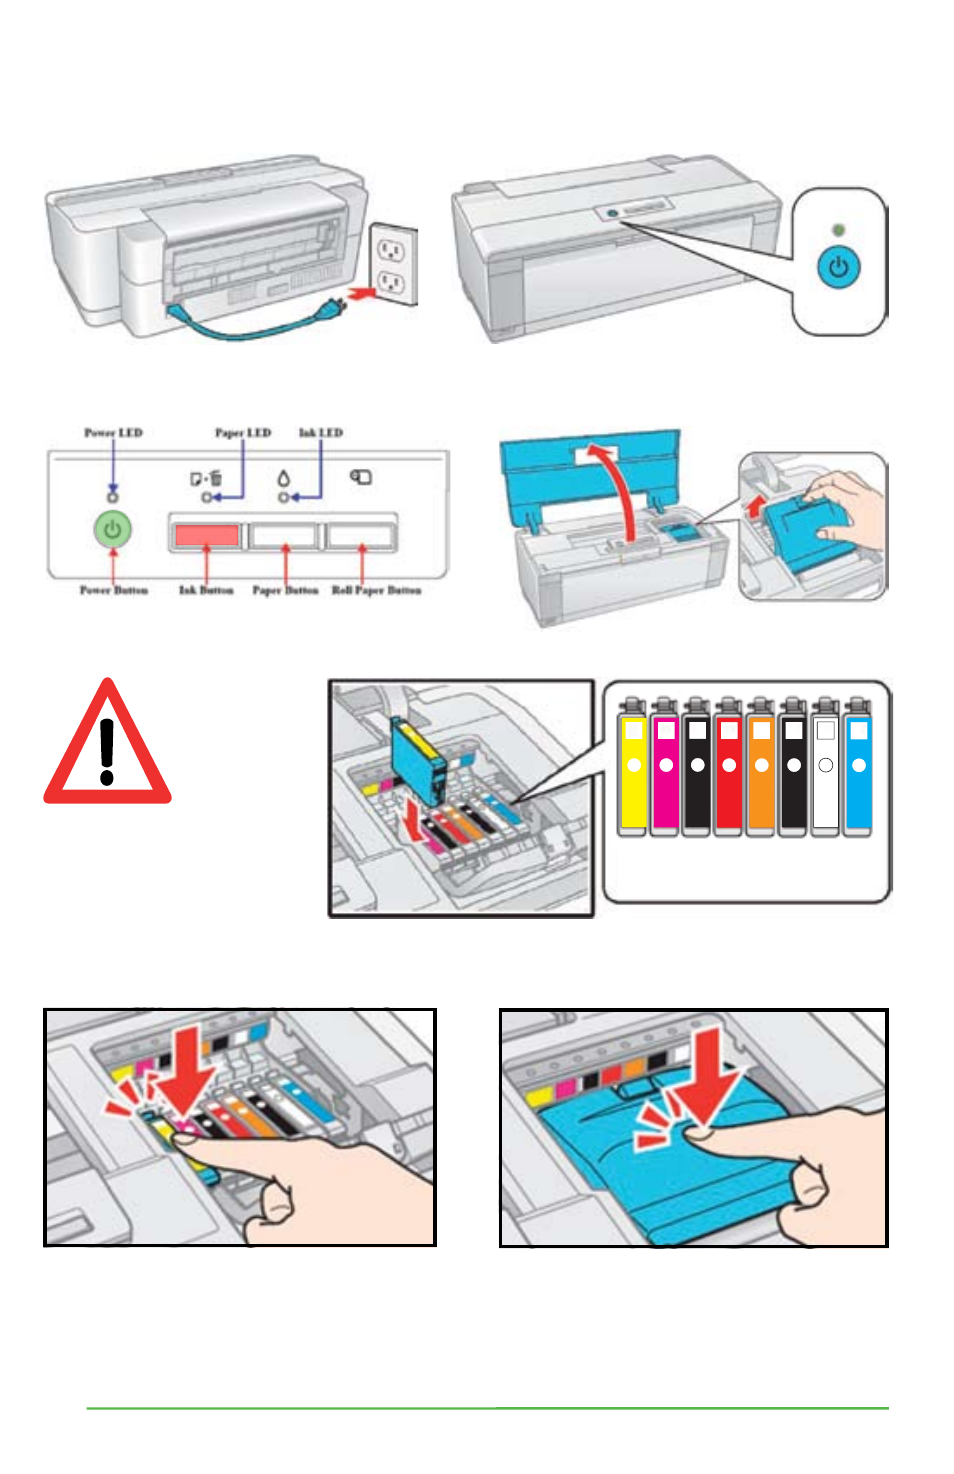
Plug the Power Cable into the Printer and the appropriate power outlet.
Turn
Printer On, lift lid, and press Cartridge Replacement Button.
3.
Insert the SubliJet IQ
®
cartridges in the indicated order.
4.
Press each cartridge body until it engages securely. Once all cartridges are in
place, close the cartridge bay lid and press to engage.
5.
Press the Ink Button. (Please see Control Panel Graphic above.) This will move
the Print Head into it’s “Parked” position, completing the Ink Cartridge
Installation for the R1900 Printer.
2.
The cartridge bay will shift into the “Remove” position. Lift the bay lid and remove
any installed cartridges.
Control Panel Graphic
Next on the agenda is the loading of the software, PowerDriverR1900XG
8®
, for the
Epson Stylus
®
Photo R1900 Inkjet Printer.
Do not shake or
agitate ink carts
before or after
installation.
CAUTION:
INSTALLATION ORDER
Y M M R O P G C
K K O