Panel descriptions, Inst] button, Display – Roland TM-2 - Trigger Module User Manual
Page 5: Buttons, Shift] button, Volume] knob, Trig in [1] [2] buttons, Sd card slot, Power) button
5
ENG
JPN
DEU
FRA
ITA
ESL
POR
NLD
Panel Descriptions
* The explanations in this manual include illustrations that depict what should typically be shown by the display. Note, however, that your
unit may incorporate a newer, enhanced version of the system (e.g., includes newer sounds), so what you actually see in the display may
not always match what appears in the manual.
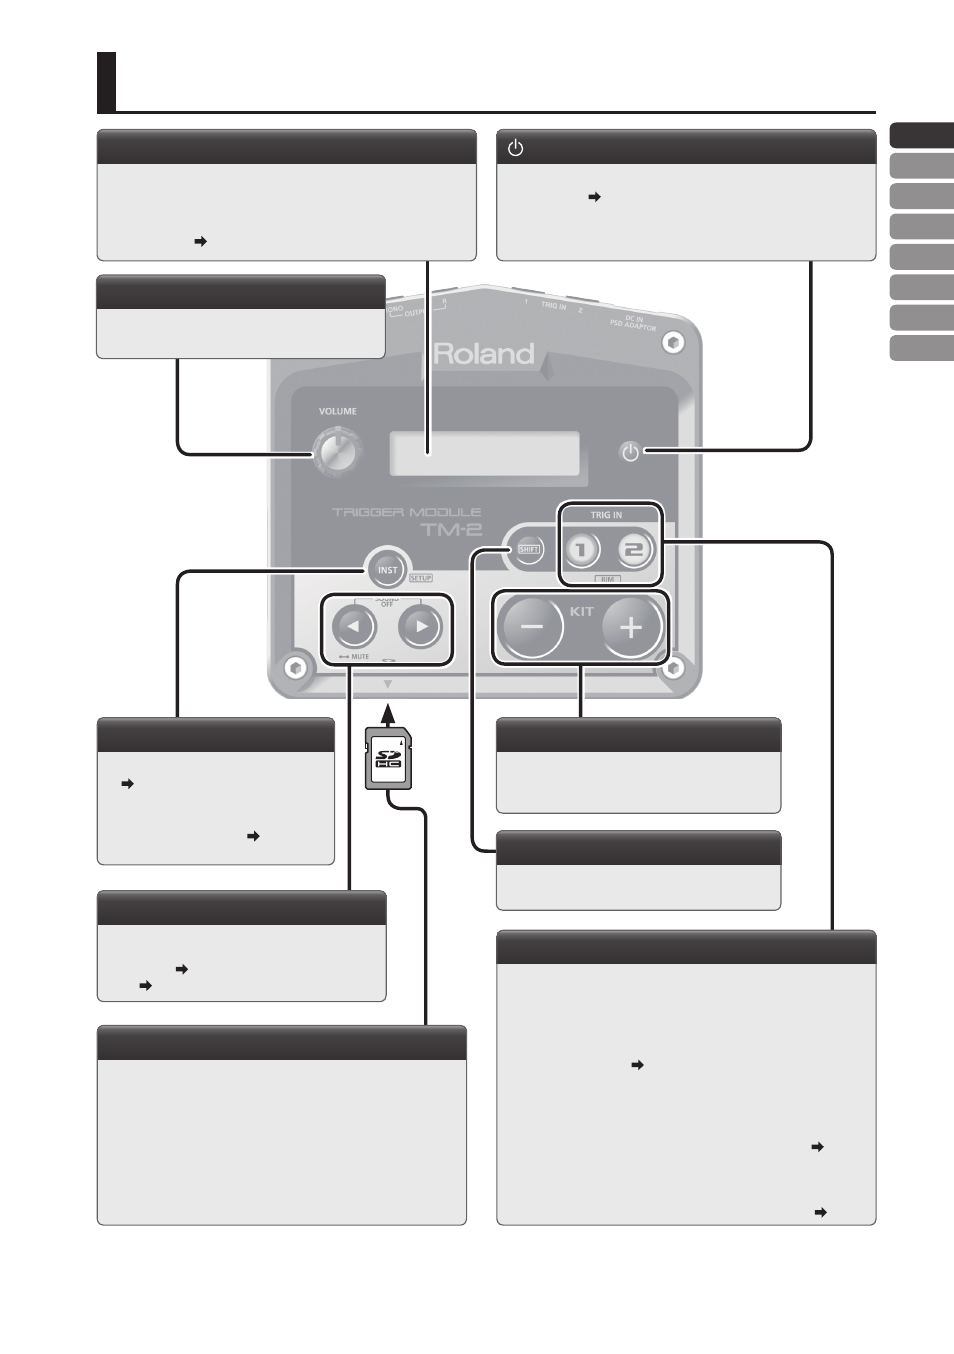
[INST] button
• Displays the instrument edit screen.
• If you hold down the [SHIFT] button
and press the [INST] button, the
setup screen appears. p. 14
Display
When you turn on the power, the display shows the kit number
and name. If you press the [INST] button, the display shows
parameters and values.
Display settings p. 14
[-] [+] buttons
Use these buttons to switch kits.
In screens such as the edit screen, use these
buttons to edit parameter values.
[SHIFT] button
You can access a variety of functions by using
this in conjunction with other buttons.
[VOLUME] knob
Adjusts the volume of the OUTPUT jacks and
PHONES jack.
TRIG IN [1] [2] buttons
• When you strike a pad, the corresponding TRIG IN [1] [2]
button lights.
• When editing an instrument, use the TRIG IN [1] [2] buttons to
select the pad whose settings you want to change. To select
the rim, hold down the [SHIFT] button and press a TRIG IN
button. (Head, Rim p. 8)
Preview
When you press a TRIG IN button, the instrument will sound,
allowing you to audition the tone. You can also change a setting
so that sound is not heard when you press the button. p. 14
Trigger lock on/off
If you long-press the TRIG IN [1] or [2] button, the target for
editing will not change even when you strike the pads. p. 14
[<] [>] buttons
Use these buttons to switch parameters or pages.
SOUND OFF
MUTE
SD card slot
You can insert an SD card into this slot.
Push the SD card once again to eject.
* Never insert or remove an SD card while this unit is turned
on. Doing so may corrupt the data on the SD card.
* Carefully insert the SD card all the way in—until it is firmly in
place.
[ ] (Power) button
Turns the power on/off. Hold down the button until the power
turns on or off. p. 6