Auto, R+timer, R-timer – Amprobe Multitest-1000 Continuity-Tester User Manual
Page 15: Warning
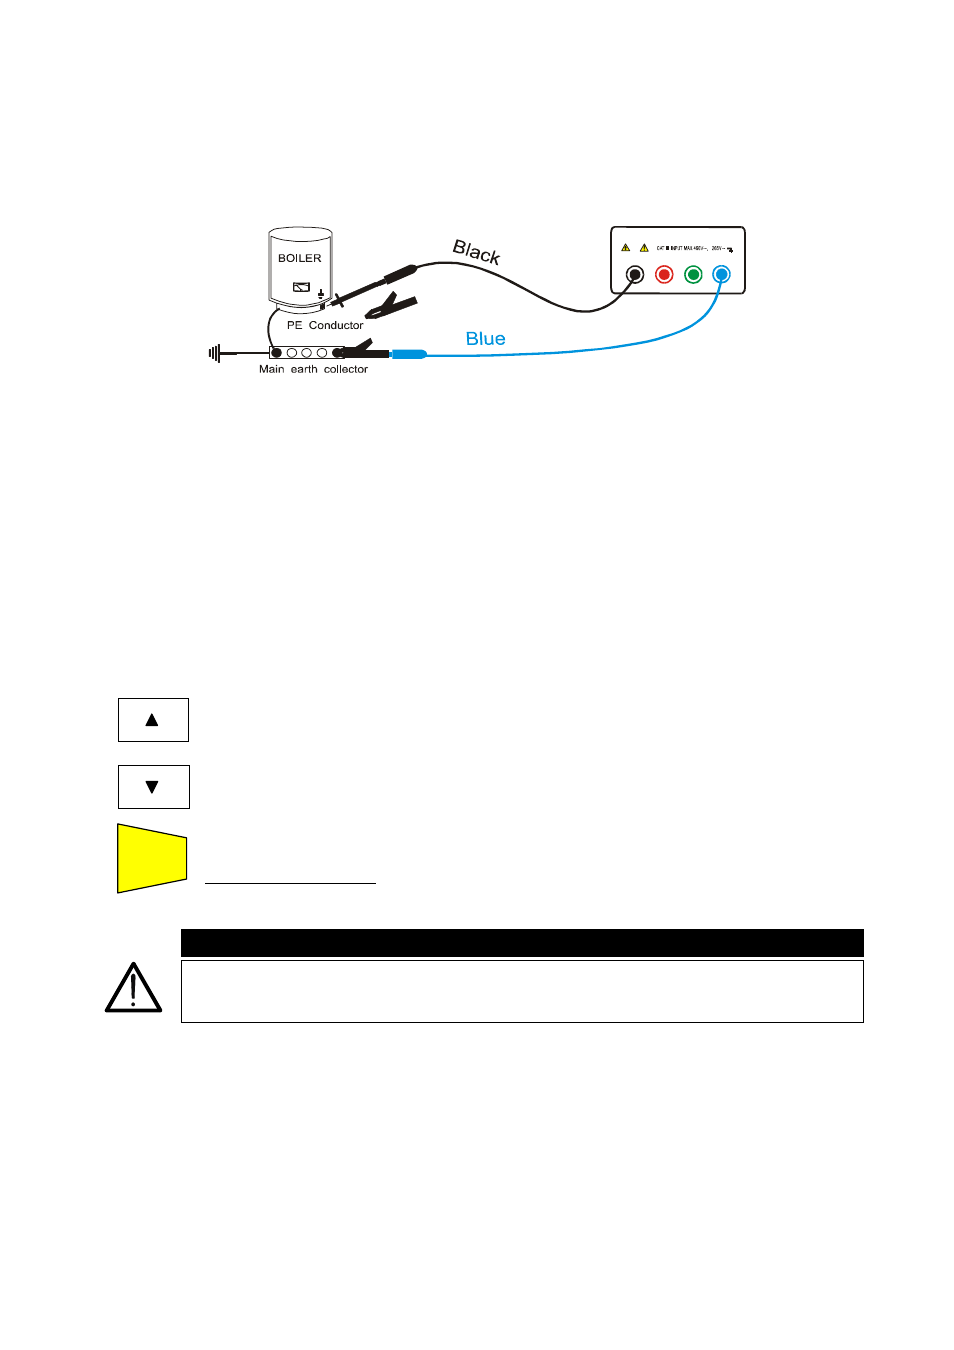
4.1.2. Procedure for measuring continuity of equalizing potential conductors mode
"AUTO", "R+TIMER", "R-TIMER"
1. Select the desired mode using the FUNC key.
2. Connect the black and blue cables to the instrument input terminals T1 and T4
respectively.
B2
B3
B4
B1
Connection of the instrument terminals during LOW
Ω test.
3. If the cables supplied with the instrument are not long enough for the measurement you can
extend the black cable.
4. Connect two alligator clips to the cable terminals.
5. Short-circuit the measuring cable ends making sure that the conductive parts of the alligator
clips make a good contact to each other. Press the START/STOP key. If the instrument
displays a resistance value other than 0.00 repeat the instrument calibration (see
paragraph 4.1.1).
6. Connect the instrument terminals to the ends of the conductor on which the continuity test is
to be performed (see previous picture).
7. If the mode "R+TIMER" or "R-TIMER" was selected use the following keys to select
the duration time of the test:
Press this key to increase the duration time of the test (Tmax=15 seconds).
Press this key to decrease the duration time of the test (Tmin=1 second).
8. Press
the
START/STOP key. The instrument takes the measurement.
START
STOP
In R+/R- Timer mode press START/STOP key again if the test is to be stopped.
WARNING
Never disconnect the test leads while the word “Measuring” is being
displayed.