Adjusting the image shape – Epson 6100i User Manual
Page 36
36
Projecting
Adjusting the Image Shape
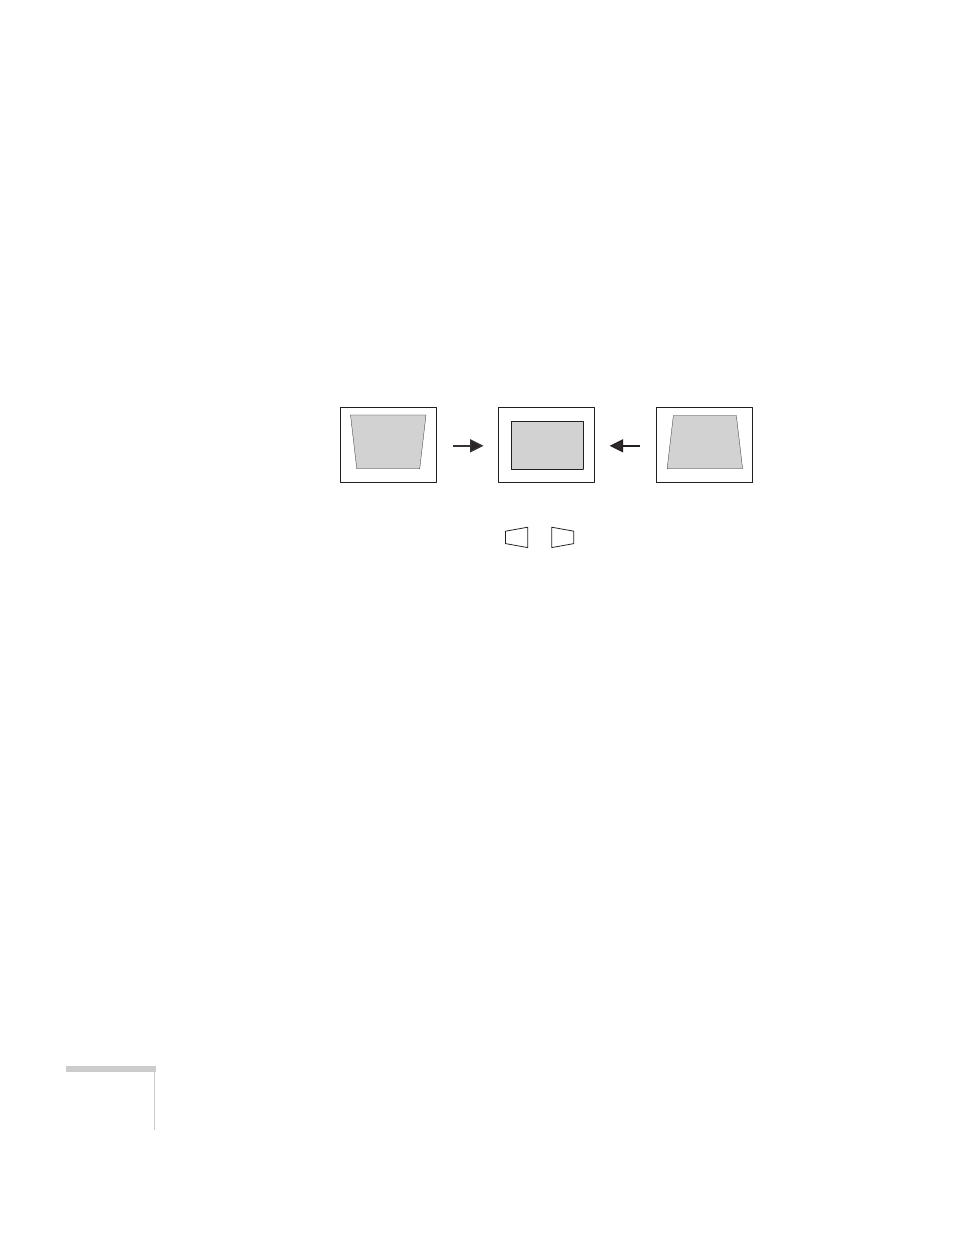
In most cases, you can maintain a square or rectangular image by
placing the projector directly in front of the center of the screen with
the base of the lens level with the bottom of the screen.
If the projector is slightly tilted (within a range of 30° up or down),
you can use the
Keystone
keys on the projector’s control panel or the
projector’s Keystone menu (see “Using Keystone Correction” on
page 37) to correct vertical keystone distortion.
If your image is shaped like
or
, you’ve placed the projector off
to one side of the screen at an angle. Place it directly in front of the
center of the screen, facing the screen squarely.
Corrected image
Projector tilted up
Projector tilted down
See also other documents in the category Epson Projectors:
- 70c (2 pages)
- MOVIEMATE 72 (70 pages)
- 71c (86 pages)
- 6110I (16 pages)
- 53c (108 pages)
- 480i (259 pages)
- LS47P1 (138 pages)
- EH-TW2800 (64 pages)
- EB-1725 (116 pages)
- EB 1735W (116 pages)
- 21L (21 pages)
- Livingstation HDTV LCD Projection Television LS57P2 (6 pages)
- EB-W10 (2 pages)
- 76C (111 pages)
- 9100i (122 pages)
- Cinema 200+ (80 pages)
- EB-84 (121 pages)
- ELPMBATA (11 pages)
- POWERLITE 1810P (2 pages)
- ANSI LUMENS 2000 (2 pages)
- ELP-3300 (110 pages)
- 7000 (2 pages)
- ELP-800UG (120 pages)
- EB G5200WNL (6 pages)
- 7250 (2 pages)
- 735C (2 pages)
- ELPMBC01 (6 pages)
- 81p (116 pages)
- Z8455WUNL (256 pages)
- ELP-3000 (103 pages)
- ELPLP29 (75 pages)
- 8100i (120 pages)
- 62c/82c (113 pages)
- 2500 Lumens (10 pages)
- 1080 (76 pages)
- 5300 (5 pages)
- DREAMIO EMP-TW700 (60 pages)
- 8500 UB (4 pages)
- DREAMIO EH-TW4400 (66 pages)
- POWERLITE HOME 10+ CPD-1790-4R2 (44 pages)
- BrightLink 450Wi (186 pages)
- 505c (141 pages)
- 810p (120 pages)
- EB-G5350 (131 pages)
- ELPMBPJF (10 pages)