Sealey VS7023A User Manual
Page 2
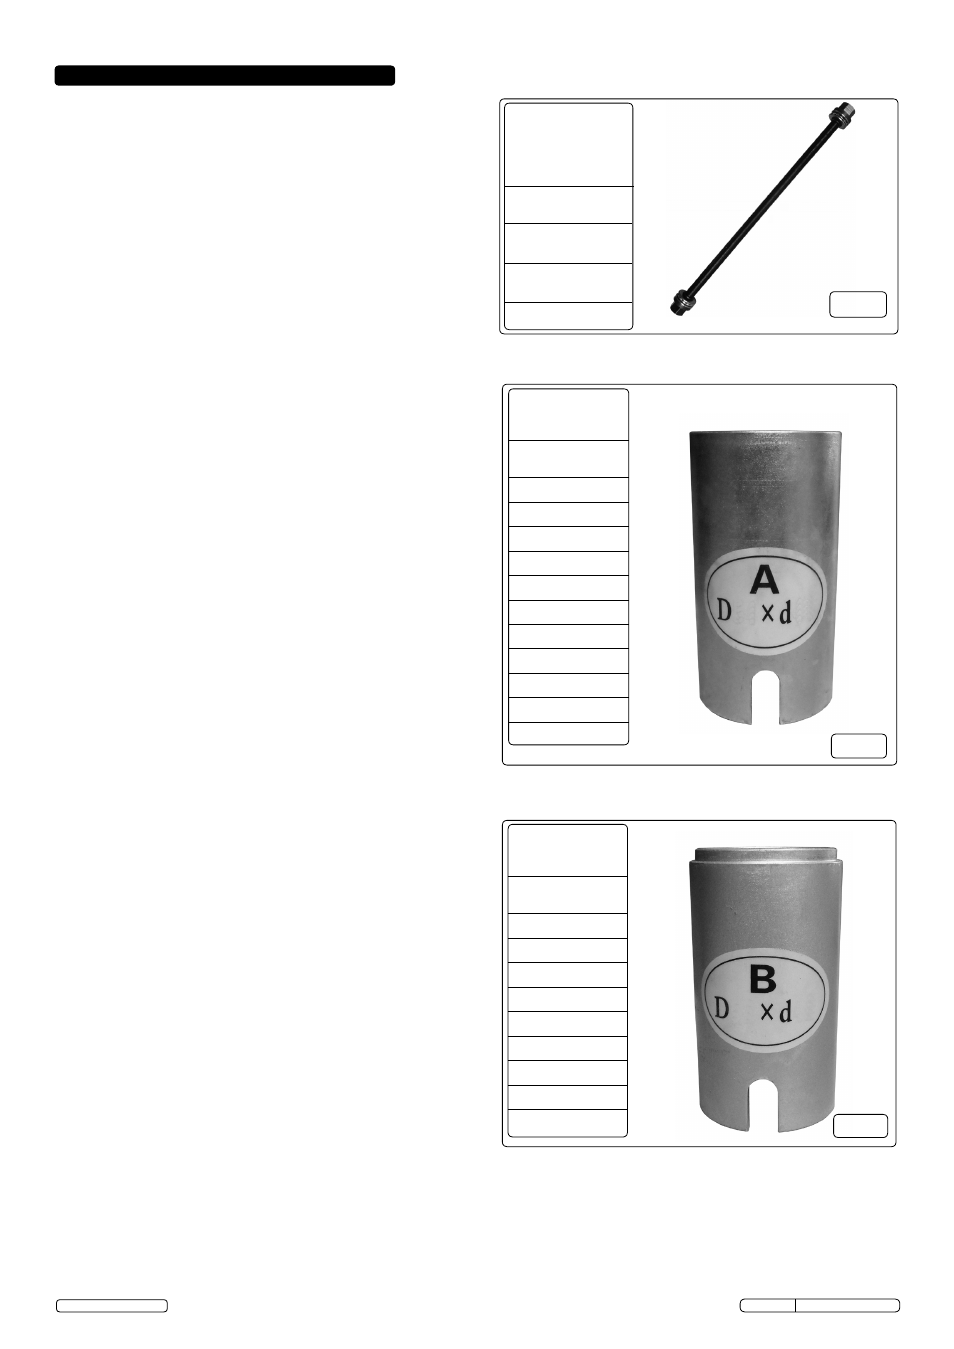
Fig.2
Sleeve 'A'
(11 pieces)
Sizes
D44 x d34
D46 x d36
D54 x d44
D56 x d46
D58 x d48
D66 x d56
D68 x d58
D70 x d60
D78 x d68
D80 x d70
D82 x d72
Sleeve 'B'
(9 pieces)
Sizes
D48 x d38
D50 x d40
D52 x d42
D60 x d50
D62 x d52
D64 x d54
D72 x d62
D74 x d64
D76 x d66
Fig.3
Fig.4
4.1 bush/bearing Removal (Fig.5)
4.1.1 Select a sleeve that will sit square on the bearing/bush
housing and will allow the bush/bearing to be
extracted without interference. Ensure that only the
force end of the sleeve with the U-shape inspection
slot is used to sit on the bush/bearing housing. The
stepped end of the sleeve should be used to locate in
the end plate.
4.1.2 Select a second sleeve that will sit square on the outer
ring of the bearing/bush and will pass through the
bearing/bush housing without interference. Ensure
that only the force end of the sleeve with the U-shape
inspection slot is used to sit on the outer ring of the
bush/bearing. The stepped end of the sleeve should
be used to locate in the end plate.
4.1.3 Remove the nuts and thrust washers and pass the
force screw half way through the bush/bearing centre
hole. Lubricate the force screw before use.
Note! Always use the largest diameter force screw available
that will fit through the centre of the bush/bearing.
4.1.4 Fit the end plates to the stepped ends of the selected
sleeves. Ensure that side-A is only used for 'A' sleeves
and side-B is only used for 'B' sleeves.
4.1.5 Slide the assembled end plates and sleeves over the
force screw and fit the thrust washers and nuts.
Progressively tighten the nuts whilst locating the
sleeves squarely on the bush/bearing housing and the
bush/bearing outer ring. Once the sleeves are square
on the housing and outer ring, tighten the nuts and
check that the thrust washers are centralised in the
end plates.
4.1.6 Using the appropriate size ring spanners for the force
screw nuts, gradually tighten the force screw nuts to
drive the bush/bearing from the housing.
DO NOT use
air tools to operate the force screw nuts.
DO NOT
apply more than 150Nm torque to the force screw
nuts.
4.1.7 Once the bush/bearing has been successfully
removed, clean the components used and return
them to the carry case.
4.2 bush/bearing Installation (Fig.5)
4.2.1 Select the appropriate sized sleeves for the housing
and bush/bearing as described in Section 4.1.
4.2.2 Prior to installing the bush/bearing clean the inside of
the housing with abrasive cloth to ensure that it is free
from debris and corrosion.
4.2.3 Lightly oil the outer ring of the bush/bearing to be
installed and using a hammer, gently tap around the
outer ring of the bush/bearing to locate it into the
housing. Care should be taken to ensure that the
bush/bearing is square to the housing when installing.
Note! Always use the largest diameter force screw available
that will fit through the centre of the bush/bearing.
4.2.4 Lubricate the force screw and assemble the kit as
described in Section 4.1 and as shown in Fig.5. Once
the sleeves are square on the housing and outer ring,
tighten the nuts and check that the thrust washers are
centralised in the end plates.
4. OPERATION
VS7023A Issue No.1 - 14/11/12
Original Language Version
450mm long
Force Screw
(4-pieces)
Sizes/Torque*
M10X1.5/ 33Nm
M12X1.5/ 60Nm
M14X1.5/ 99Nm
M16X1.5/155Nm
© Jack Sealey Limited
*
Max recommended
torque (lubricated).