Fig.2, Instructions – Sealey VS312 User Manual
Page 2
4. inSTRuCTionS
VS312 Issue No: 1 - 30/09/11
NOTE: It is our policy to continually improve products and as such we reserve the right to alter data, specifications and component parts without prior notice.
iMPoRTAnT: No liability is accepted for incorrect use of this product.
WARRAnTY: Guarantee is 12 months from purchase date, proof of which will be required for any claim.
inFoRMATion: For a copy of our latest catalogue and promotions call us on 01284 757525 and leave your full name and address, including postcode.
WARninG! Ensure you have read, understood and apply
Section 1 safety instructions.
4.1. Remove the glow plugs from the cylinder head.
4.2. Determine the thread size of the glow plugs. This can be done
by carefully using the reamer guides to make a comparison
with the threads in the glow plug aperture.
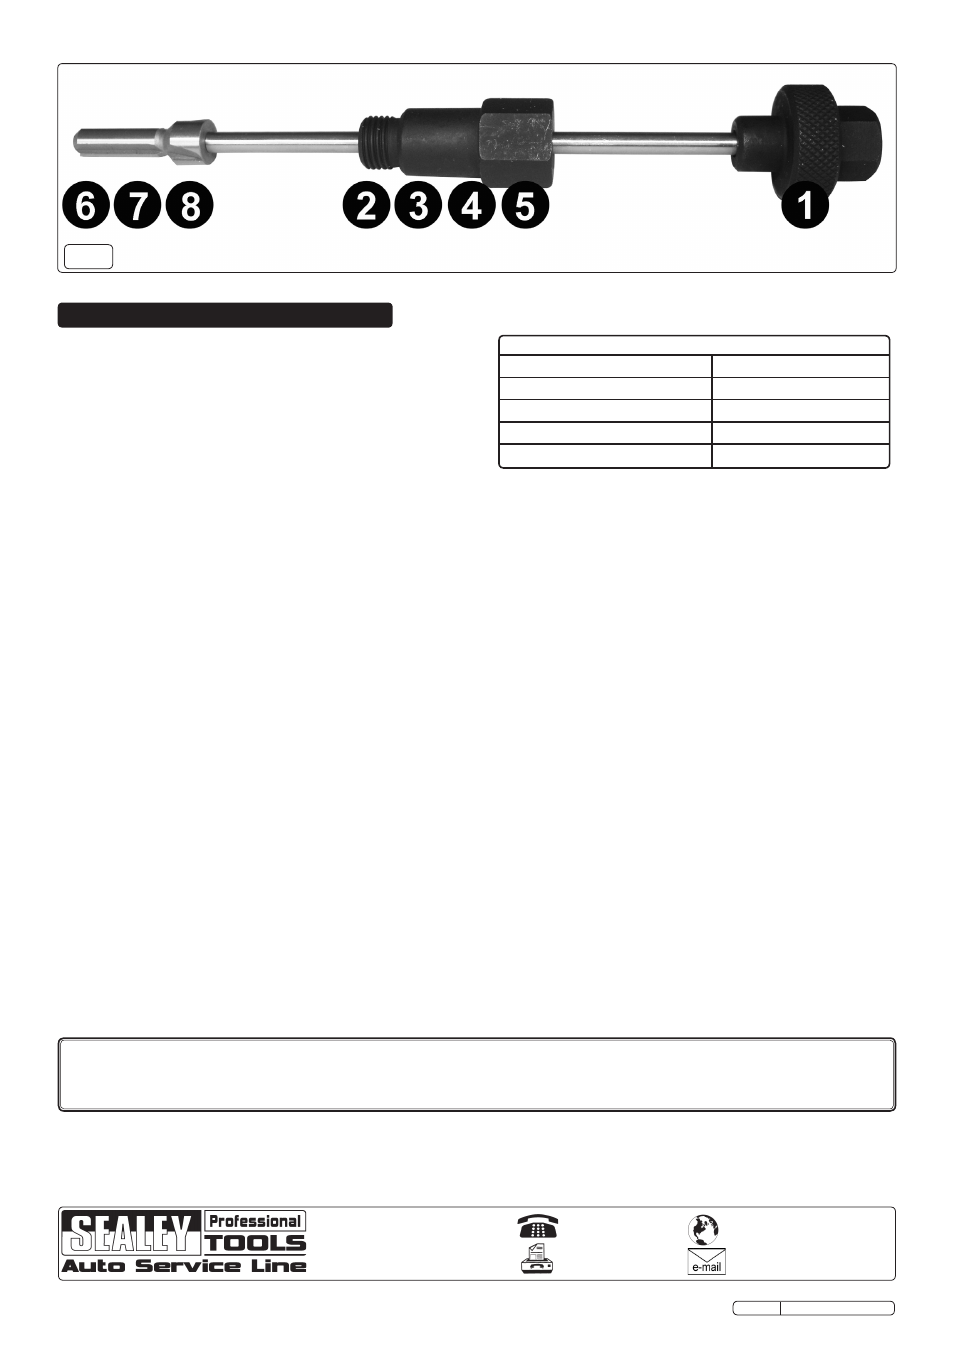
4.3. Assemble the set as shown in fig.2 using the correct
configuration of reamer guide and reamer for the glow plug
thread size. (See table opposite).
4.4. Smear the reamer with general purpose grease. This will hold
the carbon deposits as they are removed and reduce carbon
ingress into the engine.
4.5. Place the reamer into the glow plug aperture and secure
with the reamer guide in the glow plug threads.
4.6. Apply a firm pressure to the guide rod and handle and rotate
with an alternating clockwise and anti-clockwise movement.
The guide rod and handle can be turned either by hand using
the knurled portion of the handle as a grip, with a 14mm
spanner or socket on the hexagon portion or a 1/4” drive
ratchet can be inserted directly into the top of the handle.
WARninG! Take care not to cut into the metal seat.
4.7. When the carbon deposits are removed the operation of the
reamer will become smoother. Unscrew the reamer guide and
remove the set from the glow plug aperture. Thoroughly clean
the glow plug aperture to remove any traces of loose carbon
deposits and grease.
4.8. Clean the reamer, re-apply a fresh smear of general purpose
grease and repeat the procedure for the remaining glow plug
apertures.
4.9. After use, ensure all tools are removed from the engine bay
and stored away. Store in a safe, dry, childproof location.
01284 757500
www.sealey.co.uk
01284 703534
Web
Sole uK Distributor, Sealey Group,
Kempson Way, Suffolk Business Park,
Bury St. Edmunds, Suffolk
IP32 7AR
Original Language Version
Reamer/Guide Configurations (Refer to fig.1 & fig.2)
Guide Size:
Reamer no:
M8x1.0 (5)
7
M10x1.0 (4)
6
M10x1.25 (3)
6
M12x1.25 (2)
8
fig.2
Parts support is available for this product. To obtain a parts listing and/or diagram, please log on to www.sealey.co.uk, email
[email protected] or phone 01284 757500.