Fig. 2, Operating instructions – Sealey TC180 User Manual
Page 3
4. OPERATING INSTRUCTIONS
WARNING! As with all power tools, there are potential hazards involved with the use of
this cutter. It is, therefore, vital to ensure you read, understand and apply all the safety
instructions in section 1. familiarise yourself again with the specific safety rules for each
step of the following operation. failure to do so may cause serious damage and/or personal
injury and may invalidate your warranty. Disconnect the cutter from the mains power before making adjustments or changing blades.
Ensure that all clamps, screws and nuts are secure and that the blade is in good condition and correctly mounted. ALWAYs have the
blade guard down before turning on the cutter. Wear approved safety eye protection.
4.1.
fill the water tray approx. two thirds so that the lower blade guard is in the water. the water cools and lubricates the blade during
cutting and also helps to suppress the dust.
4.2.
set the table tilt angle and the fence position to suit the required cut. Lower the blade guard as far as possible whilst leaving room for
the tile to pass beneath it.
4.3.
check that everything is ready, plug the cutter into the mains power supply and switch on.
WARNING! DO NOT attempt to pick up an off-cut before the blade has completely stopped.
4.4.
Hold work firmly against the fence and table (hold the main section, not the piece that will become the off-cut).
4.5.
slowly move the workpiece forward into the rotating blade. continue holding the workpiece firmly until the cut is complete.
3.4.
CHANGING THE BLADE
3.4.1. remove the water tray from under the cutter and ensure that the work table is not at an angle.
3.4.2. tilt the cutter onto the left-hand side and remove the lower blade guard.
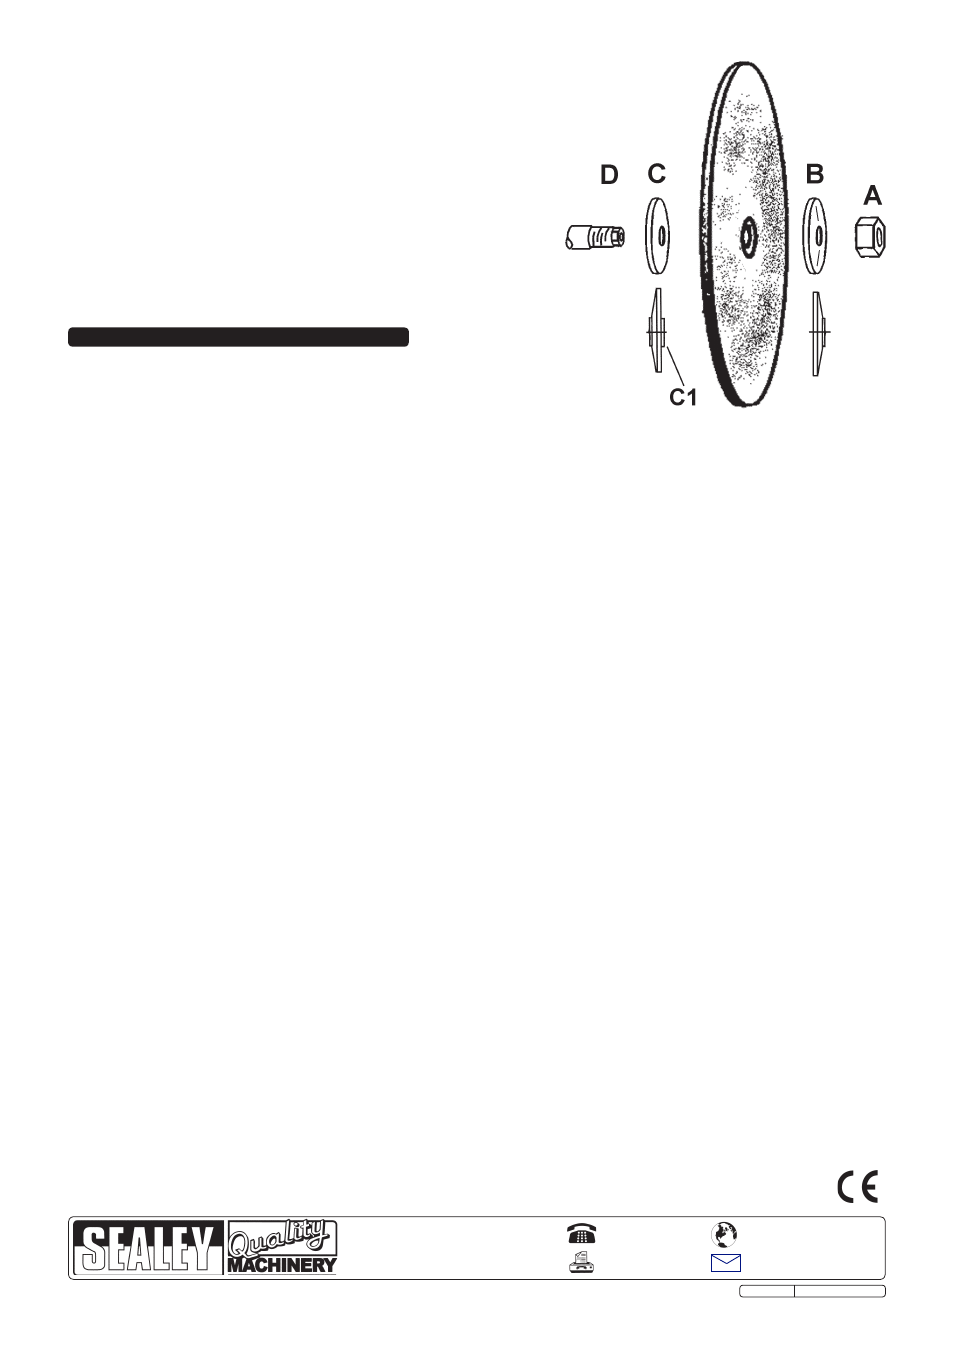
3.4.3. Hold the end of the shaft (fig. 2.D) with a spanner on the flats and remove the blade
retaining nut (fig. 2.A).
3.4.4. remove the outer blade washer (fig. 2.B) and the blade.
3.4.5. When fitting the new blade it is very important to ensure that the rotation
arrows on the blade match the direction arrow on the blade guard.
4.4.6. tighten retaining nut while holding shaft end with spanner.
note: the two blade washers (fig.2.B & c) are different and must be
correctly fitted. the inner washer (c) has a spigot (c1), to locate the
blade, which is not present on the outer washer. Each washer
must
be fitted with the flat face in contact with the blade.
3.4.7. replace lower blade guard, stand cutter upright and refit water tray.
fig. 2
NOTE: It is our policy to continually improve products and as such we reserve the right to alter data, specifications and component parts without prior notice.
IMPORTANT: no liability is accepted for incorrect use of this product.
WARRANTY: Guarantee is 12 months from purchase date, proof of which will be required for any claim.
INFORMATION: for a copy of our latest catalogue and promotions call us on 01284 757525 and leave your full name and address, including postcode.
01284 757500
01284 703534
Sole UK Distributor, Sealey Group,
Kempson Way, suffolk Business Park
,
Bury st. Edmunds, suffolk,
IP32 7Ar
www.sealey.co.uk
Web
Original Language Version
tc180.V2 Issue: 2 - 24/11/09