Fig.13, Maintenance – Sealey SM1302 User Manual
Page 6
5.3. CHOOSING THE RIGHT BLADE AND SPEED
the scroll saw accepts a wide variety of blade widths and thicknesses for cutting wood and other fibrous materials. the blade width
and thickness and the number of teeth per inch or centimetre are determined by the type of material and the size of the radius being
cut.
Note: As a general rule, always select narrow blades for intricate curve cutting and wide blades for straight and large curve cutting.
5.4.
BLADE INFORMATION
scroll saw blades wear out and must be replaced frequently for optimum cutting results. scroll saw blades generally become dull after
1/2 hour to 2 hours of cutting, depending on the type of material and speed of operation.
When cutting wood, best results are achieved with pieces less than one inch (25mm) thick.
When cutting wood thicker than one inch (25mm), the user must guide the workpiece very
slowly into the blade and take extra care not to bend or twist the blade while cutting.
5.5.
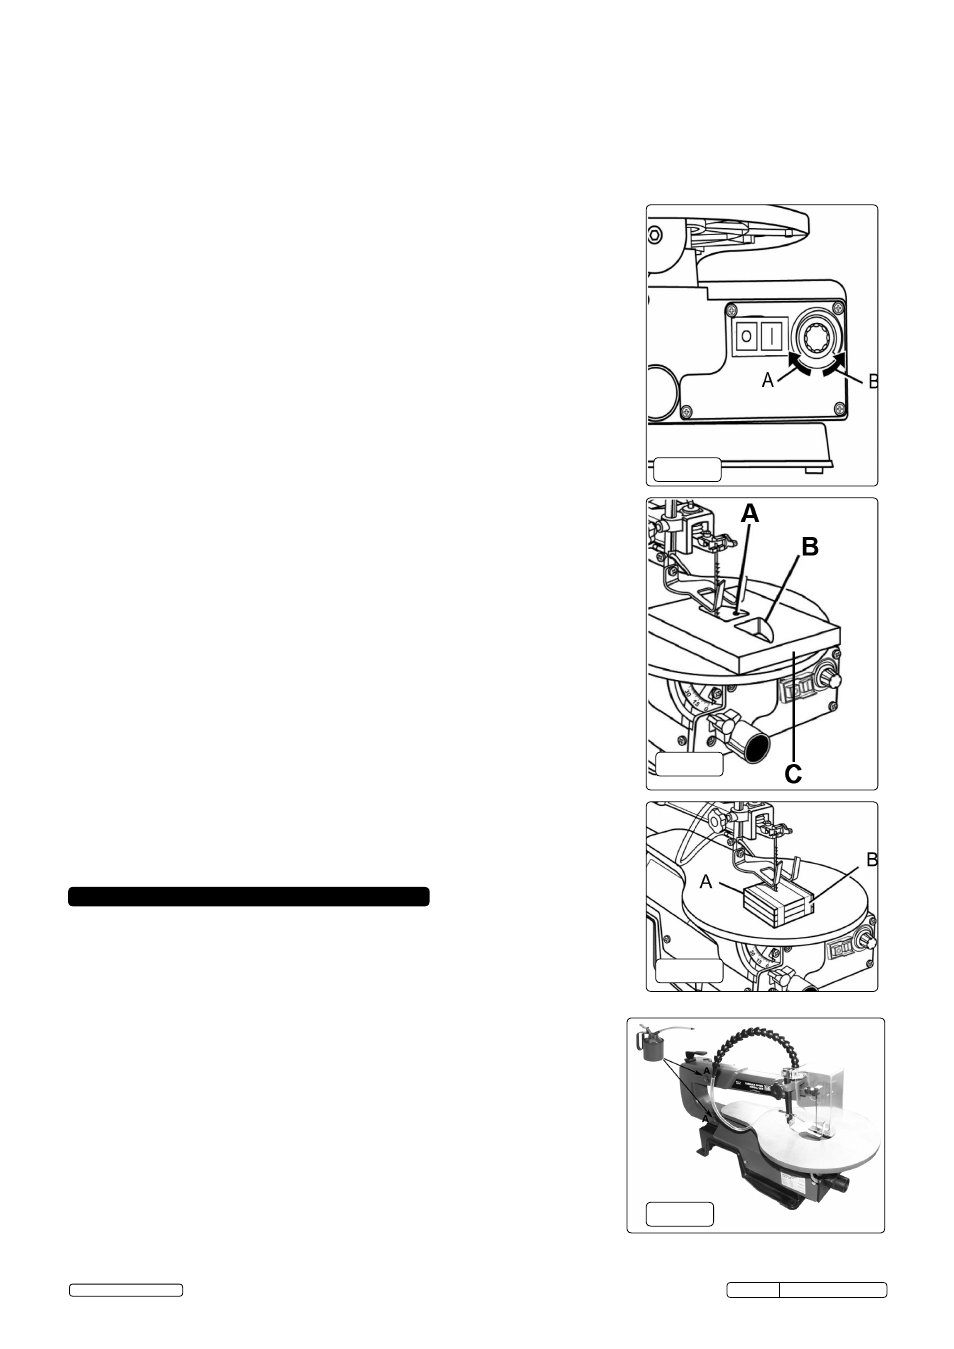
SPEED SETTING. See Fig.10
5.5.1. By turning the speed selector, the saws speed may be adjusted from 400 to 1,600sPM
(strokes Per Minute). to increase the strokes per minute, turn the speed selector clockwise.
5.5.2. to decrease the strokes per minute, turn the speed selector anticlockwise.
Fig.10
A. to IncreAse
B. to decreAse
5.6. SCROLL CUTTING
In general, scroll cutting consists in following the pattern lines by pushing and turning the
workpiece at the same time. once you have started a cut, do not try to turn the workpiece
without pushing it - the workpiece could bind or twist the blade.
WARNING! to prevent serious personal injury, never leave the saw unattended until the
blade has come to a complete stop.
5.7. INTERIOR SCROLL CUTTING See Fig.11
5.7.1. one feature of a scroll saw is that it can be used to make scroll cuts within a workpiece
without breaking or cutting through the edge or perimeter of the workpiece.
5.7.2. to make interior cuts in the workpiece, remove the scroll saw blade as explained in the
section on Installing Blades.
5.7.3. drill a 1/4in. (6mm) hole in the workpiece.
5.7.4. Place the workpiece on the saw table with the drilled hole over the hole in the table.
5.7.5. fit the blade, feeding it through the hole in the workpiece; then adjust the drop foot and
blade tension.
5.7.6. When finished making the interior scroll cut, simply remove the blade from the blade
holders as described in the section on Installing Blades, and remove the workpiece
from the saw table.
Fig.11
A. drIll Hole
c. WorKPIece
B. InterIor cut
5.8.
STACK CUTTING. See Fig.12
once you have become well acquainted with your saw through practice and experience,
you may wish to try stack cutting.
stack cutting may be used when several identical shapes need to be cut. several
workpieces may be stacked one on top of the other and secured to each other before
cutting. Pieces of wood may be joined together by placing double sided tape between each
piece or by wrapping tape around the corners or ends of the stacked wood. the stacked
pieces must be attached to each other in such a way that they can be handled on the table
as a single workpiece.
WARNING! to avoid serious personal injury, do not cut several workpieces at a time
unless they are properly attached to each other.
Fig.12
A. Wood PIeces
B. tAPe
Fig.10
Fig.11
Fig.12
WARNING! When replacing parts, use only authorised replacement parts. the use
of any other spare parts may create a hazard or damage your saw.
6.1.
GENERAL MAINTENANCE
6.1.1. Keep your scroll saw clean.
6.1.2. do not allow pitch to accumulate on the saw table. clean it with a suitable cleaner.
6.2.
ARM BEARINGS. See Fig.13
lubricate the arm bearings after the first 10 hours of use. oil them ever 50 hours
of use or whenever there is a squeak coming from the bearings.
6.2.1. carefully place the saw on its side as shown in fig.15. remove the rubber cap
from the upper and the lower arm of the saw.
6.2.2. squirt a few drops of oil on the end of the shaft and arm bearings. leave the saw in
this position overnight to let the oil soak in.
Note: Lubricate the bearings on the other side of the saw in the same manner.
WARNING! If the power cord is worn, cut, or damaged in any way, have it replaced
immediately by a qualified service technician. failure to do so could result in serious
personal injury.
Fig.13
A. ArM BeArInGs
Fig.13
6. MAINTENANCE
sM1302 Issue: 3(sP) - 14/02/14
Original Language Version
© Jack sealey limited