Connecting to other equipment – Casio QV-7000SX. User Manual
Page 25
97
CONNECTIONS
• Computer (page 101)
• QV Color Printer
(page 100)
DIGITAL Terminal
IMPORTANT!
• Be sure to turn off both the camera and other equip-
ment before making any connections.
• Check the documentation that comes with your other
equipment for information you may need to know
when making connections.
• Leaving the same image displayed on a television or
computer display screen for very long periods can
cause the image to be “burned in” on the screen. When
this happens, a faint after-image remains on the
screen, even after you disconnect the camera. To avoid
this, you should not leave the same image displayed on
such a screen for very long periods.
• This camera does not support cable transfer of data
with other CASIO digital cameras.
Cables
The type of cable you
should use depends on
the type of equipment
to which you are
connecting.
DIGITAL
Terminal
98
INPUT
VIDEO
L
R
AUDIO
TV
Accessory video cable
VIDEO OUT
terminal
VIDEO IN terminal
Selecting the Video Output Signal Mode
You can select either of two common video output modes:
NTSC or PAL.
The video system you should use depends on the country
where you plan to use the output signal. In the United States
or Japan, for example, you should use NTSC, but in Europe
you need to use PAL.
Check with your local video or TV retailer if you are unsure
about which video mode you should use in your country.
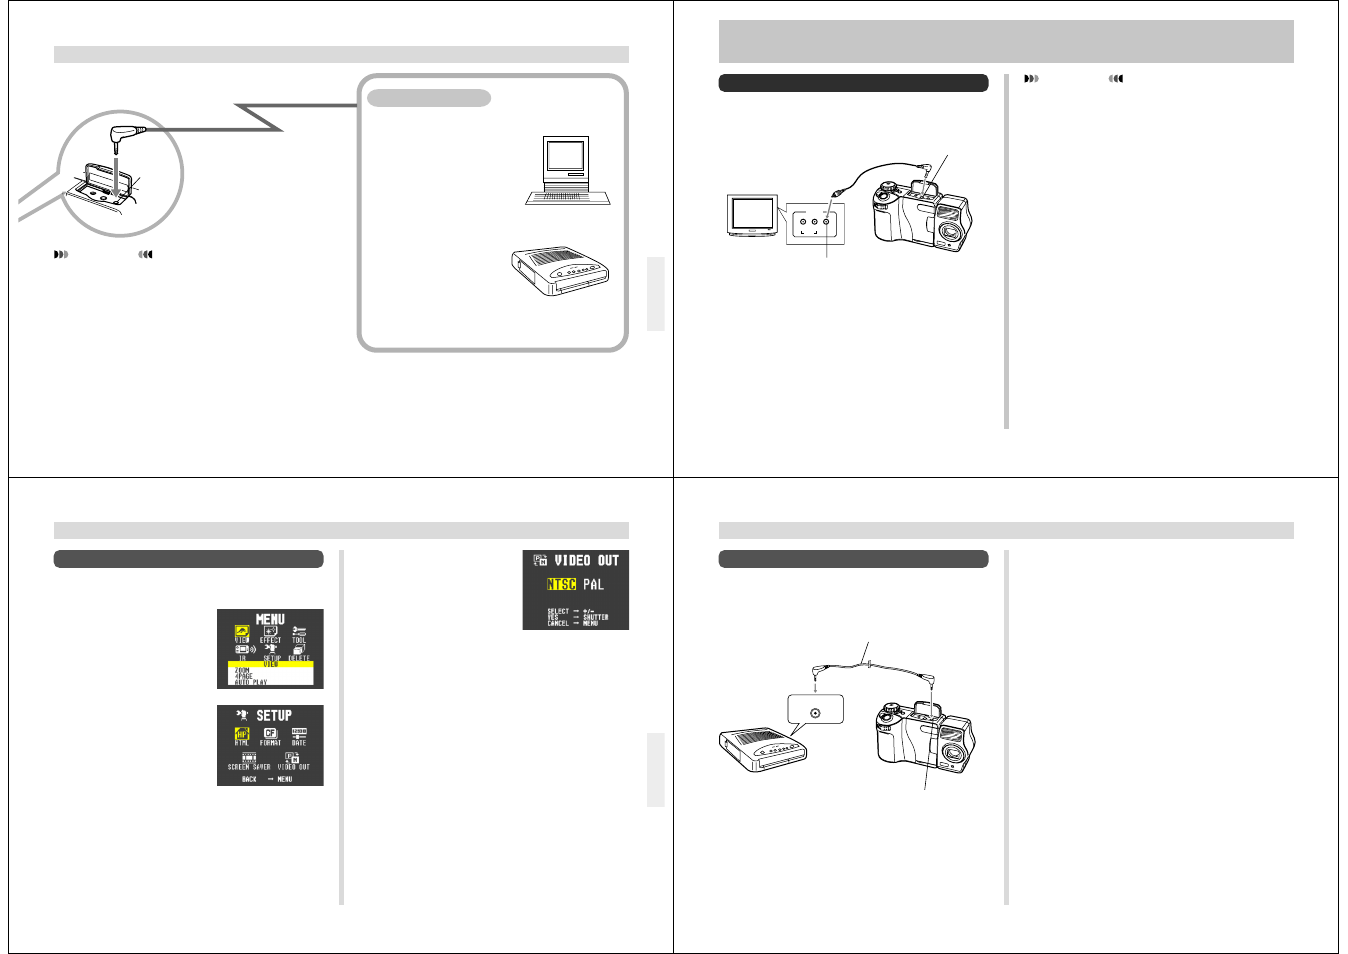
To Connect to a Television
You can playback images in camera memory on the screen
of a connected television.
CONNECTING TO OTHER EQUIPMENT
1.
Connect one end of the video cable to the cam-
era and the other end to the television.
2.
Set up the television for video input.
• See the documentation that comes with the television
for information about how to do this.
3.
Use the operations under “Playback” on page
67 to playback images on the television screen.
IMPORTANT!
• A television must have a video input terminal like the
one shown in the illustration to connect to this camera.
• Battery capacity (page 29) and other displays that nor-
mally appear on the camera’s monitor screen are also
displayed on the television screen.
• The monitor screen goes blank as soon as you con-
nect the video cable to the camera.
99
To Change the Video Output Mode
1.
Slide the Function Switch to PLAY.
2.
Press MENU.
3.
Use [+] and [–] to select
SETUP, and then press
the shutter button.
CONNECTING TO OTHER EQUIPMENT
4.
Use [+] and [–] to select
VIDEO OUT, and then
press the shutter button.
5.
Use [+] and [–] to select the video mode you
want to use, and then press the shutter button.
100
CONNECTING TO OTHER EQUIPMENT
1.
Connect one end of the cable that comes with
the QV Color Printer to the camera and the
other end to the printer.
2.
Slide the camera’s Function Switch to PLAY
and then turn on camera power.
3.
Perform the QV Color Printer operations re-
quired for printing.
• See the documentation that comes with the QV Color
Printer for details.
• Performing a print operation for a movie prints the 4 or
16 individual frames that make up the movie.
• Printing a panorama prints the individual images that
make up the panorama.
To Connect to a QV Color Printer
You can use a QV Color Printer to produce printouts of your
image data.
Supported Printer Models: DP-300, DP-8000
DIGITAL COMMUNICATION
Data communication cable
DIGITAL terminal