Casio QV-7000SX. User Manual
Page 13
49
OTHER RECORDING FUNCTIONS
4.
Use [+] and [–] to increase or decrease the dis-
tance value on the monitor screen, until the
one closest to distance you measured in step 3
is displayed.
5.
Press the shutter button.
• The operation indicator and the Auto Focus frame do
not appear while manual focus is in use.
Manual Focus indicator
Manual Focus
Manual Focus lets you manually adjust the focus of an im-
age.
• Manual focus is indicated by the
indicator on the moni-
tor screen.
1.
Slide the Function Switch to REC.
2.
Press
a num-
ber of times until the
indicator appears on the
monitor screen.
• Each press of
cycles the focus mode in
the following sequence:
Auto Focus
Manual Fo-
cus (
)
Macro (
).
3.
Manually measure the distance to the subject,
and then press [+] or [–].
• This causes the current focus distance to appear on
the screen.
50
OTHER RECORDING FUNCTIONS
Macro setting
Movie Recording Mode
Using the Macro Feature
With the macro feature, you can record close up images of
subjects locate only 10cm (4") from the lens.
•
is shown on the monitor screen when the macro feature
is turned on.
• Auto Focus is disabled while the Macro feature is in use.
To record an image using the macro feature
1.
Slide the Function Switch to REC.
2.
Press
a num-
ber of times until the
indicator appears on the
monitor screen.
• Each press of
cycles the focus mode in
the following sequence:
Auto Focus
Manual Fo-
cus (
)
Macro (
).
3.
After composing the image on the monitor
screen, press the shutter button all the way
down to record the image.
Movie Recording
You can record movies that are approximately 3.2, 6.4, or
12.8 seconds long.
There are two types of movie recording: PAST and FU-
TURE. PAST lets you capture images of events that oc-
curred before you pressed the shutter button while FUTURE
records what happens after you press the shutter button.
See “Using the Record Menu” on page 59 for details on how
to select the movie length and recording type.
FUTURE
1.
Slide the Function Switch to REC.
2.
Align the dial with
to
select Movie Recording
Mode.
51
OTHER RECORDING FUNCTIONS
3.
Compose the image on the monitor screen and
then press the shutter button about half way.
• Auto Focus automatically adjusts in accordance with
the movement of the subject.
4.
After confirming that the Auto Focus operation
is complete (operation indicator is green),
press the shutter button all the way down to
record the image.
• See “Playing Back a Movie” on page 68 for details on
playing back a movie.
PAST
1.
Slide the Function Switch to REC.
2.
Align the dial with
to select Movie Record-
ing Mode.
3.
Compose the image on
the monitor screen and
then press the shutter
button about half way.
• Auto Focus automatically
adjusts in accordance with
the movement of the subject.
• The message “STAND BY” remains on the monitor
screen for a period that is equal to the movie length
you select (3.2, 6.4, or 12.8 seconds).
Recording is not performed if you press the shutter
button while this message is on the monitor screen.
4.
Keep the camera pointed
at the action you want to
record, and press the
shutter button all the
w a y d o w n w h e n y o u
want to end recording.
• If you selected a movie length of 12.8 seconds, for
example, pressing the shutter button records every-
thing that went on in front of the lens from about 12.8
seconds ago up to the point you pressed the shutter
button.
52
OTHER RECORDING FUNCTIONS
IMPORTANT!
• Flash is disabled during movie recording.
• A movie uses four images worth of memory, regard-
less of the movie length.
Panorama
Recording Mode
3.2 seconds
5
4
4
6.4 seconds
10
16
4
12.8 seconds
5
16
4
Frames Per
Second
Images Per
Frame
Memory
Used
• Movie images that are uploaded to a personal com-
puter and then download back to the camera cannot
be played back as a movie. Uploading a movie image
to a computer ungroups it, so you will not be able to
play it back when you download it back to the camera
unless you re-group them using the procedure on
page 69.
• Entering the Movie Mode for recording automatically
applies digital zoom. You can also use digital zoom in
combination with optical zoom.
• During movie recording, Auto Focus is performed in
accordance with the movement of the subject.
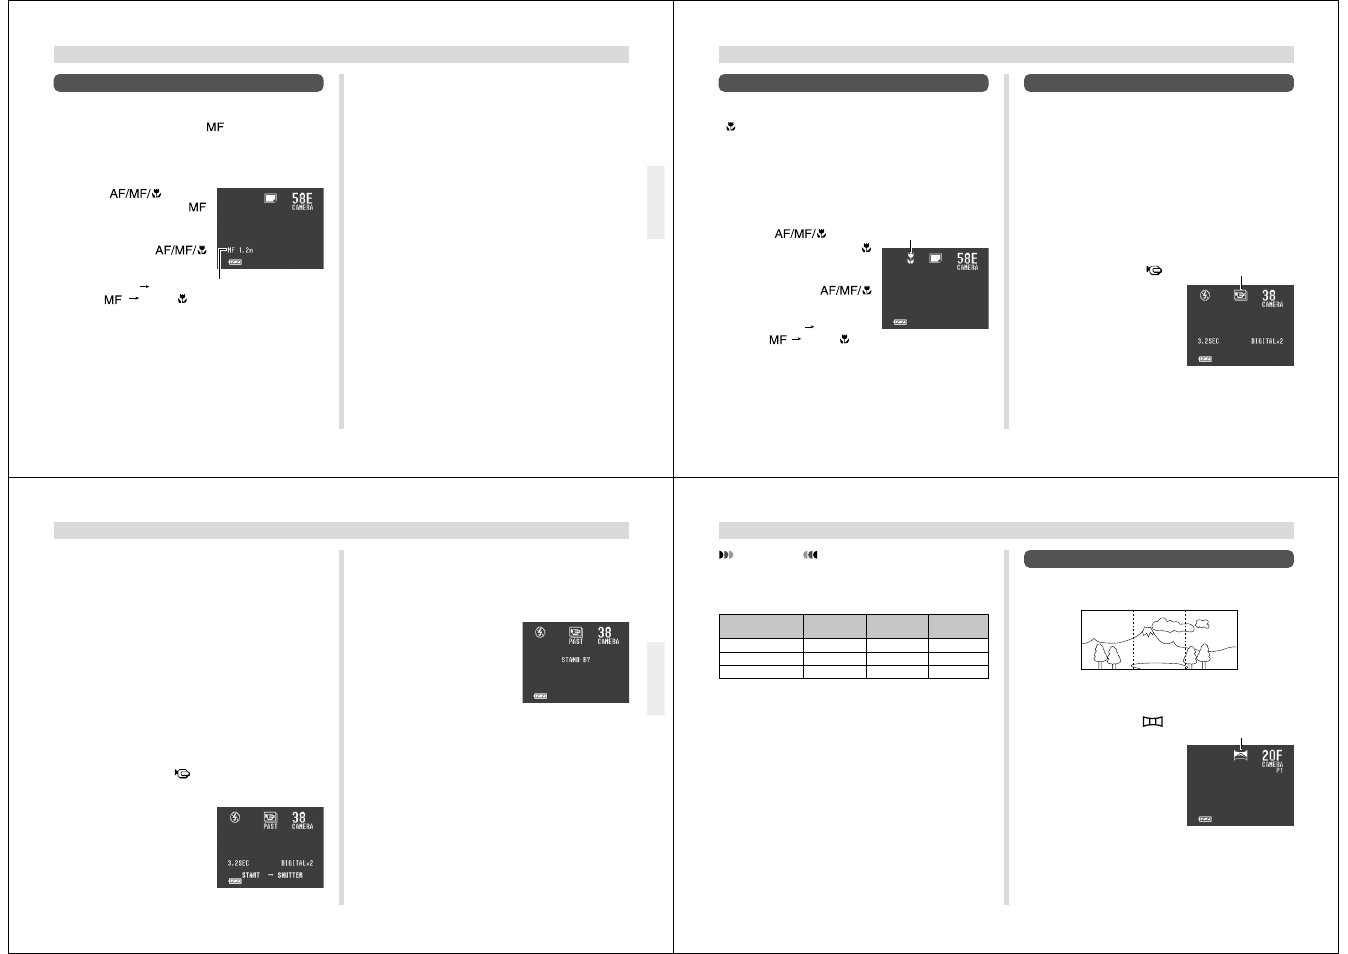
Panorama Recording
With panorama recording you record a series of images and
then link them to create a single panoramic effect.
1.
Slide the Function Switch to REC.
2.
Align the dial with
to
s e l e c t P a n o r a m a R e -
cording Mode.
3.
Compose the image on the monitor screen and
then press the shutter button about half way.