3 hopper, 3 hopper ” (p72), P 72 – Epson Stylus TX100 User Manual
Page 72
Epson STYLUS NX100/NX105/SX100/SX105/TX100/TX101/TX102/TX103/TX105/TX106/TX109/ME 300
Revision A
DISASSEMBLY/ASSEMBLY
Disassembling the Printer Mechanism
72
Confidential
4.5.3 Hopper
Parts/Components need to be removed in advance:
Scanner Stand/Cover Wire (
), Scanner Unit (
), Middle Housing (
Panel Unit (
)
Removal procedure
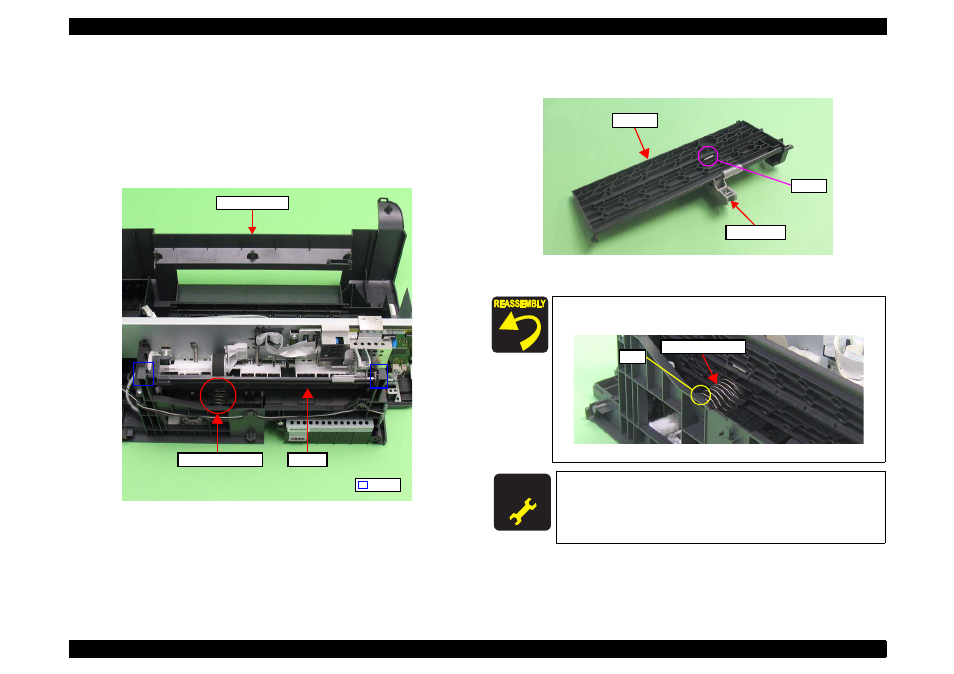
1. Release both the dowels that secure the Hopper, and remove the Hopper and
the Compression Spring from the Lower Housing.
Figure 4-37. Removing the Hopper
2. Release the hook that secures the Edge Guide, and remove the Hopper from
the Edge Guide.
Figure 4-38. Removing the Edge Guide
Hopper
Lower Housing
Compression Spring
Hook
When installing the Hopper, make sure to install the Compression
Spring under the rib as shown below.
Figure 4-39. Assembling the Hopper
A D J U S T M E N T
R E Q U I R E D
Whenever the Hopper is removed/replaced, the required
adjustments must be carried out.
•
Chapter 5 “ ADJUSTMENT” (p.100)
Hopper
Edge Guide
Hook
Rib
Compression Spring