4 scanner stand /cover wire, 4 scanner stand, Cover wire ” (p60) – Epson Stylus TX100 User Manual
Page 60
Epson STYLUS NX100/NX105/SX100/SX105/TX100/TX101/TX102/TX103/TX105/TX106/TX109/ME 300
Revision A
DISASSEMBLY/ASSEMBLY
Removing the Housing
60
Confidential
4.3.4 Scanner Stand /Cover Wire
Parts/Components need to be removed in advance:
None
Removal procedure
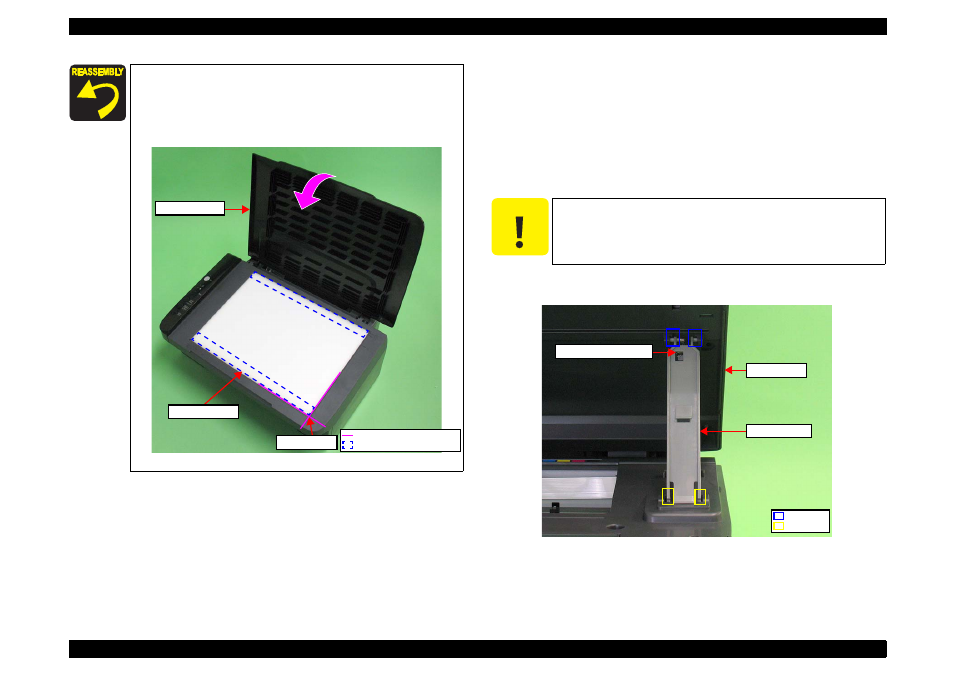
Scanner Stand
1. Open the Scanner Unit.
2. Release the hooks (x2) at the lower part of the Scanner Stand.
3. Release the guide pins (x2) at the upper part of the Scanner Stand, and remove
the Scanner Stand.
Figure 4-8. Removing the Scanner Stand
Install the Document Pad following the procedure below.
1. Place the Document Pad with the side where the double-sided
tape
attached upward on the Rod Lens Array aligning its
corner with the home position.
2. Close the Document Cover to attach the Document Pad.
Figure 4-7. Document Pad Position
Document Pad
Home position
Double-sided tape position
Standard line
Document Cover
C A U T I O N
Be careful not to lose the Scanner Stand Spring when removing the
Scanner Stand.
Hook
Guide pins
Scanner Stand
Scanner Unit
Scanner Stand Spring