Chapter 8: geometry application – Casio ClassPad II fx-CP400 Examples User Manual
Page 30
Chapter 8: Geometry Application
30
Chapter 8:
Geometry Application
0801
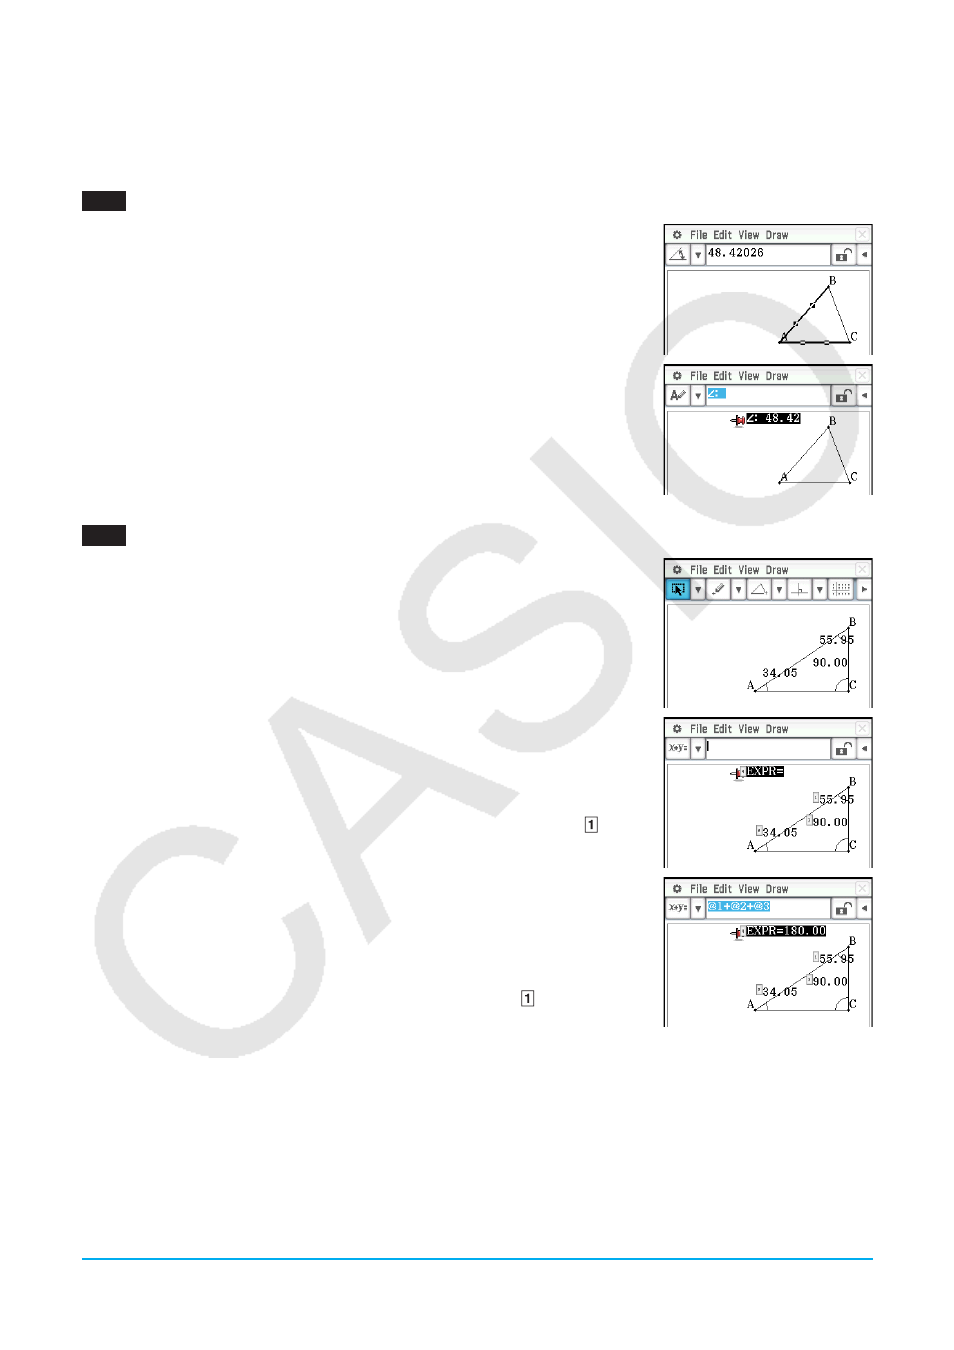
1. Draw the triangle.
2. Tap
G. Next, tap side AB and then side AC to select them.
3. Tap the
u button to the right of the toolbar.
• This displays the measurement box, which indicates the specified angle.
4. Tap [Draw], [Measurement], and then [angle].
• This shows the angle measurement on the screen.
• You can also perform the operation below in place of step 4.
- Select (highlight) value in the measurement box and drop it into the
Geometry window.
- Tap the
Q button on the far left of the measurement box.
0802
1. Draw a triangle and then display the inside angle value of each angle.
• For information about displaying angle values, see “To attach an angle
measurement to a figure” in the User’s Guide.
2. Tap [Draw] - [Expression].
• This displays an “EXPR=” object.
3. Tap the
u button to the right of the toolbar.
• This will display the measurement box and also display numeric labels for
each measurement currently on the screen.
4. Now you can use the numeric labels to specify measurement values in the
calculation you input in the measurement box.
• To input a measurement value in the measurement box, input the at
sign (@) followed by the numeric label of the value. To input value , for
example, you would input “@1”.
• Since we want to calculate the sum of the interior angles of the triangle
here, you would input the following: @1+@2+@3.
5. After inputting the calculation expression, press
E.
• The calculation result is displayed to the right of “EXPR=”.
Tip:
In step 4 above, you also can input the numeric label of a displayed measurement
value into the measurement box by tapping the label. Tapping , for example,
will input “@1” into the measurement box.
LY777Ex_E.indb 30
13/02/25 11:24