Setup – HEIDENHAIN ND 1400 Quick Start User Manual
Page 4
2
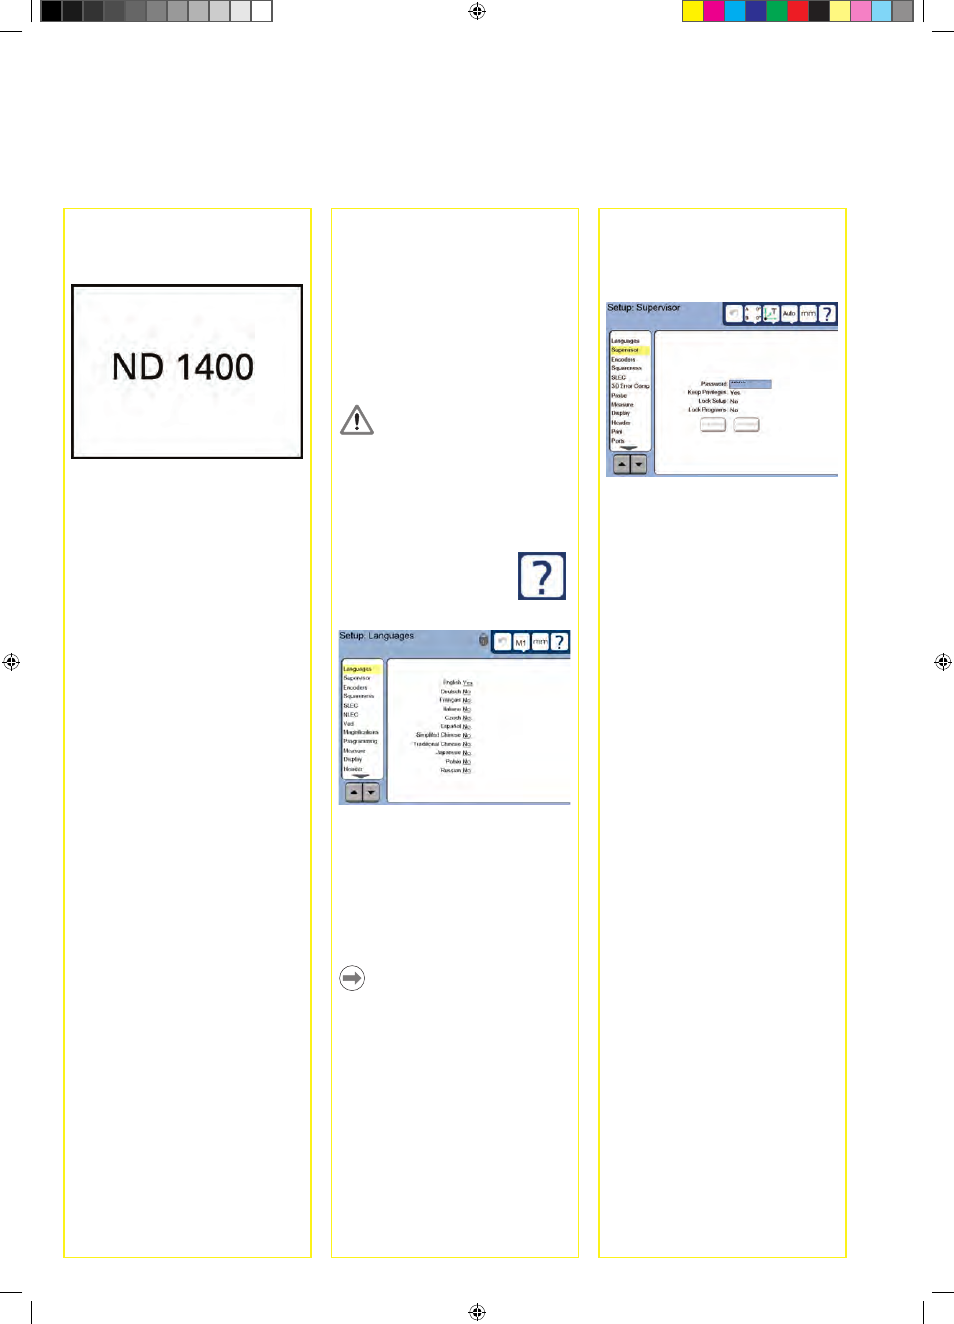
3. Enter the Supervisor Password
• Touch the SUPERVISOR setup menu
item and then touch the PASSWORD
field.
• Enter the supervisor password.
4. Calibrate the touch screen
The touch screen should be calibrated
to respond correctly to each operator’s
finger tip size and pressure.
• Touch the MISCELLANEOUS setup
menu item and then touch the CAL
button.
• Follow the instructions shown on the
LCD screen.
5. Select a probe
• Touch the PROBE setup menu item
and then touch the PROBE HOLDER
field to select the desired probe type.
• Prepare for probe qualification by
touching the QUALIFICATION
DIAMETER field and entering the
qualification sphere diameter in the
correct unit of measure.
6. Select the point entry type
Backward or forward annotation can be
used to collect data points. Backward
annotation allows the user to probe
any number of data points to measure
a feature. Forward annotation limits
the number of points to a required
minimum.
• Touch the MEASURE setup
menu item and then touch the
ANNOTATION field to select
BACKWARD or FORWARD
annotation.
Setup
Software setup
The operating parameters of the
ND 1400 must be configured prior
to using it for the first time, and any
time part measurement, reporting or
communication requirements change.
Settings will be retained until:
• The data-backup battery is changed
• The data and settings are cleared
• Software upgrades are performed
Caution
Setup parameters control the operation
of the ND 1400 and are password-
protected. Only qualified personnel
should be given password access to
setup screens.
1. Display the setup menu
• Touch the QUESTION icon
once, and then touch the
SETUP button twice to
display the SETUP MENU.
• Touch menu items to select them.
Scroll the setup menu using the
ARROW buttons.
2. Select the language
Touch the LANGUAGES setup menu
item and then touch the desired
language.
Note:
When the language is changed, power
to the ND 1400 must be cycled off and
then back on.
Initial power up
• Press the POWER SWITCH to power
the ND 1400. The startup screen is
displayed.
• Press the FINISH key to display the
current axis positions on the DRO
screen.