Available mounting brackets, Usb port on the menu panel (see, Figure 9 – Grass Valley Zodiak Installation Planning Guide User Manual
Page 12
12
Zodiak Installation Planning Guide
Installation
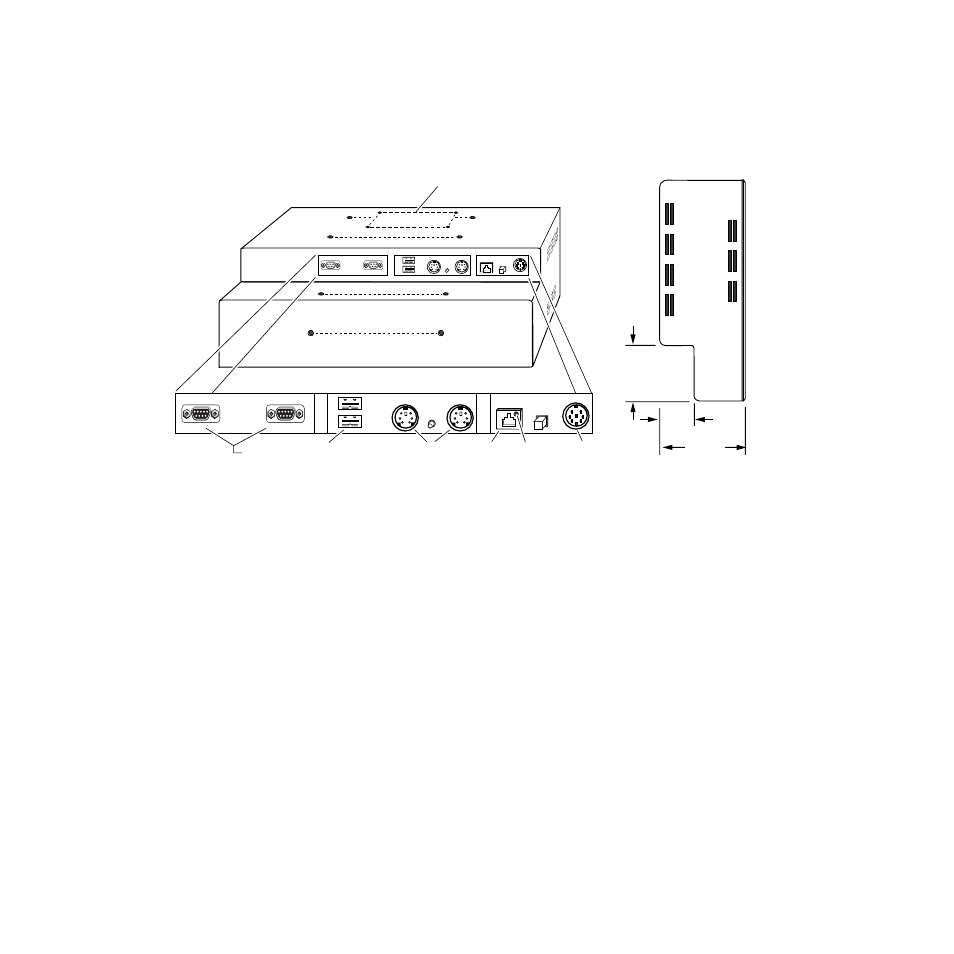
Ports located on the rear of the Menu panel (
) provide connections
to the Zodiak Main Panel, Video Processor frame, an external Zip drive,
and other devices.
Figure 9. Menu Panel Connections
CAUTION
All Menu panel mounting holes are tapped 10-32. Do not penetrate the case
more than 0.24 in. / 6.10 mm.
Available Mounting Brackets
Three different mounting brackets are available for mounting the Menu
panel:
•
Adaptable Mounting Bracket (standard),
•
Adjustable Console Bracket, or
•
Flush Mount Kit.
When considering mounting options, remember that the optimum viewing
angle is 90 degrees in both the horizontal and vertical planes. The adapt-
able mounting bracket allows the Menu panel to be tilted on a horizontal
axis for optimum viewing. Clamping pivot screws secure the bracket angle.
The adjustable console bracket has a friction-lock mechanism to allow the
user to tilt the Menu panel to the desired horizontal position.
CAUTION
When using either console mounting bracket, be sure to open the Main panel
lid and check for sufficient clearance between the Menu panel and the Main
panel components. Without sufficient clearance, the lever arm or joystick
could damage the Touch Screen when the Main panel is opened.
8096_00_14_r5
2.5 in.
64 mm
Left Side
View
Panel Bottom
Rear of panel
Alternative Four Hole Pattern for
Adjustable Freestanding Console Bracket
or Articulated Arm
Serial Ports
1.6 in.
41 mm
4.3 in.
109 mm
*
*
*
*
◊
= Hole pairs (top and bottom) for Flush Mount kit
◊
= Hole pair for Adaptable Mounting Bracket (5)
*
USB Ports PS/2 Mouse/Keyboard Ethernet
Power
LAN
DC IN
MOUSE
KEYBOARD
USB 1
USB 2
RESET
COM 3
CROSS
OVER
COM 4
Link LED