Grass Valley RS-422 Interface Board User Manual
Page 23
Installing the RS-422 Interface Board
RS-422 Interface Board Installation
23
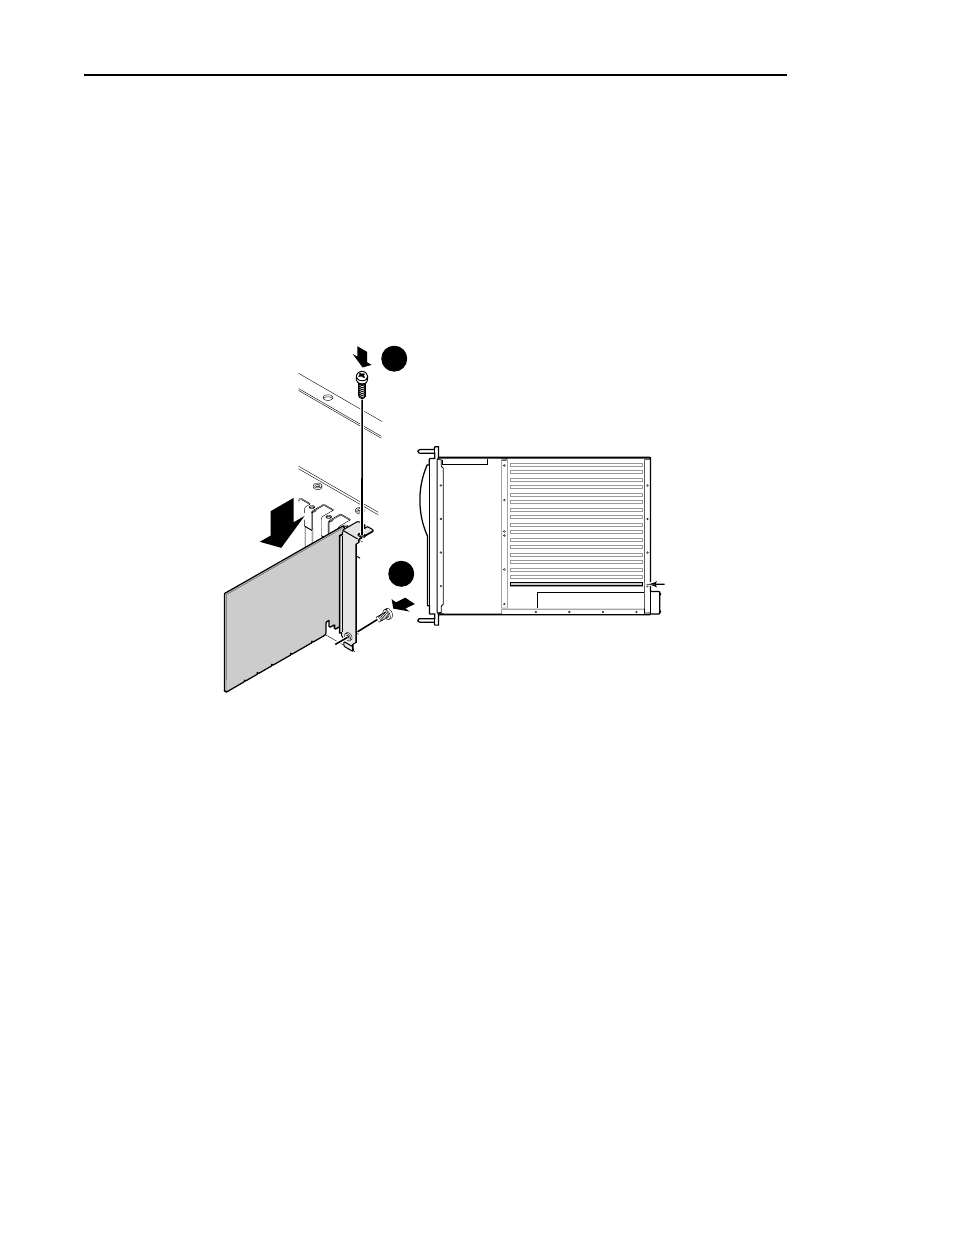
2. Align the RS-422 board with the mother board connector in slot J17 (see
Figure 7). Firmly press down on the board until the board seats. The board is
properly seated when the top of the rear mounting bracket is resting on the
rear chassis wall shelf.
3. Use the Torx tool with the T15 tip to reinstall the screws which secure the
RS-422 board to the rear panel (see
Ê and Ë in Figure 7).
Figure 7. Installing the RS-422 Interface board and mounting bracket screw
4. If you removed the Genlock board earlier, reinstall it now by aligning it with
the connectors on the motherboard slot, making sure the extractor on the
front end of the board is in the up position. Firmly press down on the board
until the board seats and then reinstall the mounting screws (see Figure 5 on
page 21). Reconnect any internal cables removed earlier (refer to your
cabling diagram).
5. Place the SCSI cables back in the cable clamps mounted on the power
supply. (Refer to Figure 3 on page 18.)
0519-3
J17
1
2