Grass Valley Kayak HD Installation v.6.9.4 Jun 02 2011 User Manual
Page 174

174
Kayak HD — Installation and Service Manual
Section 4 — Maintenance
3.
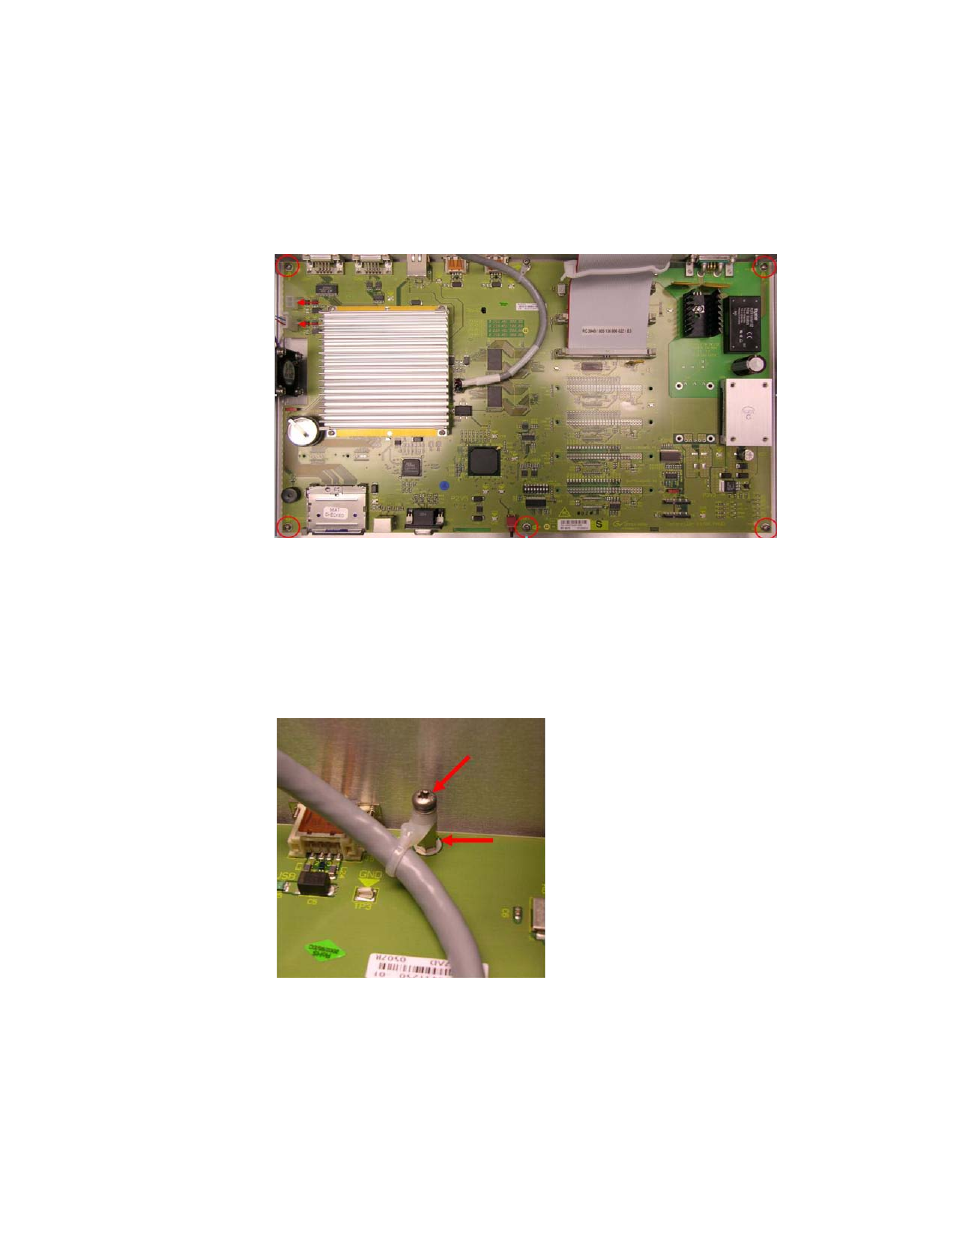
Locate and disconnect the fan housing connectors labeled
J10
and
J11,
located on the left side (facing from front of enclosure bottom), as
shown in
and marked by red arrows.
4.
Remove the five screws (circled in red) as shown in
Figure 122. Kayak Control Board—Tub Screw Removal
5.
Remove the screw from the post holding the cable and Panel CPU
board, then remove the hexagonal stand-off, as shown in
.
CAUTION Use a hex wrench to hold the hex stand-off while removing the screw to
prevent damage to the Panel CPU board.
Figure 123. Kayak Control Board—Screw and Hex Stand-off Removal
6.
Carefully remove the Panel CPU board from the enclosure bottom.
7.
Place the new Panel CPU board into the enclosure bottom.
8.
Remove the
protective film
from the
battery
on the new Panel CPU board.
